In this tutorial I will show you how I created a new blue sky, enhanced a building with color and light and created a mockup sign which I then applied to it.
In my freelance business as an illustrator and graphic designer I also get to work with photographs, creating both sign- making mockups and image editing in general. One of those very common tasks I often wind up doing is to either take a photo myself for the client or use someone else’s photo.
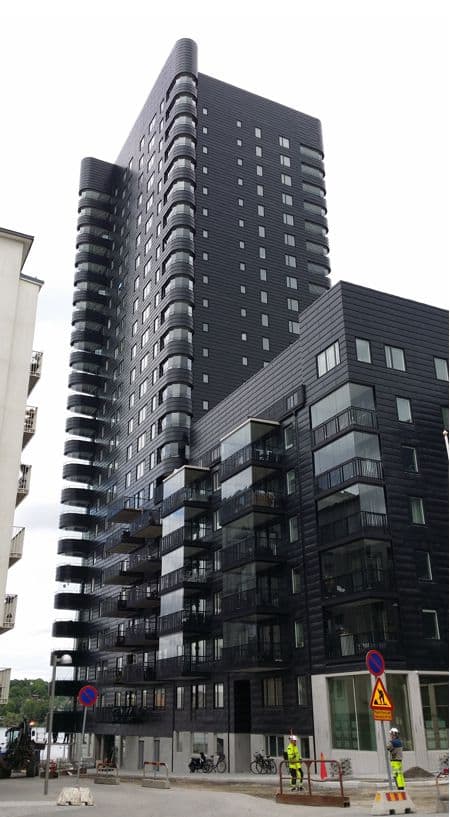
I took this photo while I was out with my bicycle, cycling around a brand new neighborhood in Stockholm, Sweden which is just being built. Back at the studio in front of my computer I used Corel PHOTO-PAINT X7 and my Wacom tablet to edit and adjust the image.
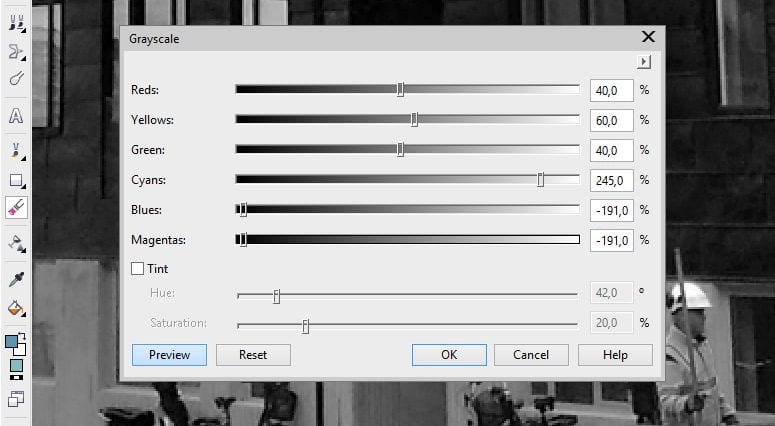
In the Object Manager Docker I picked a Grayscale Lens Object by clicking on the New Lens icon at the bottom left of the docker (or Object > Create > New Lens). I dragged the slider handles to give the facade of the building a darker tone. Basically, more black.

I could have used other adjustment tools and features to make it darker, for example Contrast Enhancement or the Tone Curve (Adjust > Contrast Enhancement or Tone Curve), to mention just a few, but I quite like the feel the grayscale effect gives to a photo, and it´s fast. It also made it very easy for me to get a cleaner white sky, making it a bit easier to create a proper mask of the sky, as my aim was to make this blue.
With the Grayscale Lens object active, and the sky now even brighter, more white, I picked the Mask Tool > Magic Wand Mask (W), from the Toolbox and selected the white sky. (If the Magic Wand Mask doesn’t pick up all of the sky at the first try, select the Additive Mode icon from the Property bar and click in any missing areas until the whole sky has been selected).
For the blue sky color I picked a brighter blue color that I like to use as a base for a blue sky. By selecting the color swatch and hovering over the blue color swatch in the Document Palette, I picked one of the darker blues next to the brighter blue and added this to the palette (or you can drag the darker blue from the default Color Palette down to the Document Palette). This way, I had the two blue colors set to create the effect I was aiming for.

I created a new object in the Objects Manager Docker by clicking on the New Object icon in the bottom left corner of the docker. With Mask still active, I used the Fill tool from the Toolbox to fill the selection of the sky with the brighter blue color. (To change the fill color, double-click on the Fill icon at the bottom of the Toolbox. In the Edit Fill window, grab the Eyedropper tool and pick up the lighter blue from the Document Palette. Or you can also just drag the lighter blue from the default Color Palette over to the Fill icon).
I kept the mask with the marching ants active and created another new object in the Object Manager Docker. With the Paint tool from the Toolbox, I used the darker blue I selected to paint in the upper part of the mask. (To change the foreground color to paint with, just drag the darker blue from the Document Palette or default Color Palette over to the Foreground icon at the bottom of the Toolbox).

I next created a third new object, while the mask was still active, and painted in the bottom of the mask with white color.
I selected the second object (with the darker blue), and used the Object Transparency tool from the Toolbox (you can find this under the Drop Shadow fly out menu on the Toolbox), and dragged down from the top right to the bottom left, to apply a transparency. And as you can see in the picture below, it gave a very nice feel to it.

I did the same with the white object, but instead applied the transparency the opposite direction, from the bottom left and dragged upwards to the right, (see final image), in the same diagonal direction as the blue - which gave a very nice feel to it as well.
I deselected the mask tool (Mask > Remove or CTRL+R), and looked closer at the edges of the mask - in this case the blue - and painted more blue color with the Paint tool, using a soft nib where it was needed, especially around the balconies here and there. Basically touching up with blue so that no white was shining through.
And with that the sky was finished.
I went back and selected the Grayscale Lens Object in the Object Manager and then chose the Eraser Tool from the Toolbox. Using a pen tablet - I use a Wacom Intuos PRO - I began to erase those areas and details on the photo where I didn’t want a grayscale effect to be applied. It is so much easier for detail work, to use a pen tablet. Colors from the original photo, the Background object, started to reappear. I used a soft round nib and gently erased grayscale lens object effects from the people, the ground, the street signs and many of the windows.
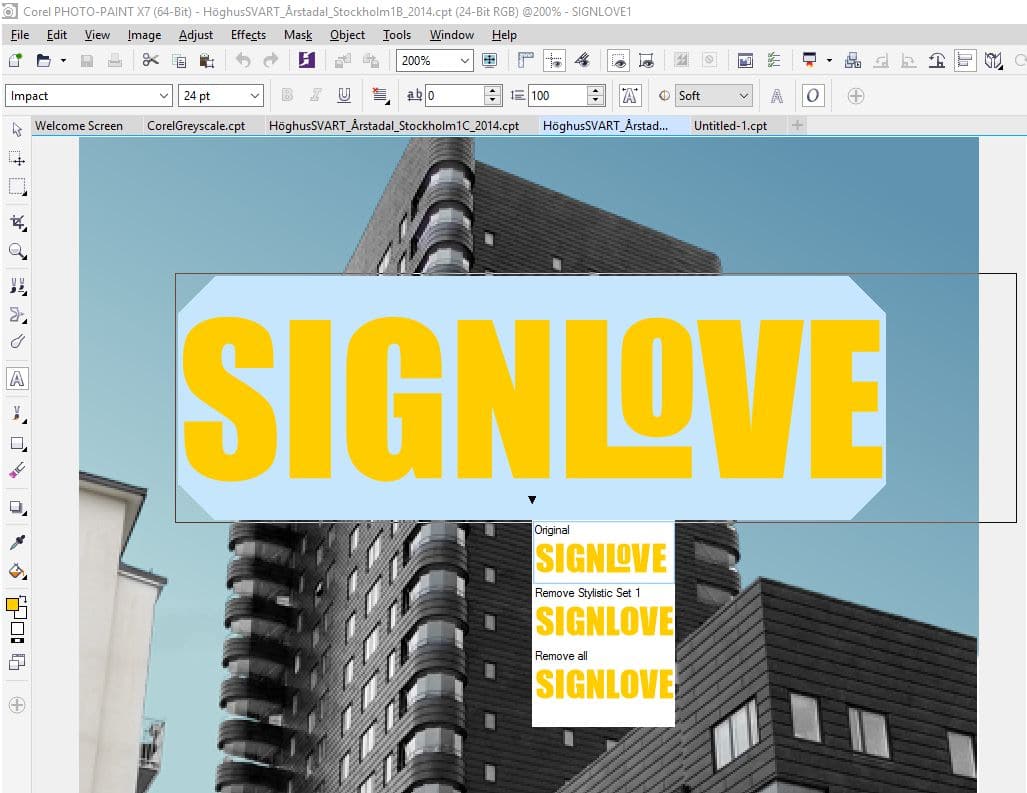
To show the client how their sign would eventually look on the facade, I later made this mockup in three mockup versions. To make this easier and faster, I used the New Font list features to quickly divide the three types of fonts I was going for, by simply selecting the Filter type variations in the Font list. (To access these features, select the Text tool from the Toolbox and on the Property bar , open the drop-down Font list. Click on the Show Filter list icon at the top right of the drop-down window and check any styles you’d like to search for).

I wrote the text for the sign and used the Object Pick tool to shape the text´s perspective, following the perspective of the house (Click on the text object a couple of times until you get the Perspective handles).
Because the sign on the wall was a text object, I used the Open Type features in Corel PHOTO-PAINT X7. You can quickly find the open type font features available within a certain font by clicking the black little arrow that appears when the text is selected. This will open up a drop-down list that shows the alternative style sets.
I applied an effect behind the text, saved the entire image and then sent it to my client.
