CorelDRAW has a variety of Artistic Media brushes, divided into different categories, covering a wide range of designs and effects. But sometimes, we need something "more realistic" and at that point, Corel PHOTO-PAINT provides photo-realistic effects that can be applied to any photo. But what happens if we want to apply these effects to a vector drawing in CorelDRAW? Are both worlds apart? Fortunately, the two programs are linked, which makes it easy for us to use Corel PHOTO-PAINT brushes in CorelDRAW.
Let's see how.
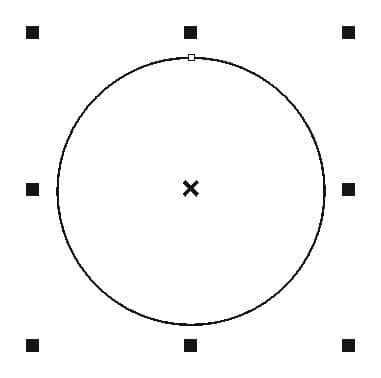
Draw a circle or rectangle (with no fill and no outline), and with, for example a width of 40 mm (Toolbox > Ellipse tool or Rectangle tool).
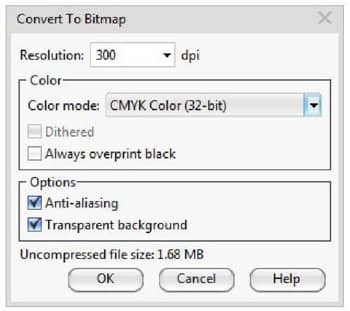
Convert to bitmap (Bitmaps > Convert to Bitmap...), checking the box for 'Transparent background' and choosing as the Color mode, RGB or CMYK according your workflow.
|
|
Right-click the bitmap and choose "Edit bitmap...". This will launch Corel PHOTO-PAINT.
Press the i-key to select the Image Sprayer tool. Then from the Brush Type drop-down list on the Property bar, select the 'Sparkles' brush and adjust the size of the brush in the Property bar using the Size settings.

Close PHOTO-PAINT and the program will prompt you to save. Select "Yes" and you will return automatically to CorelDRAW with the changes saved.

Now you can modify the size, add a lens, change the transparency mode, rotate the image, etc. and the result should be something like this:

And of course, there are many brushes available in Corel PHOTO-PAINT to experiment with.
|
|
|
|
Let try another effect: adding fire.
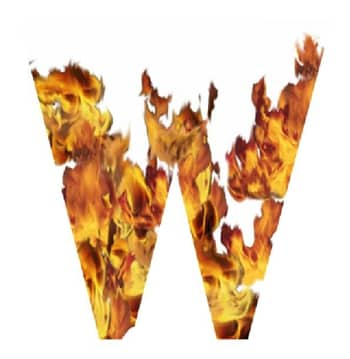
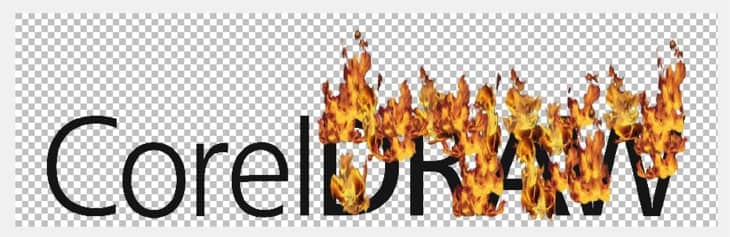
We can use a single letter, such as the 'W' of CorelDRAW, or an entire word.
You can create a transparent rectangle or circle, as in the previous exercise, and follow the same steps. But this time, we will do something different and create a custom white frame

Convert the white shape around the 'W' to a bitmap (Bitmaps > Edit Bitmap), and choose Edit bitmap either by right-clicking on the bitmap or by clicking on the Edit Bitmap button in the Property bar. This will open Corel PHOTO-PAINT.
Press the i-key for select the Image Sprayer tool. Choose the "Fire" brush and apply. Adjust the brush size to fit with the file. When finished, close the file in Corel PHOTO-PAINT. The program will prompt if you want to save, select "Yes" and will return automatically to CorelDRAW.
Place the white bitmap with the fire effect behind the letter W in the text (CTRL+pgdn).
|
|
|
|
But we can do the same with the entire word. In this case, we need to create a simple frame - a rectangle with no fill and no outline – around the text and the rectangle. Group both Text and Rectangle (Ctrl+G) and choose no fill and no outline.

Right-click the bitmap and choose "Edit bitmap..." (or choose Edit Bitmap from the Property bar). This will launch Corel PHOTO-PAINT.
Press the i-key to select the Image Sprayer tool. Choose the "Fire" brush and apply. Select the brush size according to the design. You can leave or erase the original text, since it's only there as a reference.

When finished, close the file in PHOTO-PAINT and say 'Yes' when prompted to save, to return to CorelDRAW.
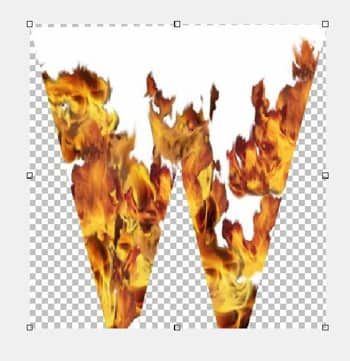
And now we have fire with a transparent background! For this reason is very important to leave the 'Transparent background' box enabled when converting to a bitmap.
The key is to create the custom shape before converting to a bitmap in order to have the real space to apply the brush to.

The next effect is an old trick, but still very useful: interlacing a bitmap with text.
Create a new transparent rectangle and convert to a bitmap, or, just open Corel PHOTO-PAINT and then create a new image (File > New), and set the size according your job (i.e. 10 x 15 cm), and check the option for > 'Transparent background'.
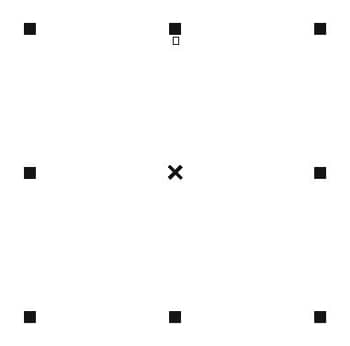
Using the Image Sprayer tool (Toolbox > Image Sprayer or, press the i-key), and create a simple shape. For example, this line was made with the Rope brush.
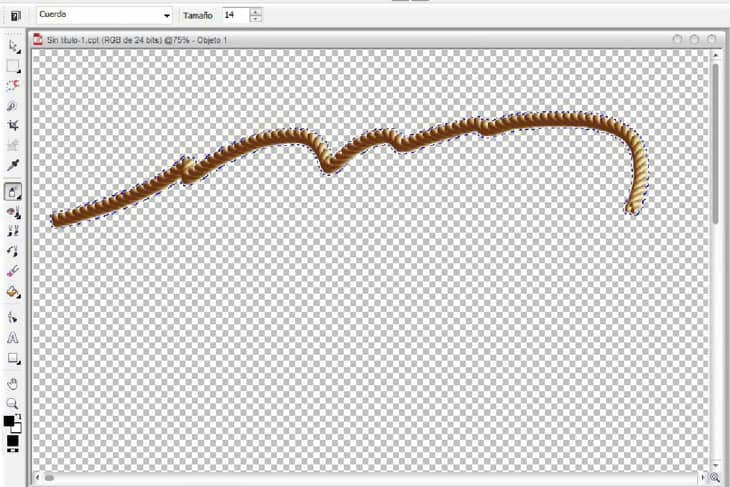
Return to CorelDRAW or save the image as a .CPT file and then import it into your CorelDRAW document (File > Import). It should look something like this:

Add the text following the shape. Now, break the text apart (Ctrl+K) to have individual characters. Move some letters behind the transparent bitmap and leave others in front in order to create the illusion of interlaced objects (this can be easily done by dragging some of the individual text objects below the bitmap in the Object Manager).

There're several ways to create the interlace effect but one easy and fast way is to use the Eraser tool (Toolbar > Eraser tool), or by pressing the X-key to delete just a part of the letter.

The text should then look like this:
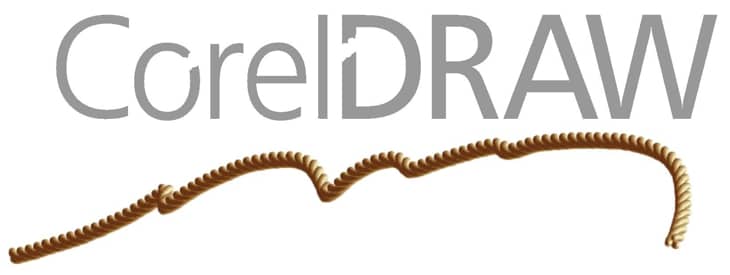
And the final result is...

Using our imagination, we can create a lot of realistic effects in CorelDRAW.
Part of the effect will be a bitmap and the rest will be a vector. The mix of both will create fantastic illustrations, since it will combine the perfect shape of a vector with the realistic texture of the bitmaps.