Creating a pop-art, graphical version of an original image using CorelDRAW X7 and Corel PHOTO-PAINT X7
By Suzanne Smith
In this tutorial we are going to take a portrait and using various lenses in Corel PHOTO-PAINT, create a more pop-art, graphical look.
![]() |
![]() |
- Start by importing an image in to CorelDRAW and pressing the +-key on the numerical keypad to create a copy (you should see two instances of the bitmap in the Object Manager).
- With the top image selected, click on: Edit Bitmap in the Property Bar to take the image into Corel PHOTO-PAINT.
- In Corel PHOTO-PAINT, click on Image > Cutout Lab.
- With the green Highlighter tool, trace around the outside of the image, placing the green line half on the image contour and half on the background that we are going to remove.
![]()
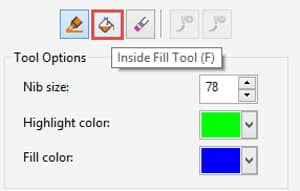
- Now click on the Inside Fill tool to fill out the green highlighted area.
- Click on Preview and then zoom in to examine the accuracy of the outline.
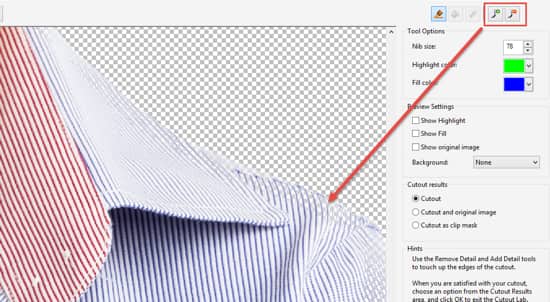
- Using the Add Detail and Remove Detail tools (see image below), add detail to any missing parts of the image, or using the Remove Detail tool, remove any remaining parts of the image background.
![]()
- Click on OK to finish.
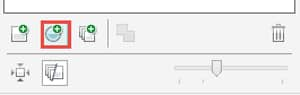
- In the Object Manager, click on the New Lens icon at the foot of the docker.
![]()
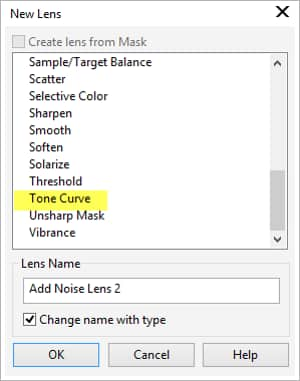
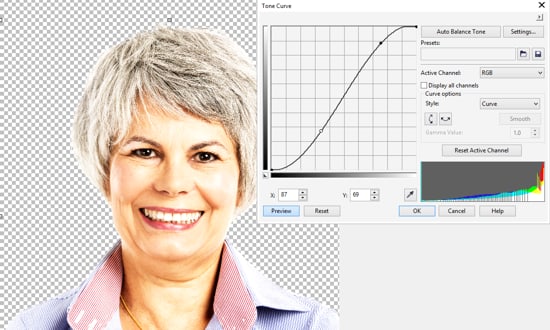
- Choose the Tone Curve lens from the New Lens list panel.
![]()
- The Tone curve filter lets you perform color and tonal corrections by adjusting either individual color channels or the composite channel (all channels combined). Individual pixel values are plotted along a tone curve that appears in a graph and represents the balance between shadows (bottom of graph), midtones (middle of graph), and highlights (top of graph). In this case, we are going to create an 'S'-shaped curve to increase the contrast.
![]()
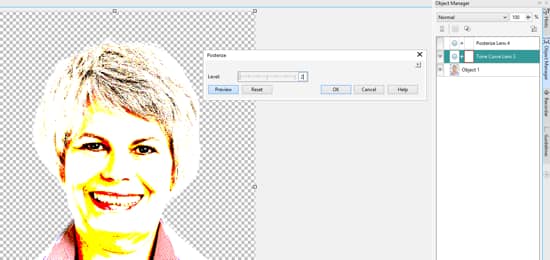
- Click OK to finish and then click on the New Lens icon again. Choose the Posterize Lens.
- This will let us reduce the number of tonal values in an image to remove gradations and create larger areas of flat color. Set the Level to 2.
![]()
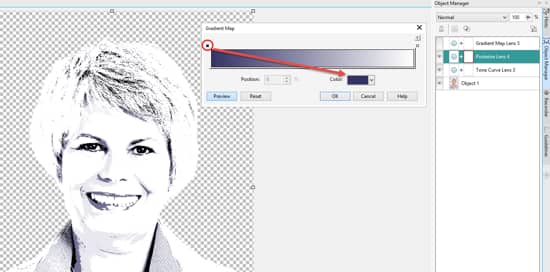
- Finally, we are going to apply one more lens - the Gradient Map lens. The Gradient Map lens lets you apply color to a black-and-white image or change the colors in a color image.
- In this case, with the node for the darkest pixels selected, I'm going to choose a dark blue color.
![]()
- Click OK to finish.
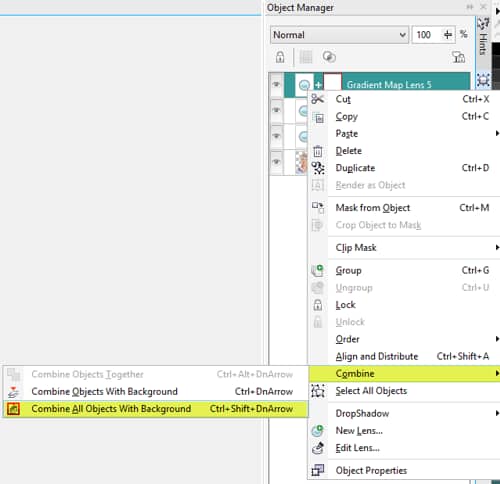
- In the Object Manager docker, right-click on the Gradient Map lens object and choose Combine > Combine All Objects with Background (Ctrl+Shift+DnArrow).
![]()
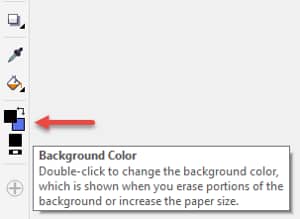
- Here, the result after flattening the layers. Note: The resulting background color will be the same as the Background Color on the Toolbox, which I had set to blue before combining the objects.
![]()
![]()
- Click on the Finish Editing button, save the changes and return to CorelDRAW.
- In CorelDRAW we now have our original image overlaid with the new, edited image.
- We can either leave the image as it now is (in this case delete the original image below it to reduce the file size), or apply a transparency to the top image to allow some details of the original image to shine through.
The final image without transparency applied.
![]()
After using the Transparency tool (Toolbox > Transparency tool), with a Uniform Transparency set to around 30% to bring out the underlying image details.
![]()