
Tip 1: Quick selection
It’s well-known that when you double-click the Rectangle tool, a rectangle forms around the page. But a lesser-known trick is that if you select one or more objects, hold down the Shift key and double-click the Rectangle tool, a rectangle is formed around the selected objects.
Tip 2: Duplicate objects
Here are a few ways to duplicate objects in CorelDRAW:
- Duplicate (Ctrl + D) creates a copy of the selected object or objects, at the distance established in the Properties bar.
- Transform (Alt + F7) allows you to create multiple copies at a specified distance. Also applies when you rotate, skew, etc.
- The simplest way to duplicate an object is to use the Pick tool to select your objects with the main button of the mouse, and before releasing it, you click with the secondary button of the mouse. A “+” sign will appear at the cursor, indicating that it has been duplicated. It can also be done when you rotate, when you mirror with the mouse, etc.
Tip 3: Mirror an object
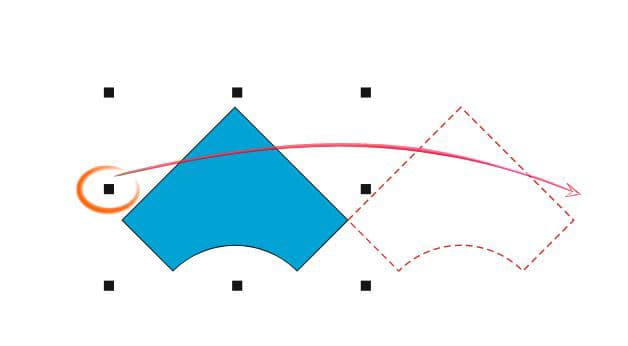
To make a mirror of an object in CorelDRAW, with the Pick tool selected hold down the Ctrl key, and click on a handle and drag it to the opposite side. Then before releasing the primary mouse button, do right-click, this will create a mirrored duplicate.
Tip 4: Rotating objects
If you hold down the Ctrl key when rotating an object, it will rotate in steps of 15 degrees. You can change this value by going to Tools > Options > CorelDRAW to bring up the Options window. In the left menu select Edit and adjust the Constrain angle to the degree you’d like.
Tip 5: Select an object in a group
You can select an object that is part of a group, with Ctrl + click on the object. The handles will be circular instead of square to indicate that it is part of a group.
Tip 6: Quickly select objects
You can select an object without having to surround it, simply by holding down the Alt key with the Pick tool. If you drag over a portion of the object, the entire object is selected. This is a great way to select multiple objects when you are zoomed in on a page.
Tip 7: Zoom shortcuts
Here are a few quick ways to use the Zoom tool while you’re working:
- Double-clicking the Zoom tool zooms in on all objects on the screen, just like pressing F4.
- Shift + F2 zooms in on only the selected objects on screen.
- The Z key activates the Zoom tool, but F2 activates the zoom-in only once, and returns to the previous tool. F3 zooms out without changing tools.
- You can also use the central mouse wheel to zoom in or out on the image. Go to Tools > Options > CorelDRAW to bring up the Options window. Select Display in the right menu and under navigation you can change the mouse wheel from zoom to scroll.
Tip 8: Editing content
You can easily edit the content of a PowerClip, Symbol, Rollover, or a Symmetry. Simply choose Ctrl + click on the object. A blue square will appear around the object you’re working with. Once you’re done editing, Ctrl + click on an empty space outside the object to exit.
Tip 9: Return to the default workspace
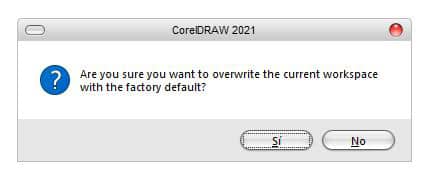
If you accidentally move or remove a tool or another component from its default place in your workspace, don’t worry as you can easily reset the workspace. To do that, simply hold down the F8 key while CorelDRAW is launching until a message appears asking if you want to overwrite the current workspace with the factory default.
Remember that by doing this you will lose any customizations you’ve created in the program.
To avoid that, you can save custom settings, including keyboard shortcuts, as a custom workspace. Click Tools > Options > Workspace to bring up the Options window. Click the Export button to select what you want to save, or simply save everything. Then, to restore your configuration, you just need to choose Import and apply it as the workspace in use.

Tip 10: Quickly select all objects
To select all the objects on a page, instead of Ctrl + A you can double click on the Pick tool in the toolbar.
Tip 11: Select all nodes
To select all the nodes from one object, select the object and double click on the Shape Tool, it selects all the nodes.
Tip 12: Select node in a sub path
You can select all the nodes from one sub-path, use the Shape tool, hold down Ctrl + Shift, and click on one node of the path
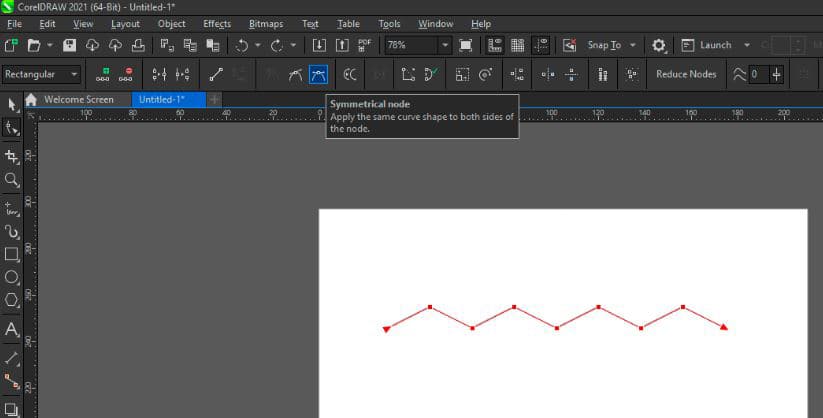
Tip 13: Creating zig-zag and wavy lines
Here is a quick way to make a zig-zag line. First create a line using the Freehand or 2-Point Line tool. Then select the end node with the Shape tool and hold down the “+” key on your keyboard or click on the green Add nodes icon in the Properties bar, that places a node in the center.
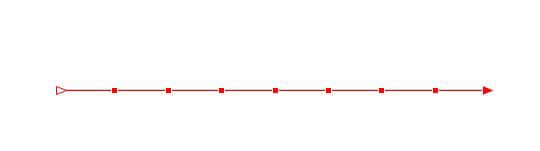
Repeating the task continues to create nodes at equal distances. Then you can select the nodes alternately with the Shape tool and move them.
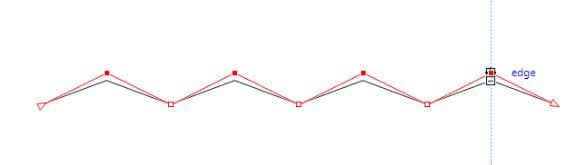
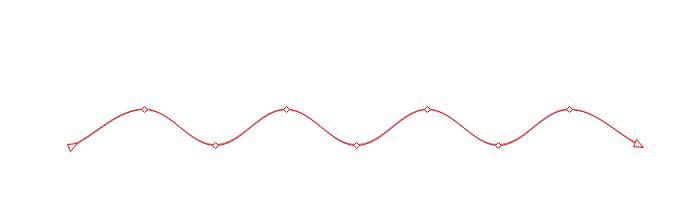
If you want it to be a wavy line, select all the nodes (double click on the Shape tool), left click on your line and select To Curve or click Convert to Curve in the Properties bar. Then with all the nodes selected, click Symmetrical node in the Properties bar.
Tip 14: Text formatting shortcuts
Here are a few short cuts you can use to speed up your text layout and formatting:
- Ctrl + K separates Text while Ctrl + L combines it.
- If you take a paragraph text divided into columns, Ctrl + K separates each column into a new paragraph.
- If you take a paragraph text, or an artistic text composed of several lines, Ctrl + K separates each line into a separate sentence.
- If you select a sentence, Ctrl + K separates word by word.
- If you select a word, Ctrl + K separates letter by letter.
Tip 15: Combining words in the right order
Building on the last tip, you can separate a text with Ctrl + K, for example a word, and then combine it with Ctrl + L, it is in reverse order. But if you go back with Ctrl + Z, and press Ctrl + L again, it will combine in the correct order.
Tip 16: Quickly changing text size
You can reduce or enlarge the size of the text, using the numeric keyboard, Ctrl + 4 and Ctrl + 6 reduce and enlarge respectively the size according to the preset list of sizes, while Ctrl + 2 and Ctrl + 8 reduce and enlarge respectively the size one point at a time.
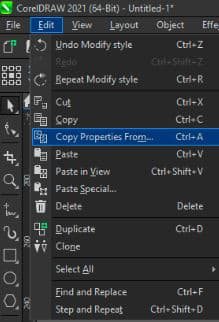
Tip 17: Copying attributes from an object
This is a great way to save time if you are applying the same attributes (colors, fills, text properties) to multiple objects. Here are a few ways you can copy properties in CorelDRAW:
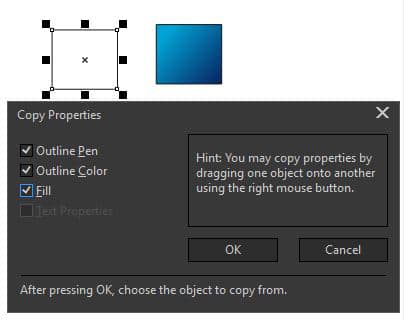
- In the menu Edit > Copy Properties From... and choose the selected object to pull up the Copy Properties window.
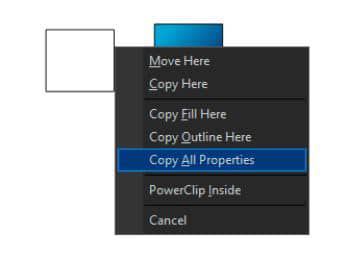
- If you drag an object over another by left clicking, a menu appears where you can choose between Copy Fill Here, Copy Outline Here, or Copy All Properties depending on what attributes you want to copy.
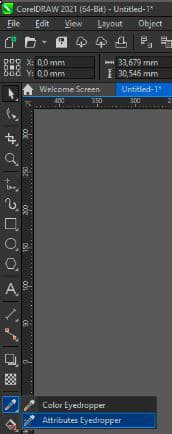
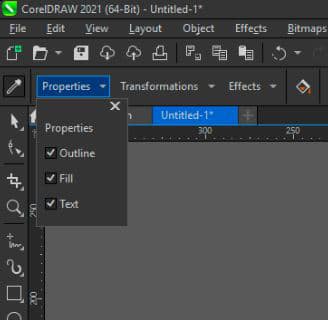
- You can also use the Eyedropper tool to copy attributes from an object. Click and hold on the Color Eyedropper tool in the toolbar and select the Attribute Eyedropper tool. Once the tool is selected, you can edit what Properties, Transformations, and Effects are copied in the property bar.
Tip 18: Attributes for combined or welded objects
When you Combine or Weld two objects together, the new object will have the attributes of the object below it. But you can choose which object determines color, fill, and outline attributes by manually selecting objects. To do that hold down the Shift key while clicking on objects to select them. The last object selected will be the one that determines the attributes.
Tip 19: Trimming objects
The order you select objects is also important to Trim. Normally, if you select two objects, the one below will be the trimmed one. You can choose which object will be trimmed by holding down the Shift key and selecting objects individually, the last selected object will be the trimmed one.
For example, if you select a circle, hold down the Shift key and select a rectangle, then click Trim in the Properties bar, the circle will trim the rectangle.

Tip 20: Editing barcode objects
When you create a barcode using the Barcode wizard (Object > Insert > Barcode), the result is a barcode object that can be edited, but you cannot change the color or font. To adjust the color and font you can cut (Ctrl + X) or copy (Ctrl + C) the generated barcode and go to the Edit > Paste Special menu and choose Picture (Metafile). The result will be a group of vector objects, which you can ungroup, change color, cut, change font, etc.