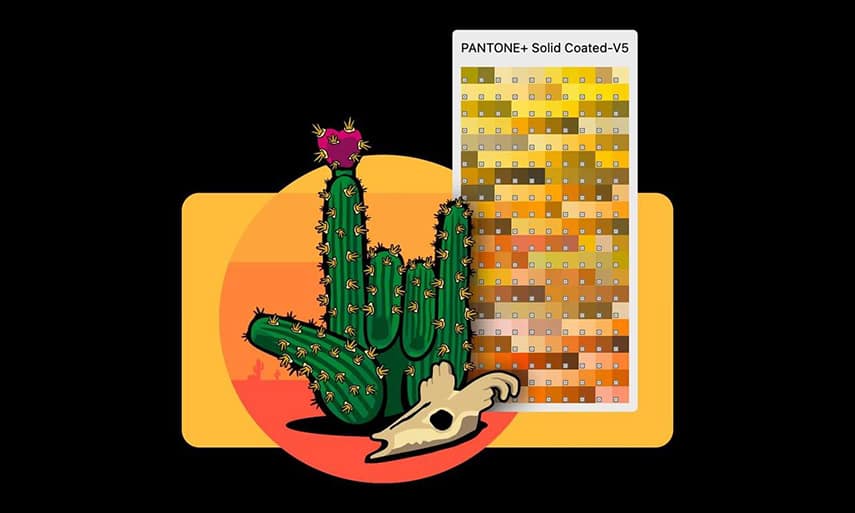
What is a Color Palette?
A color palette is a set of colors in a group meant to be used for a certain kind of output. You use them to apply FILL and OUTLINE colors to text and objects.
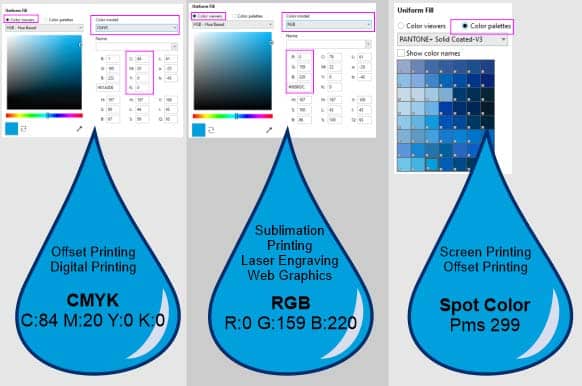
The primary color groups or models are RGB, CMYK and SPOT color (i.e. Pantone® and Roland®).
Some common uses for these color models are:
- CMYK colors are for offset
- RGB are for web graphics, digital printing, sublimation and laser engraving
- SPOT colors for screen printing, vinyl cutting and some other printing methods. Some colors cannot be printed in CMYK so a SPOT COLOR will be used to acquire an exact color match.
Each kind of color has specific values or name. This blue color all looks the same but there are actually 3 different color models.
Where to Find Palettes
To open the Palettes docker, go to Window > Dockers > Palettes. Here you see the whole array of color palettes available. If you need to turn on any palettes other than the default palette, this is where you do it.
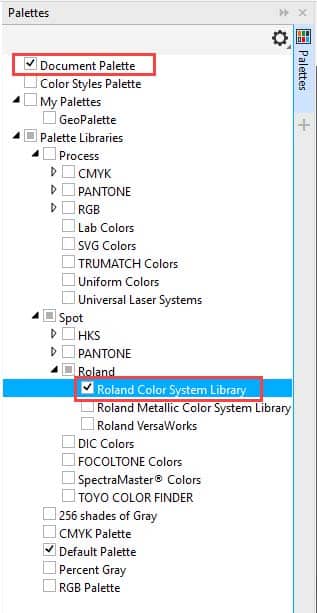
For example, if you need a Pantone Spot or Roland palette, click the arrow next to the name to expand the list. Check the box beside the palette that you want, and it will appear on the right side of your workspace.
If you hover your mouse over the grey dots at the top of the palette you will see your cursor change to a four-way arrow. Click and drag to reposition the color palette if you wish – it can attach to left, right, bottom or in the top tool bar area. Put it where it feels comfortable for you.

Palette Options
At the top or left end of all palettes (depending on if the palette is docked horizontally or vertically) is a small black arrow (flyout button) to open the palette options.
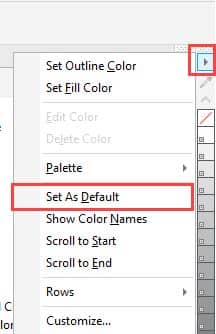
You can set a palette as the default palette, choose to show color names on the swatches, or have the palette displayed in 1, 2 or 3 rows. And if you click on Customize in the flyout menu, you have further palette options available such as large swatches and wide borders.
The Document Palette
The Document palette contains the colors used in your current document and appears in the bottom left corner of the interface, above the status bar. Every time you use a color in your document it’s automatically added to the Document palette – even if you later change the color or remove it from your document.
If you have removed colors from your Document palette, or added a bitmap, you can choose to reset your color palette. Click on the flyout arrow and select Palette > Reset Palette. This will then give the opportunity to add colors from a bitmap.
However, if you prefer to control which colors are added to the Document palette, you can disable the automatic updates and add colors manually by dragging colors from your document down into the palette. To disable automatic updates, click on the flyout arrow and select Customize. Uncheck the setting Automatically update the document palette.
The Document palette is open by default but if you don’t see it, go to Window > Color Palette > Document Palette to open it.
The Document palette is saved with the document so that if you take the file to a different system, you will have it there as well.
Creating Custom Palettes
You can also create and save your own custom color palettes. Click on the plus sign at the bottom of the Palettes docker and select:
- New empty color palette to create a palette from scratch and add your own colors;
- New palette from selected objects to create a palette containing the colors of an object or group of objects you have selected;
- New palette from document to create a palette containing the currently used colors in the document you have open. Unlike the Document palette, this will not include any colors that were previously used in the document but deleted or changed before you created the New document from palette.
How to Apply Color
Now that you have a good understanding what and where the color palettes are, let’s learn the basics of applying colors. It can be done in several ways.
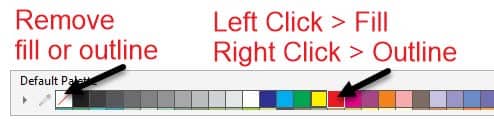
1. Select an object then click a swatch in the color palette. Left click sets the fill color and right-click sets the outline color. To remove a color fill click on the No Color swatch (right-click to remove the outline).
2. Drag and drop a swatch from a color palette onto an object or color swatch in interactive fills.
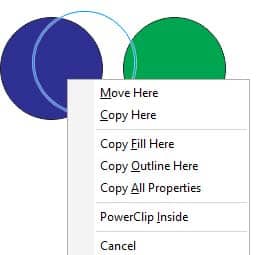
3. Hold down your right mouse button and click and drag one object over top of another object. When you release your right mouse button a popup menu will appear, with options to Copy Fill or Copy Outline.
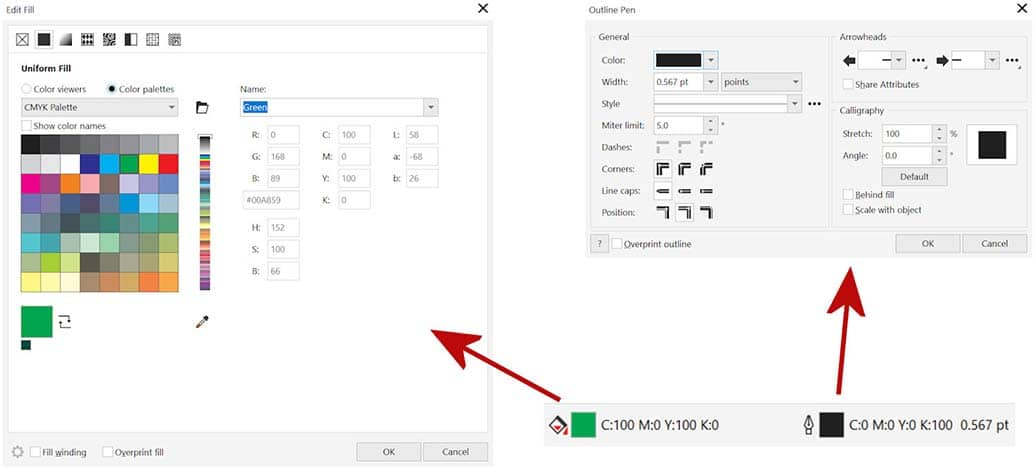
4. Double-click the fill swatch or outline swatch in the status bar to open the Edit Fill or Outline Pen windows.
5. Use the Eyedropper tool to sample a color and apply it to the selected object.
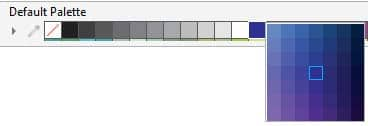
6. Click and hold a color swatch to see tint or variations of that color, then click to select a new color.
And here are two additional tips when applying color:
- If you are repeating the application of a fill color on multiple objects, use keyboard shortcut CTRL+ R to repeat the previous fill color.
- With an object selected, if you hold down the CTRL key and left-click on a color swatch, this will add 10% of the color in the swatch to the selected object.
Thanks for watching! We hope you found this tutorial helpful and we would love to hear your feedback in the Comments section below. And don’t forget to visit our social media pages and show us what you’ve learned by sharing your photos, videos and creative projects with us.