
10. Background Page Color
The first tip is to use a background color to make you more aware of what is going on inside art files. This helps you see white shapes, backgrounds and transparency so you can make decisions such as price or time on a job accordingly. There are several ways to add a background color to your document.
- Use the Rectangle tool: With nothing selected, double-click the rectangle tool and a rectangle the size of your current page will be created. You can give it a color by clicking a color on palette.
- LOCK it! With the Pick tool, right-click on the rectangle and choose Lock. This way it won’t move if you click on it when working.
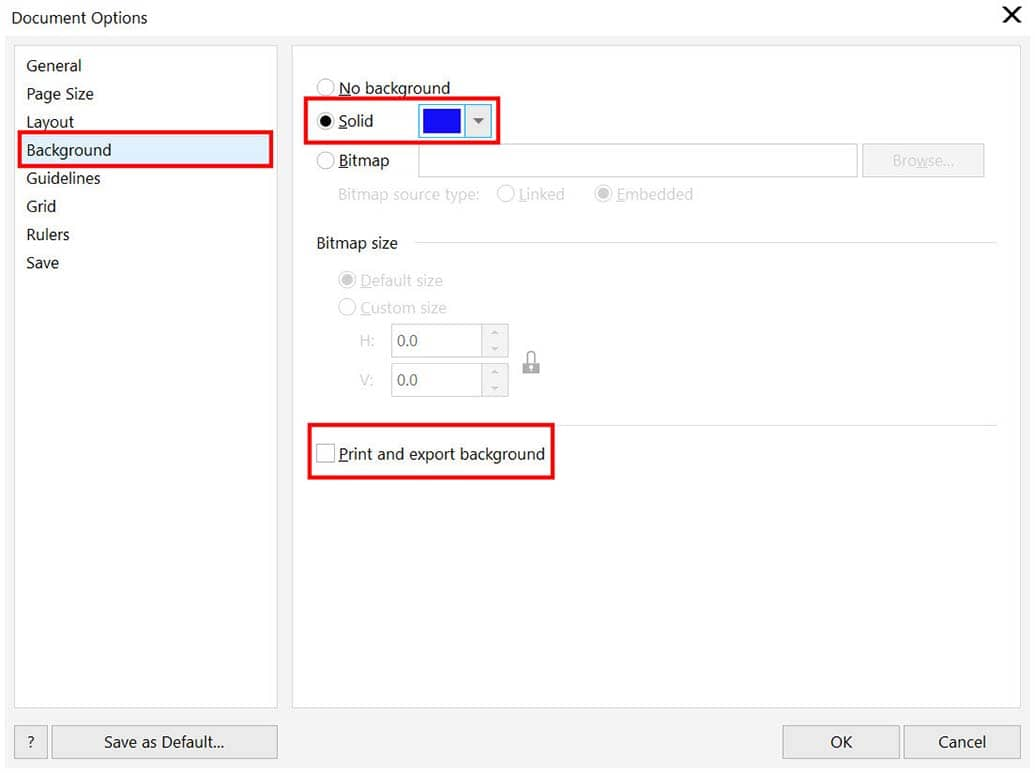
- Page options setting: Double-click the page shadow to open the Document Options window.
- Click on Background in the menu on the left, select Solid and choose a color from the dropdown color window.
- Keep in mind this applies to ALL the pages in your document.
- When using this technique ensure that you have deselected the Print and export background checkbox.
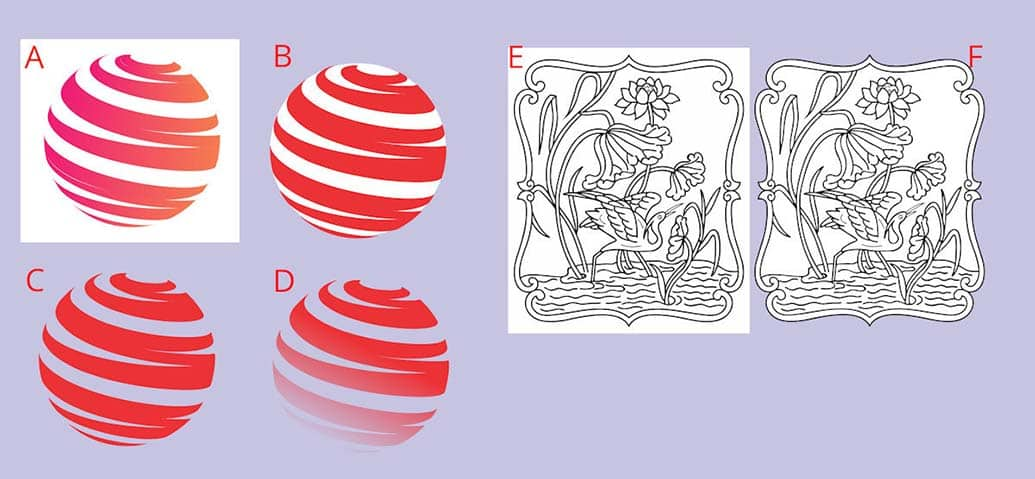
Now that we have added a background color, we can see the objects are very different even though they look the same:
- One logo has a white background (A).
- One has a white shape that could be changed a color (B).
- One is just a red shape (C) and one has transparency (D).
- In the line drawing, if the customer asked to put color in specific parts of the image, it would be simple in one (F) and more time consuming in another (E).
9. Using Wireframe View
Wireframe frame view gives you x-ray vision inside a CorelDRAW document. You can see how shapes interact and where bitmaps exist. Using wireframe view can help you select and identify shapes faster.
To use wireframe view, go to View > Wireframe
- For example, if your customer asks if you can remove the whale and use the ocean background for something else, you can see with wireframe view that the whale is a separate object that can easily be removed.
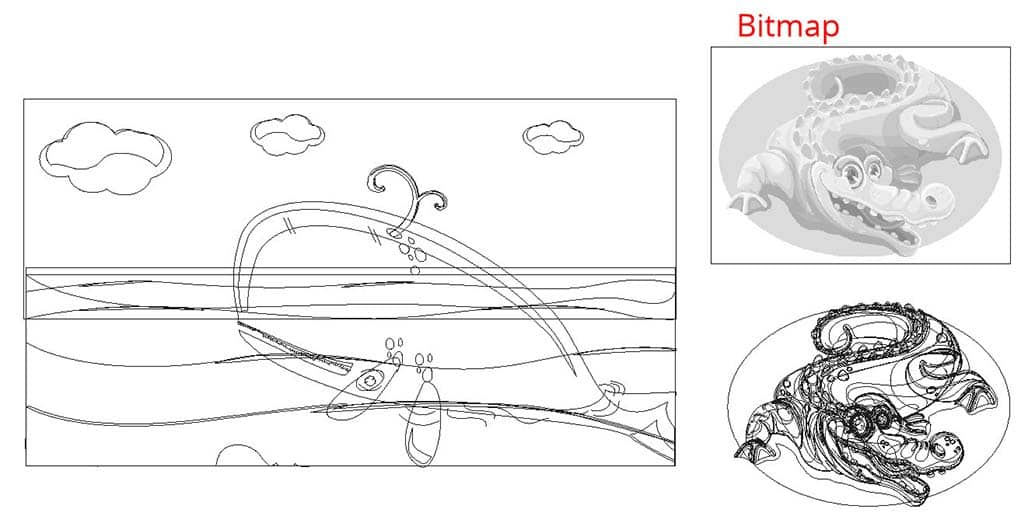
Using wireframe view can help identify bitmaps in a CorelDRAW file. They appear as grayscale with a square border.
To get out of wireframe view go to View > Enhanced.
8. Get to Know PowerClip
The PowerClip tool in CorelDRAW is an important tool to master, as it will save you a lot of time and effort when combining or modifying objects. PowerClip allows you to place one object into the frame of another object, instead of using the Shape tools or commands. In this example, we used PowerClip to put the Italian flag with stars into the shield object.

With the Pick tool, select the flag then go to Object > PowerClip > Place Inside Frame. Your cursor will turn into an arrow, then click on the shield and the flag will be “clipped” inside the shield object.
To learn more about PowerClip, watch our full tutorial Clipping Objects into Other Objects with PowerClip.
7. Convert to Vector with PowerTRACE
CorelDRAW’s PowerTRACE tool allows you to convert bitmaps or JPG images into vector objects that can be edited and resized without losing image quality.
To use PowerTRACE, select a bitmap or JPG object then go to Bitmaps > Outline Trace and choose the type of object.
To learn more, watch our full tutorial on How to Convert JPG to Vector with PowerTRACE.
6. Changing the Default Color Palette
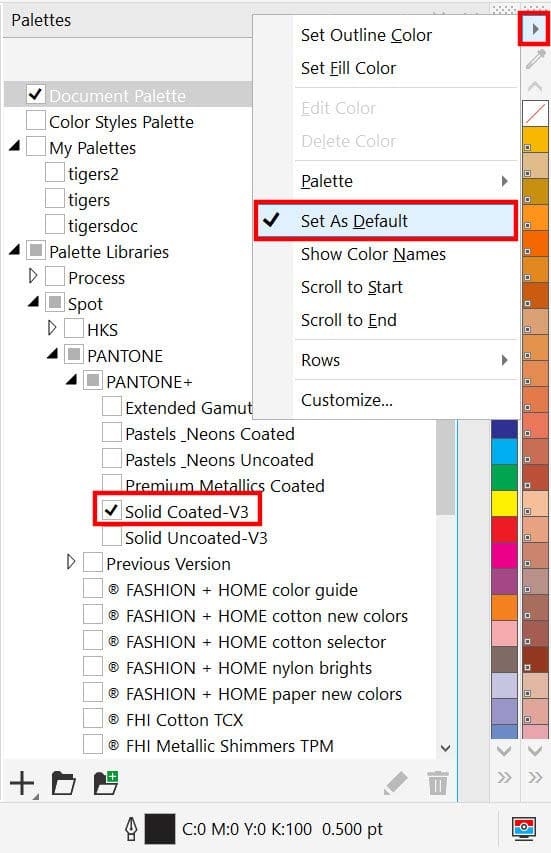
Screen printers often use the Pantone® spot color palette when creating art. Setting a Pantone palette as the default color palette gives you easy access to the colors you need.
- In this example we want to set the Pantone Solid Coated palette as our default
- Open the Palettes docker (go to Window > Dockers > Palettes)
- Expand Palette Libraries > Spot > Pantone > Pantone+ and click the checkbox beside Solid Coated.
- Once selected, the Solid Coated palette will appear in the CorelDRAW interface, either along the bottom or on the right-hand side.
- Click on the small black arrow at the top or left end of the palette and select Set As Default.
To learn more about color palettes, watch our full tutorial on Understanding Color Palettes.
5. Eraser Tool
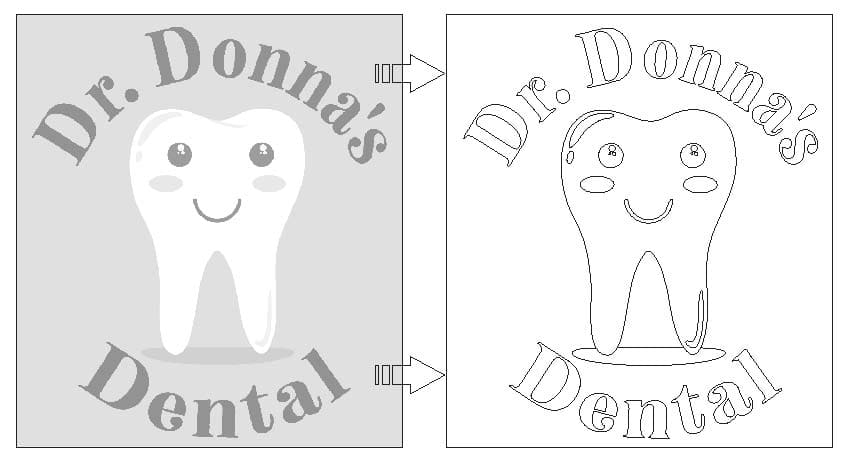
Sometimes the artwork you receive from a client is not easily editable, but the Eraser tool gives you a quick advantage to make easy edits. The Eraser tool works on vector objects and bitmaps.
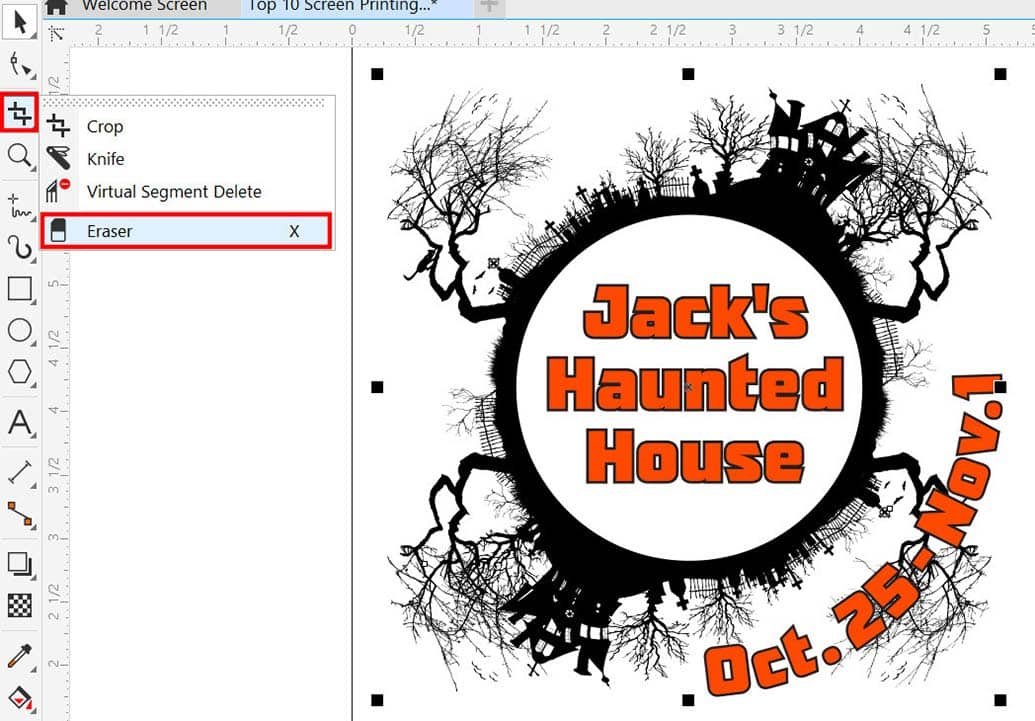
In the example of the haunted house image, it would look better if we removed the bottom right tree so that the date was more legible.
- With the Pick tool, select the object you want to erase, in this case the black frame.
- Next, activate the Eraser tool, which can be found under the Crop tool by clicking the small black arrow to expand the tool group.
- Use the Eraser to remove the parts you don’t want. Because the frame is a separate object, as long as you selected it with the Pick tool first, your erasing won’t affect the text on top.
4. Convert Text to Curves
Tips #4 and #3 go together. If you need to share a file with another user or vendor you should convert the text to curves, in case they don’t have the fonts used in the document. This ensures that the text in the document will look exactly the way you designed it.
- Select the text.
- Go to Object > Convert to Curves or use the keyboard shortcut CTRL + Q.
NOTE: If you are sending the file to someone else for editing, do not convert text to curves.
3. Label Font Names Before Converting Text to Curves
Before converting text to curves, it is a good idea to make a note of what fonts were used, in case you need to edit the text later. So, either make a backup file before you convert text to curves or add a font name label into your document.

2. Use Shortcuts
Shortcuts will save you time and help you be more efficient when creating and editing CorelDRAW files. Shortcuts can be used for repeated steps like import, open, print and save. You can also create your own custom shortcuts to suit your workflow.
To learn more about creating shortcuts, watch our full tutorial on Customizing the CorelDRAW Workspace.
For example, the Alignment shortcuts allow you to easily align objects in seconds with no extra docker or buttons. Simply select the objects with the Pick tool and use the following letters for aligning.
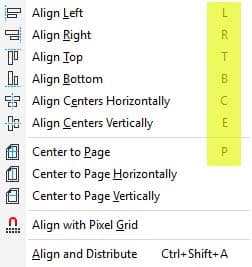
To learn more about aligning, watch our full tutorial How to Align and Position Objects.
1. Print Preview
Our #1 tip is to learn about the Print Preview window and how to use it to prevent printing mistakes. To open the Print Preview window:
- Go to File > Print.
- In the Print window, click on the double black arrows beside the Print Preview button in the bottom left corner.
- This expands the Print window to include an interactive visual of your document, which automatically updates as you make changes to the print settings.

NOTE: If you need a more detailed view, click on the Print Preview button to open a full-screen view.