
Exporting or printing?
CorelDRAW Graphics Suite has a few different options for turning your work into a PDF file. Historically, the primary option has been exporting, also known as publishing, a file to PDF—but this method comes with some limitations.
The Print to PDF feature overcomes some of these limitations with extra functionality. Let’s take a look at how it works.
How to export or publish to PDF
Whether you’re exporting or publishing a file, or need to print to PDF instead, the first few steps look the same.
1. Access your Print window
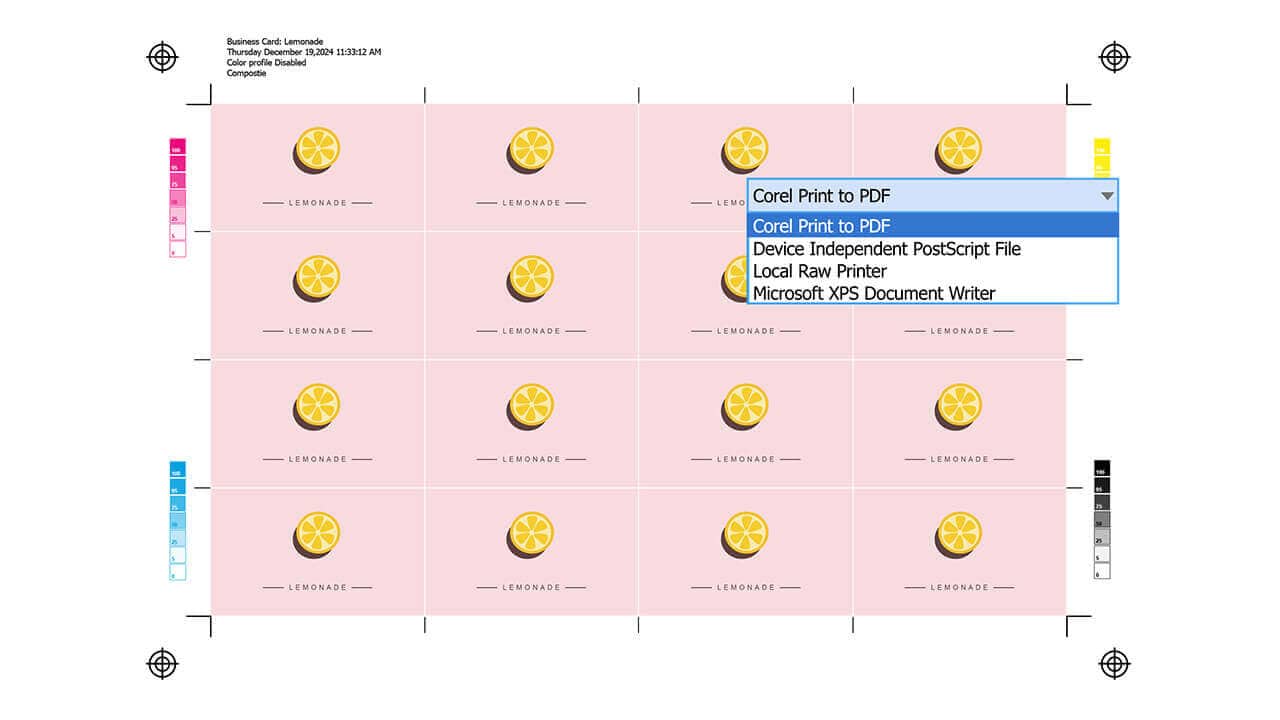
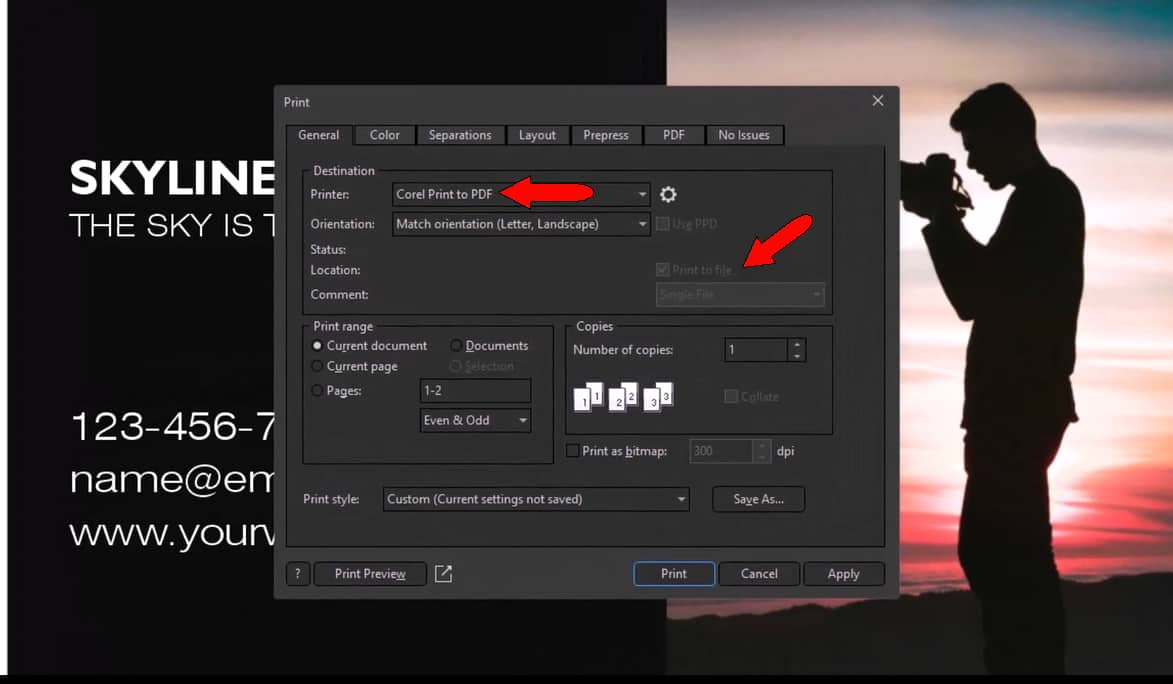
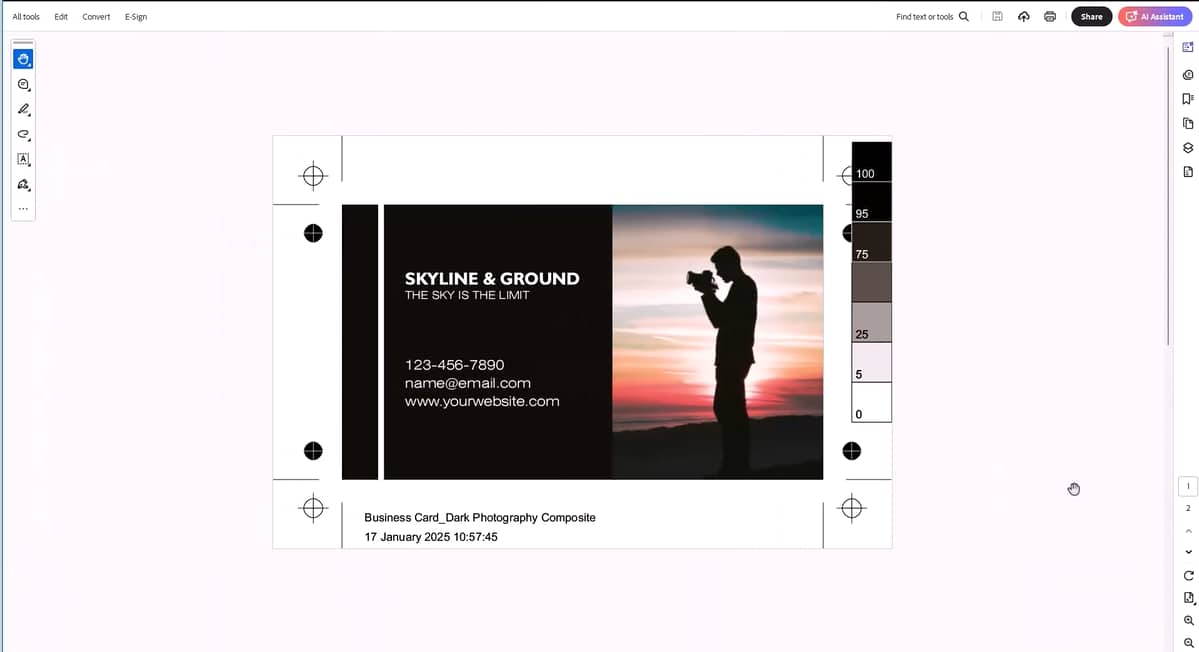
To get started, open CorelDRAW or PHOTO-PAINT and click on File > Print. Here, you can see we’re working with a two-sided business card as an example.
The General tab in the Print window shows a list of your installed printers and drivers. Choose Corel Print to PDF as your printer to automatically enable Print to File.
In your Print window, you’ll see a PDF tab that contains the settings you’ll need when using PDF Export, also known as Publish to PDF.
2. Adjust your print settings
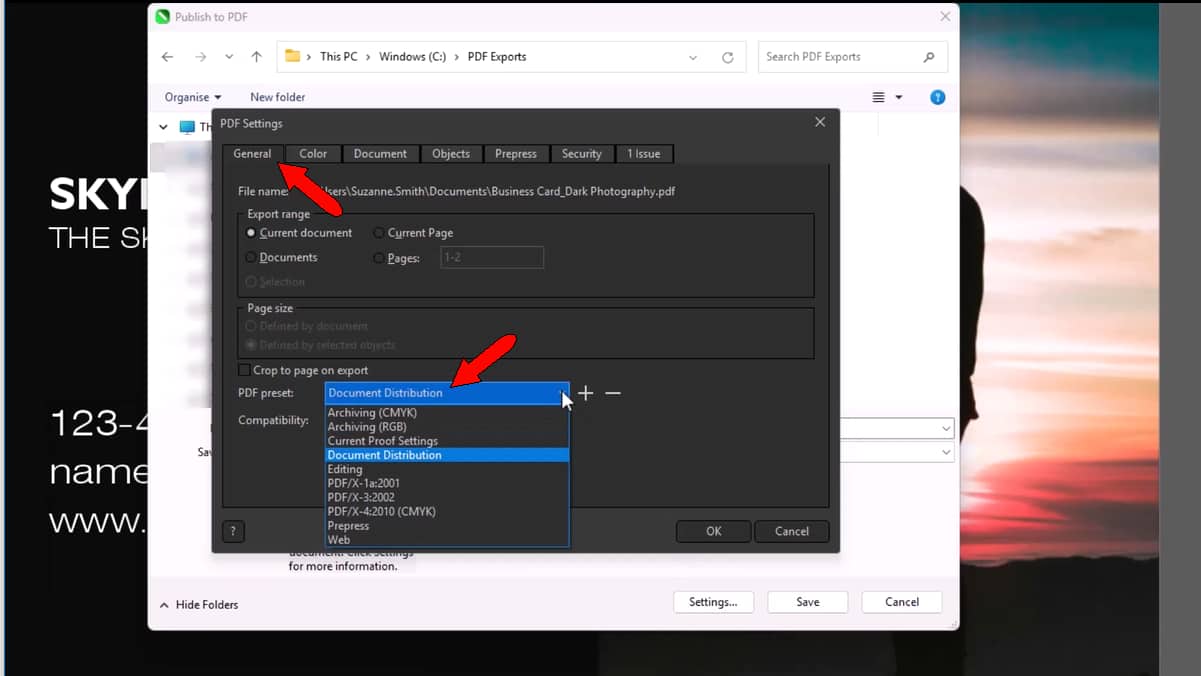
First, let’s look at the settings available when using Publish to PDF. The General tab includes PDF presets that you can choose from.
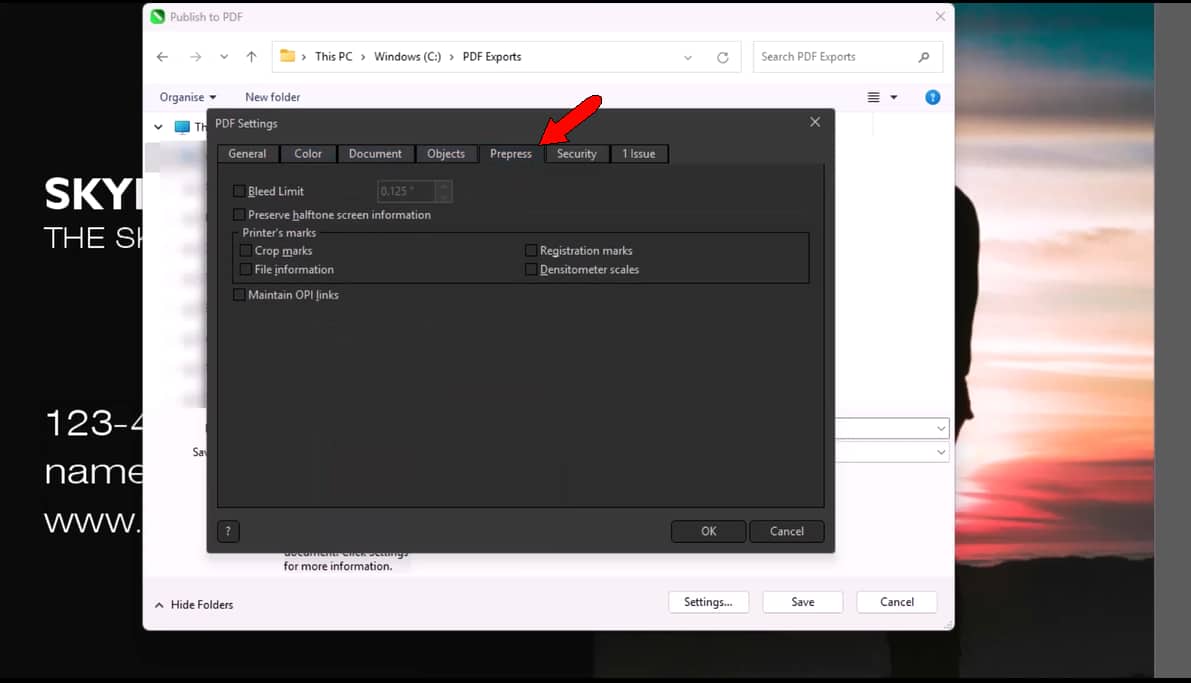
You can use the Prepress tab to adjust options for adding a bleed limit, printer’s marks, and more.
In this example, the resulting PDF would only enable printing of a single business card on a single sheet.
A typical business card print job would likely involve large sheets of hundreds of cards with front and reverse designs, printed on a professional printer and then trimmed to size. In most cases, this type of undertaking would require additional prepress raster image processing (RIP) software to generate the print output.
This is where the Print to PDF feature comes in.
Unlike PDF Export, the Print to PDF feature already includes this functionality. This means that a file can now go straight to the print service without any intermediate steps.
How to use the Print to PDF feature
The Print to PDF feature in CorelDRAW Graphics Suite and PHOTO-PAINT includes additional options for adjusting your file’s print settings.
Let’s take a look, continuing from the steps you would take to use PDF Export.
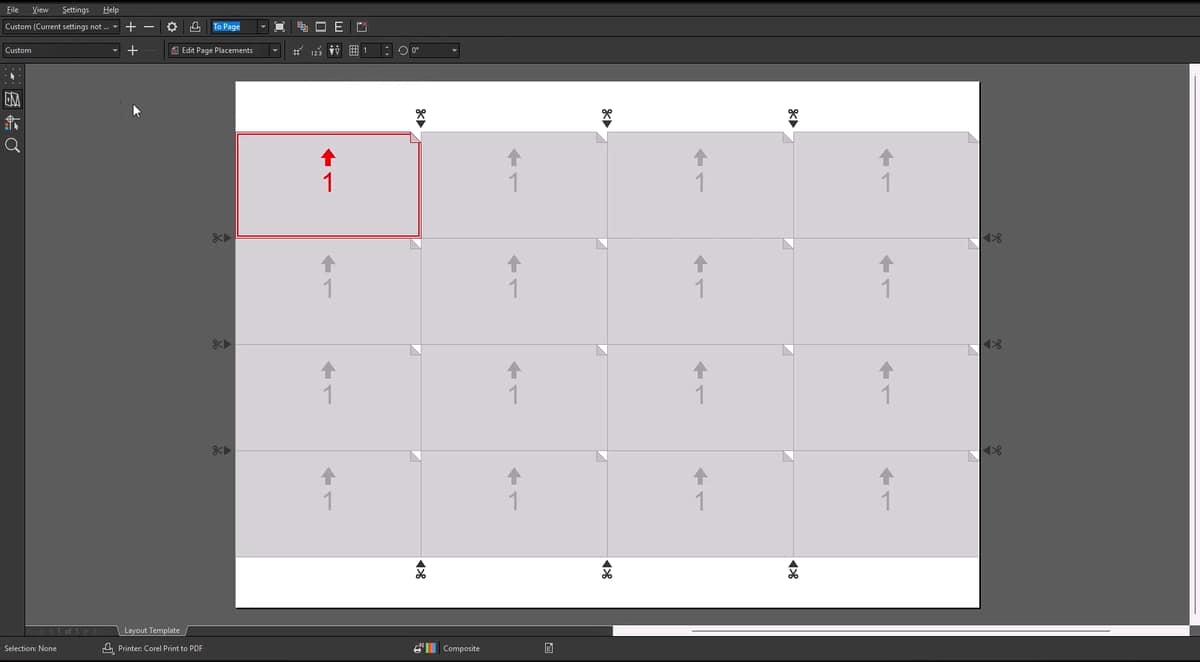
3. Set up your layout
You’ll find advanced settings, including layout options, in the Print Preview window.
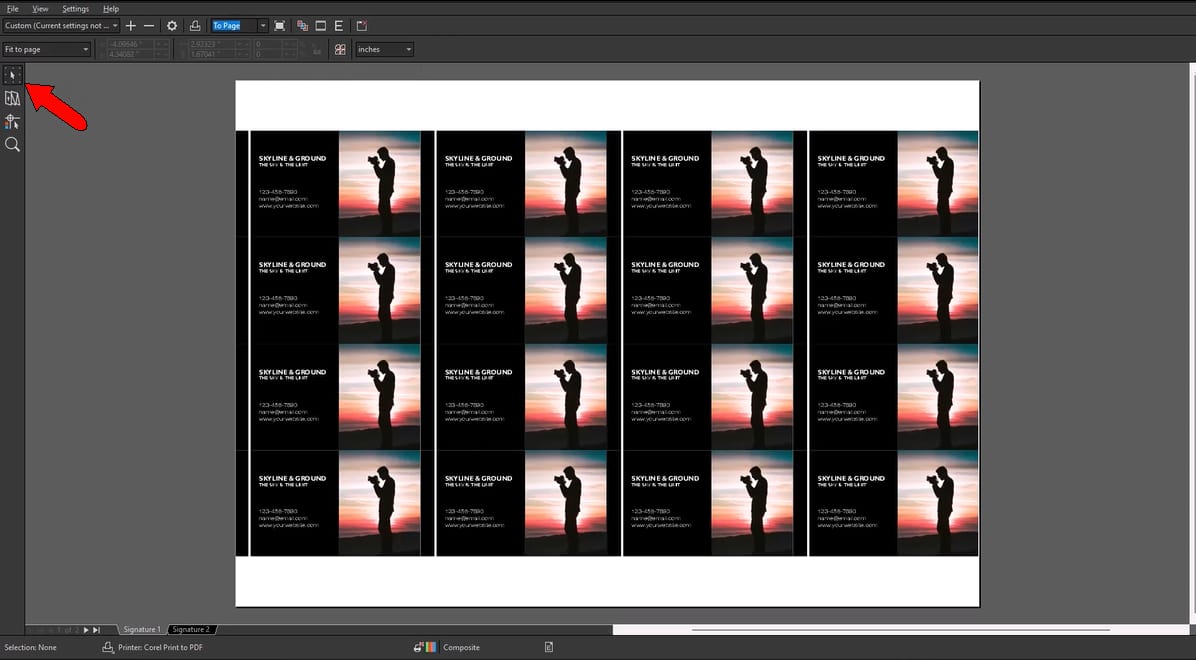
In Imposition settings, you can set up a print job with four-by-four card rows on a larger sheet. You can also edit page placements, margins, guttering, finish, and more.
Check the design preview to see how the printed sheet will look on both sides.
4. Add your printer’s marks
When you’re exporting to PDF, you can add printer’s marks—but you won’t see them until your file is ready to publish.
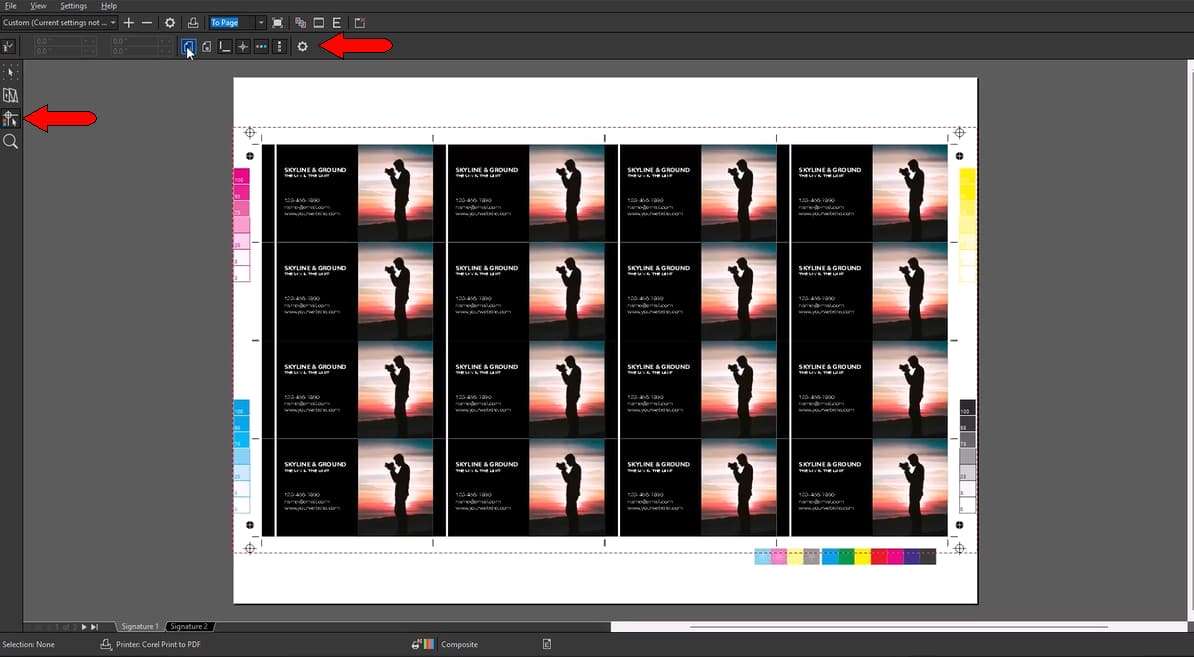
When you’re using the Print to PDF feature, you can add printer’s marks and get an advanced preview of how they will be printed. You can also add additional file information for the printer.
5. Manage your color separations
Another major benefit of the Print to PDF feature is working with color separations.
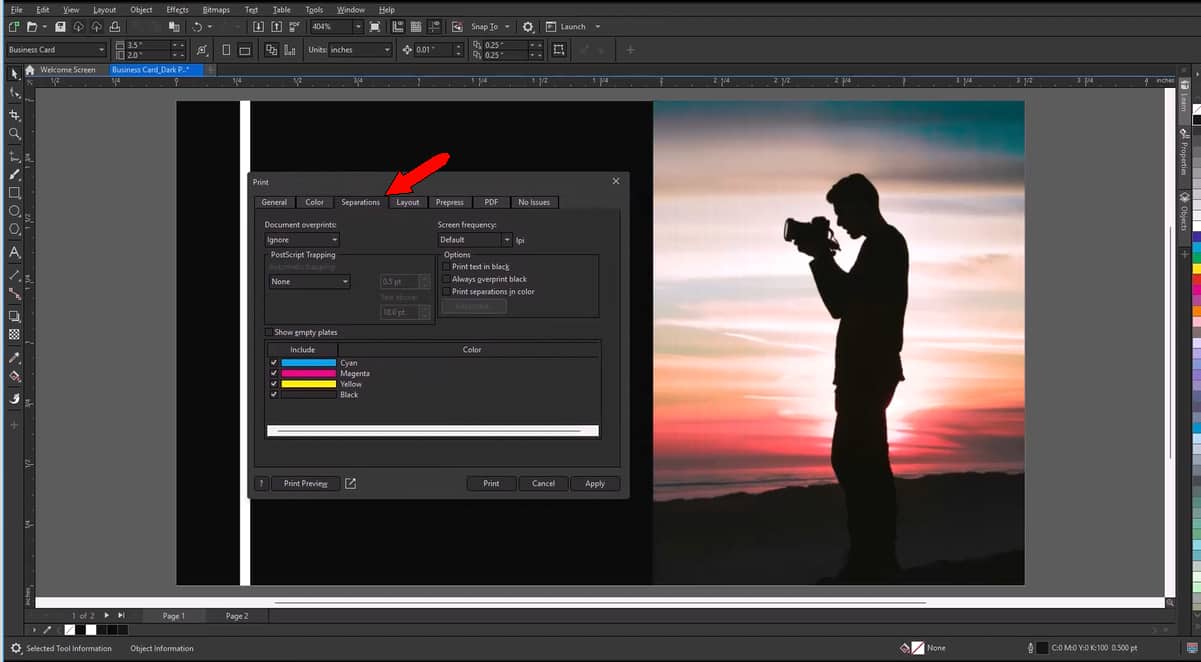
While digital printing works well for many purposes, items like business cards are typically produced using the more cost-effective offset printing, which uses separate plates for each color.
This feature is not available in PDF Export.
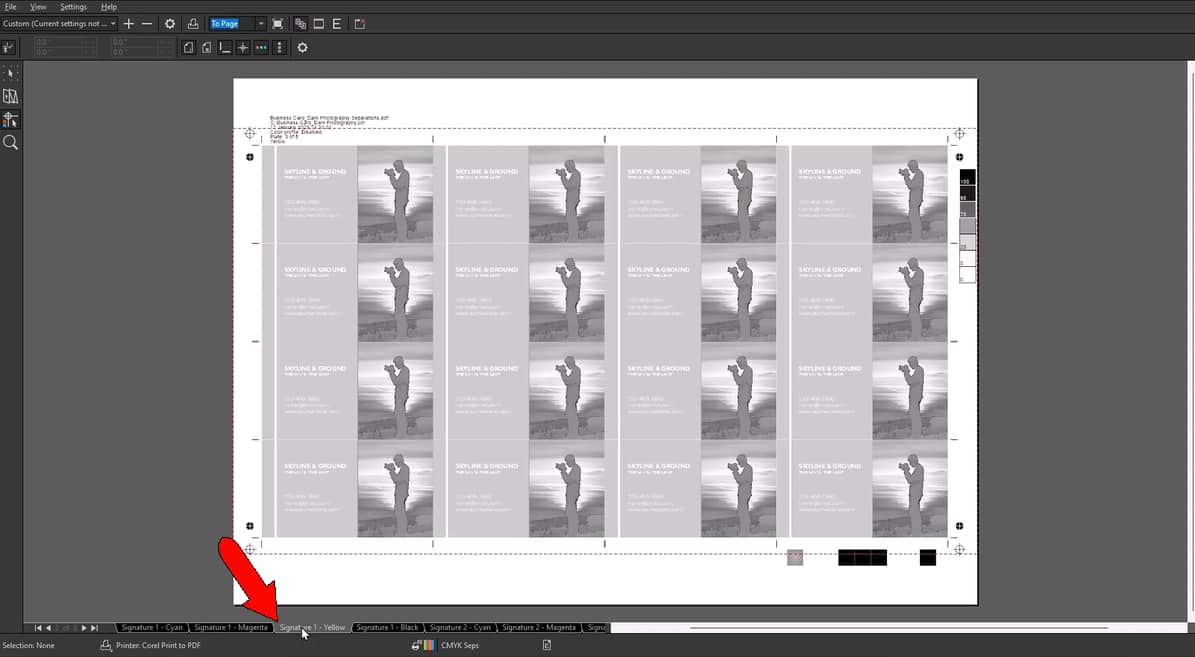
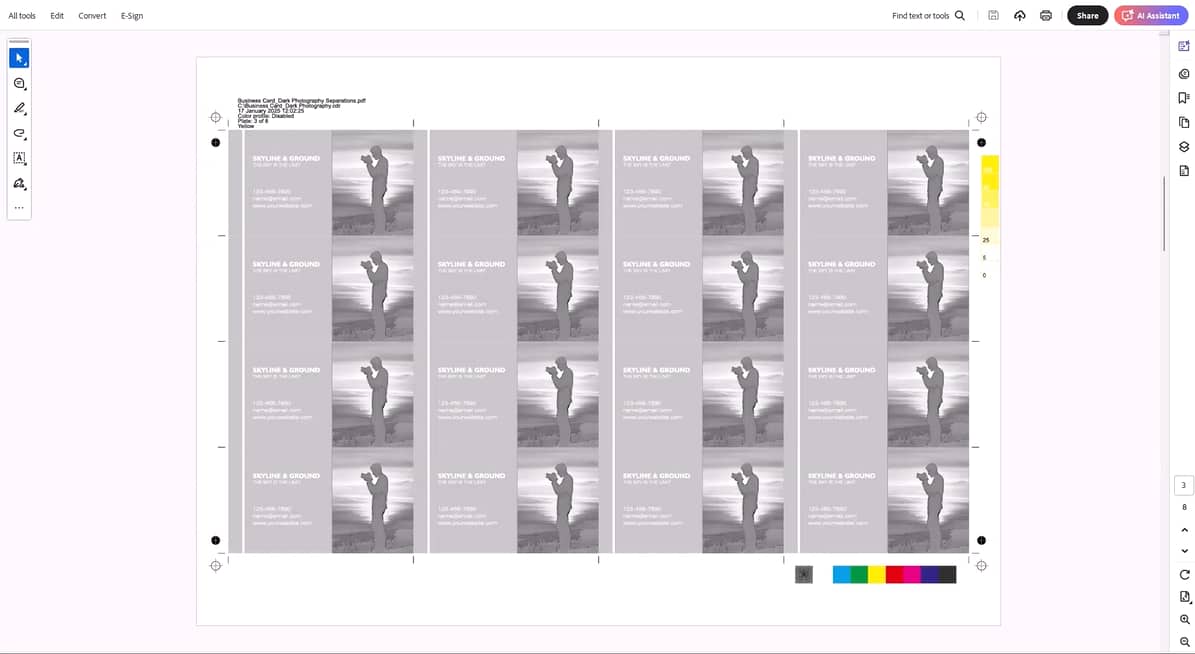
Enabling color separations produces eight tabs instead of two, representing the four separate CMYK plates for front and back.
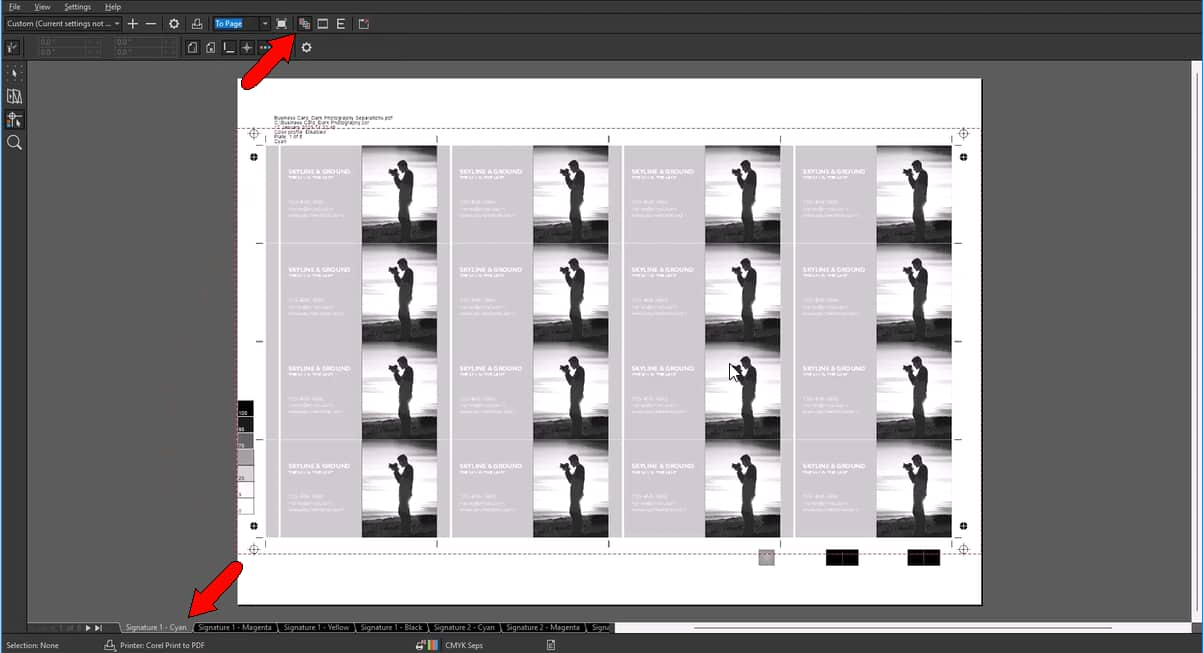
Each plate contains slightly different content. For instance, this yellow plate shows the areas that will be printed in yellow, including parts of the black background.
Note: In CMYK printing, black is not printed with only black ink; additional colors are often blended to create a richer, more vivid, and solid black.
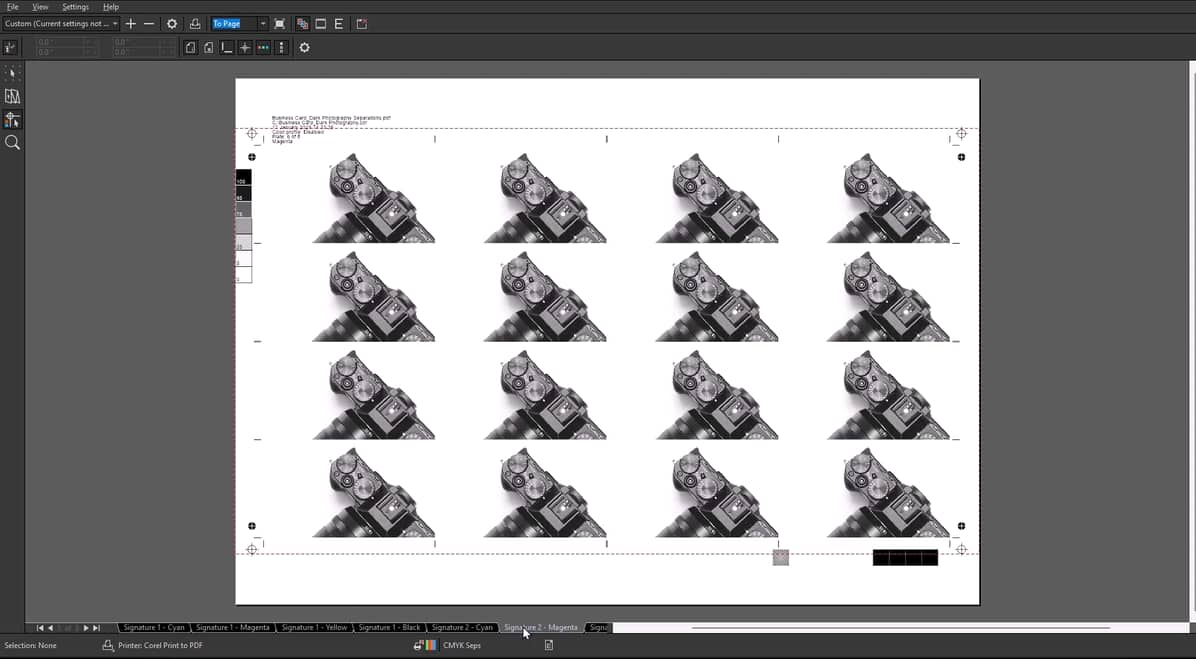
On the reverse side, the camera photo has also been separated into its various color components. Once again, the image is predominantly black, which means the printer will blend yellow, magenta, and cyan to create a rich, vibrant, and visually dynamic image.
When settings are complete, all that's left to do is click Print, then name and save the file.
6. Confirm your results
Let’s compare the two PDFs.
This is a file that’s been created with PDF Export. You can see printer marks and color marks on both sheets, and cut marks show where to cut the sheet once printed. This PDF could go straight to a digital printer.
This is a file that’s been created with Print to PDF. You can see color separations and marks where the four-by-four cards will be cut, ready to be sent to a professional offset print service.
With the Print to PDF feature in CorelDRAW and PHOTO-PAINT, you can create—and control—files that will look great digitally and on paper.
Learn more about the features that give you the power of creative freedom with a free trial of CorelDRAW Graphics Suite today.
Start your trial