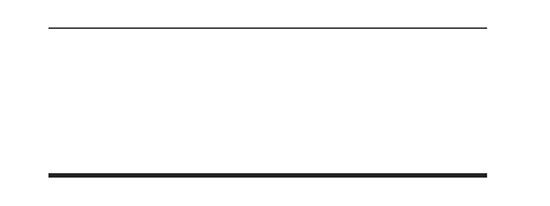
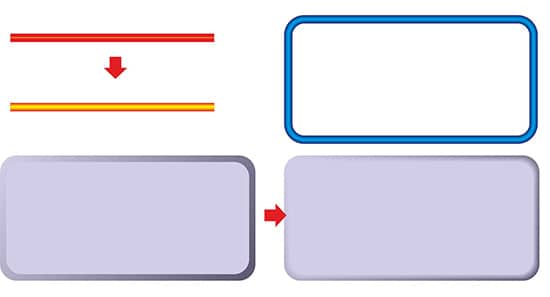
- Draw a straight line with the 2-point Line tool, and choose “Hairline” (on the Property Bar or press F12 for outline propierties).

- Draw a second line. You can duplicate the previous with the left mouse button while moving, or by pressing the + key on the numeric keypad and moving the line, or by using Copy/paste (Ctrl+C / Ctrl+V), or Duplicate (Ctrl+D). Then, set width to “2 points” (on the Property Bar or press F12 for outline propierties). Increase the width of the second line.
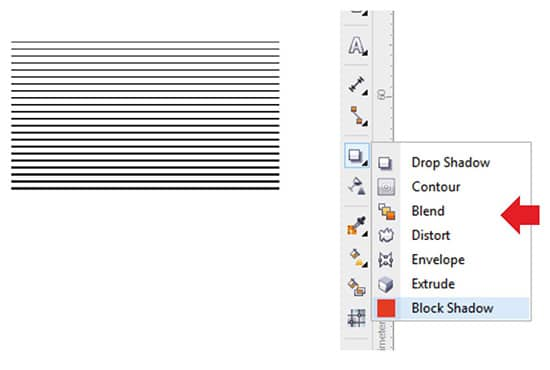
- Take the Interactive Blend Tool, on the Effects tools flyout. Then, drag the tool from one line to the other (the order is not relevant at this point). The result should be a gradient of lines.
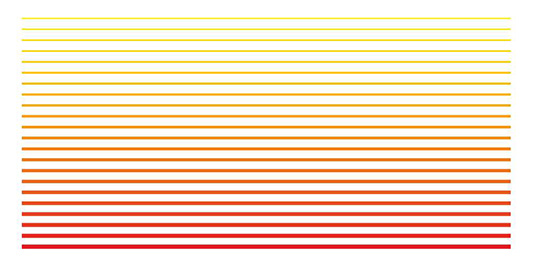
- Change the color of each line by selecting the first line with the Pick tool and right-clicking on the Color Palette). Repeat with the last line. Now we have a gradient of colors and width.
- On the Property Bar change the number of the steps in the blend by adjusting the value in the Blend Objects box. The more steps, the more one object will melt in to the other.
- You can also blend a lot of vector shapes, including text, to create attractive transitions. For example, draw an Star and a Polygon and fill with different colors.
- Then, drag with the Blend tool from one object to another. Choose less steps (according the objects size) to see how the blend works.
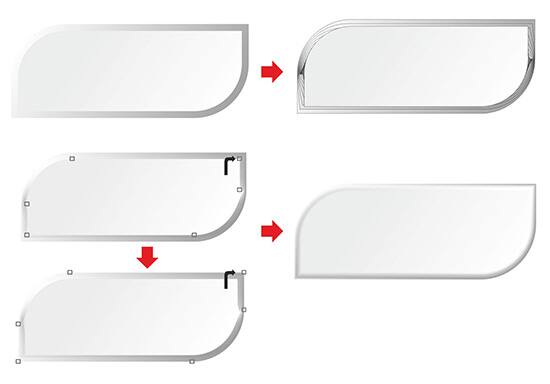
- Blend also allows for the easy simulation of 3D effects. For example, blend a thin line with a thick line... or just two rectangles with rounded corners.
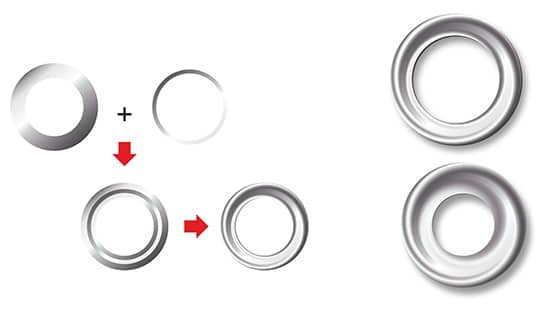
- If you use two shapes, such as a thin and a thick circle, you can create amazing results too.
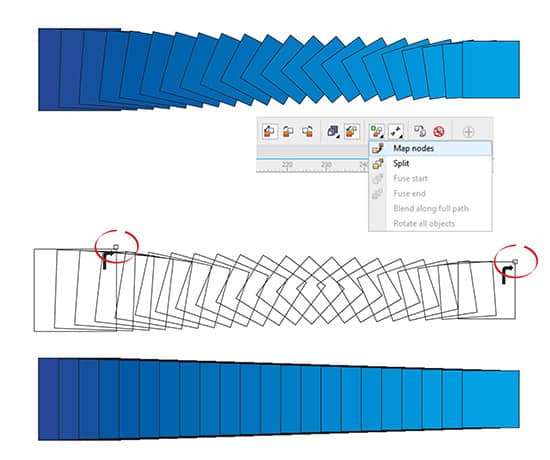
- The blend is really made by morphing from one node to another. If the blend doesn’t follow the direction you want, you can choose the nodes that you wish to have relationship, and on the Property bar, select “Map Nodes”. Then select the two nodes (one on each shape) with the black arrow.
- “Map Nodes” results in very smooth, more perfect Blends, since you have more control of the results.
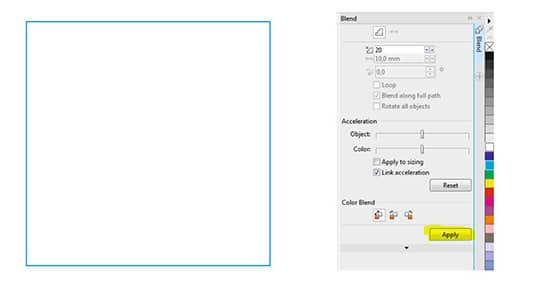
Let’s have some fun with blends. Draw a square (hold Ctrl while dragging with the Rectangle tool), then change outline color (i.e. Blue). Make a duplicate (by clicking on the + key of the Numeric Keypad or copy/paste), then change the color of the new square (i.e. to Cyan).
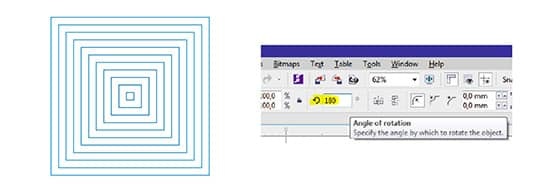
Now, select both squares and go to Effects > Blend, that will open the Blend Docker. Click on the Apply button without changing any of the default values. You won’t notice any change at this point. This is correct, since both objects had the same size and are aligned. But now, select only one of the squares and rotate it 180º (on the Property bar). Although you would think that rotating a square by 180º shouldn’t change it, it will change the direction of the blend since it changes the position of the nodes).
-
Select the same square again and choose “Mirror Horizontally” on the Property bar.
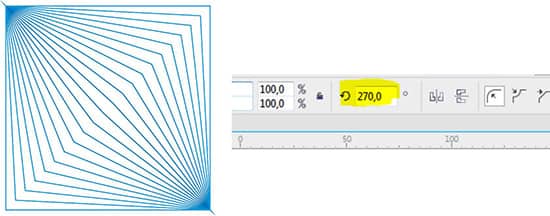
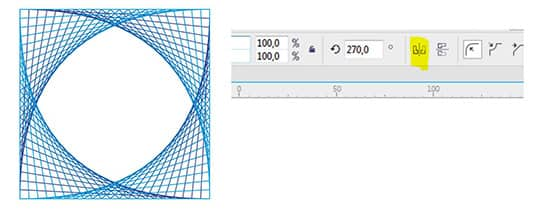
Now, always selecting the same square, change the rotation to 270°.
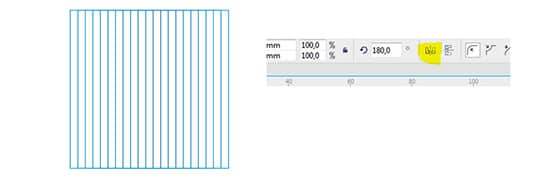
And, still selecting the same square, choose “Mirror Horizontally” again.
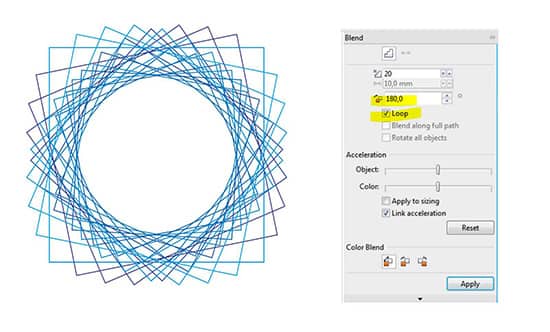
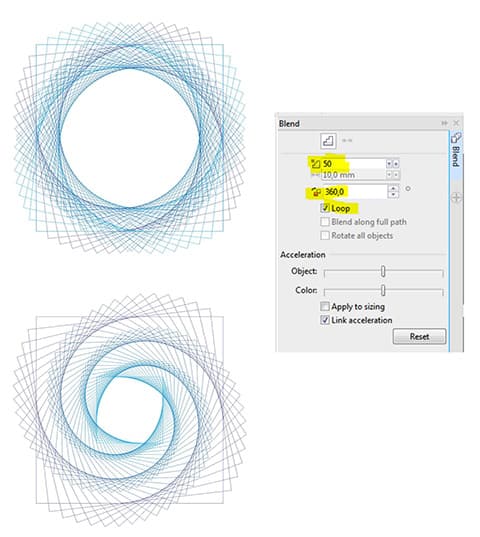
Now, select the Blend group. On the Blend docker, change the “Blend direction” to 180° and activate “Loop”, then ckick on the “Apply” button
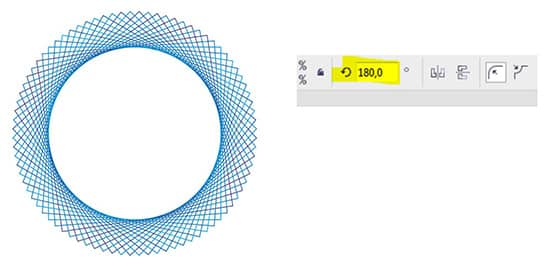
Select the same square again and change rotation to 180º. And, now we have a circle!
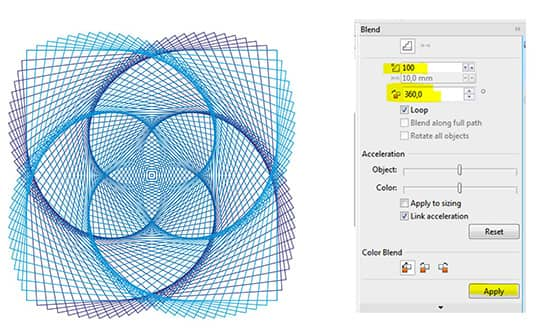
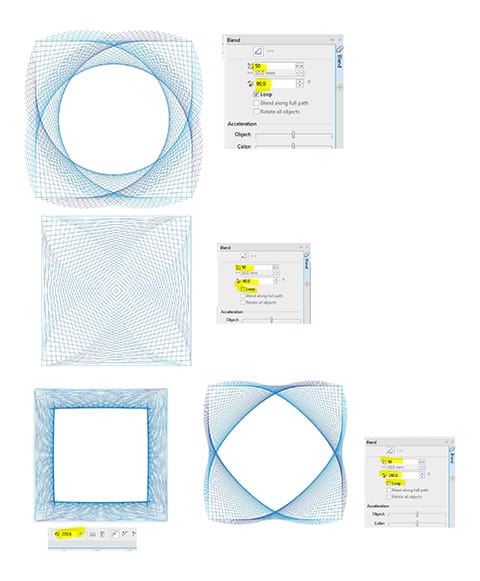
- Select the Blend group again, and go to the Blend docker. Change “Blend objects” to 100 steps (the default is 20) and “Blend direction” to 360, then press “Apply”.
Different values will create different results. And we are still only using the original two squares.
- Until now, we have been using both squares at the same size, but what happens if the size is not the same? Change the Blend objects value to 50 steps and the Blend direction to 360º with a Loop, then Apply. Now, select one of the squares and enlarge or reduce the size.
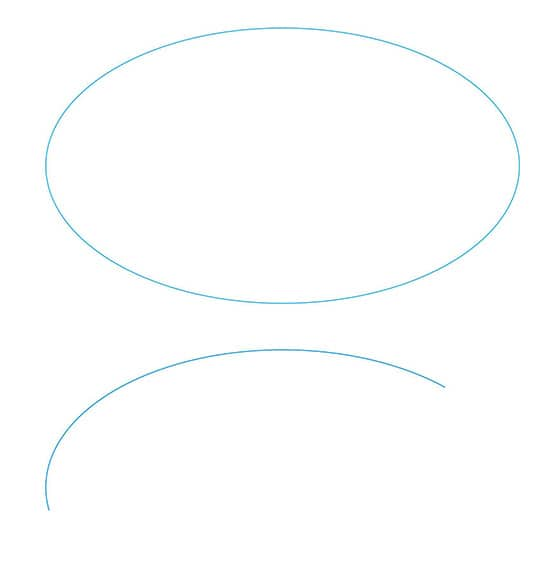
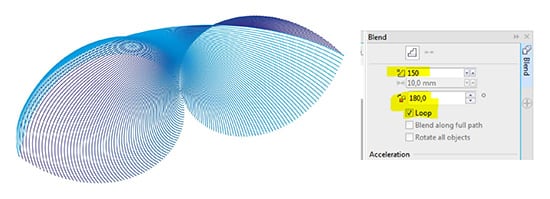
- Do you want to see an example using another shape?, OK, let’s create an Ellipse (F7), and use the Shape tool (F10) to create an arc (click on the Arc icon on the Property bar). Once again, let’s duplicate (using the + key of numeric keypad or copy/paste), then change colors to better identify each object.
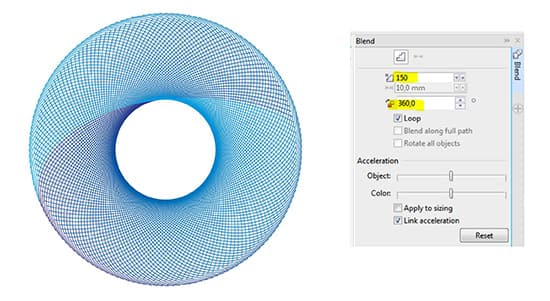
Choosing 150 steps and 360º with Loop, we will have... a donut!
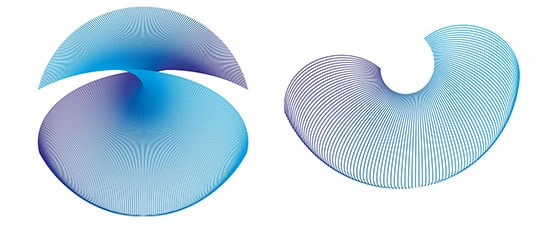
Changing the Blend direction to 180º the result is very different
Rotating, mirroring or moving one of the objects creates new shapes and effects
I hope you have enjoyed this tutorial and I hope that you will experiement with diffent shapes and colors to créate fantastic blends. The only limit is our imagination!