Watch the tutorial video on YouTube for a closer look or follow the written guide below.
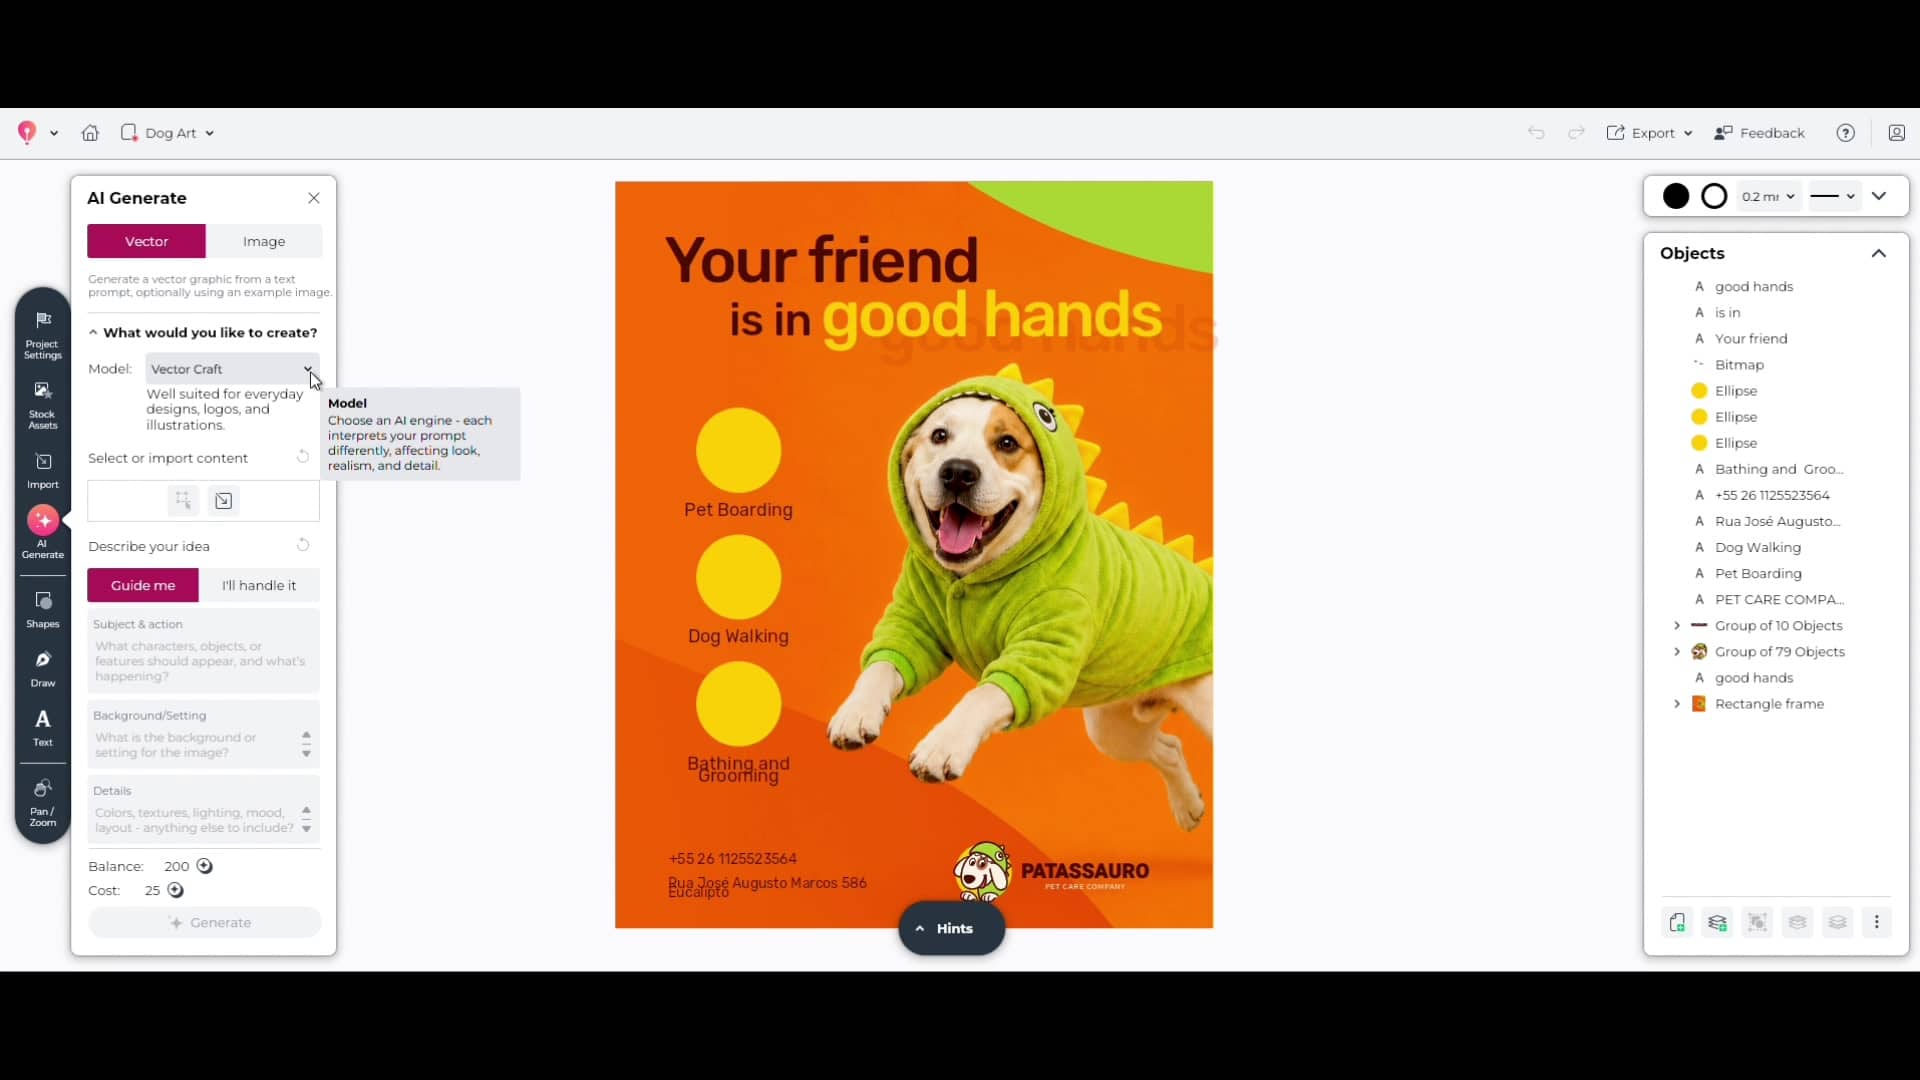
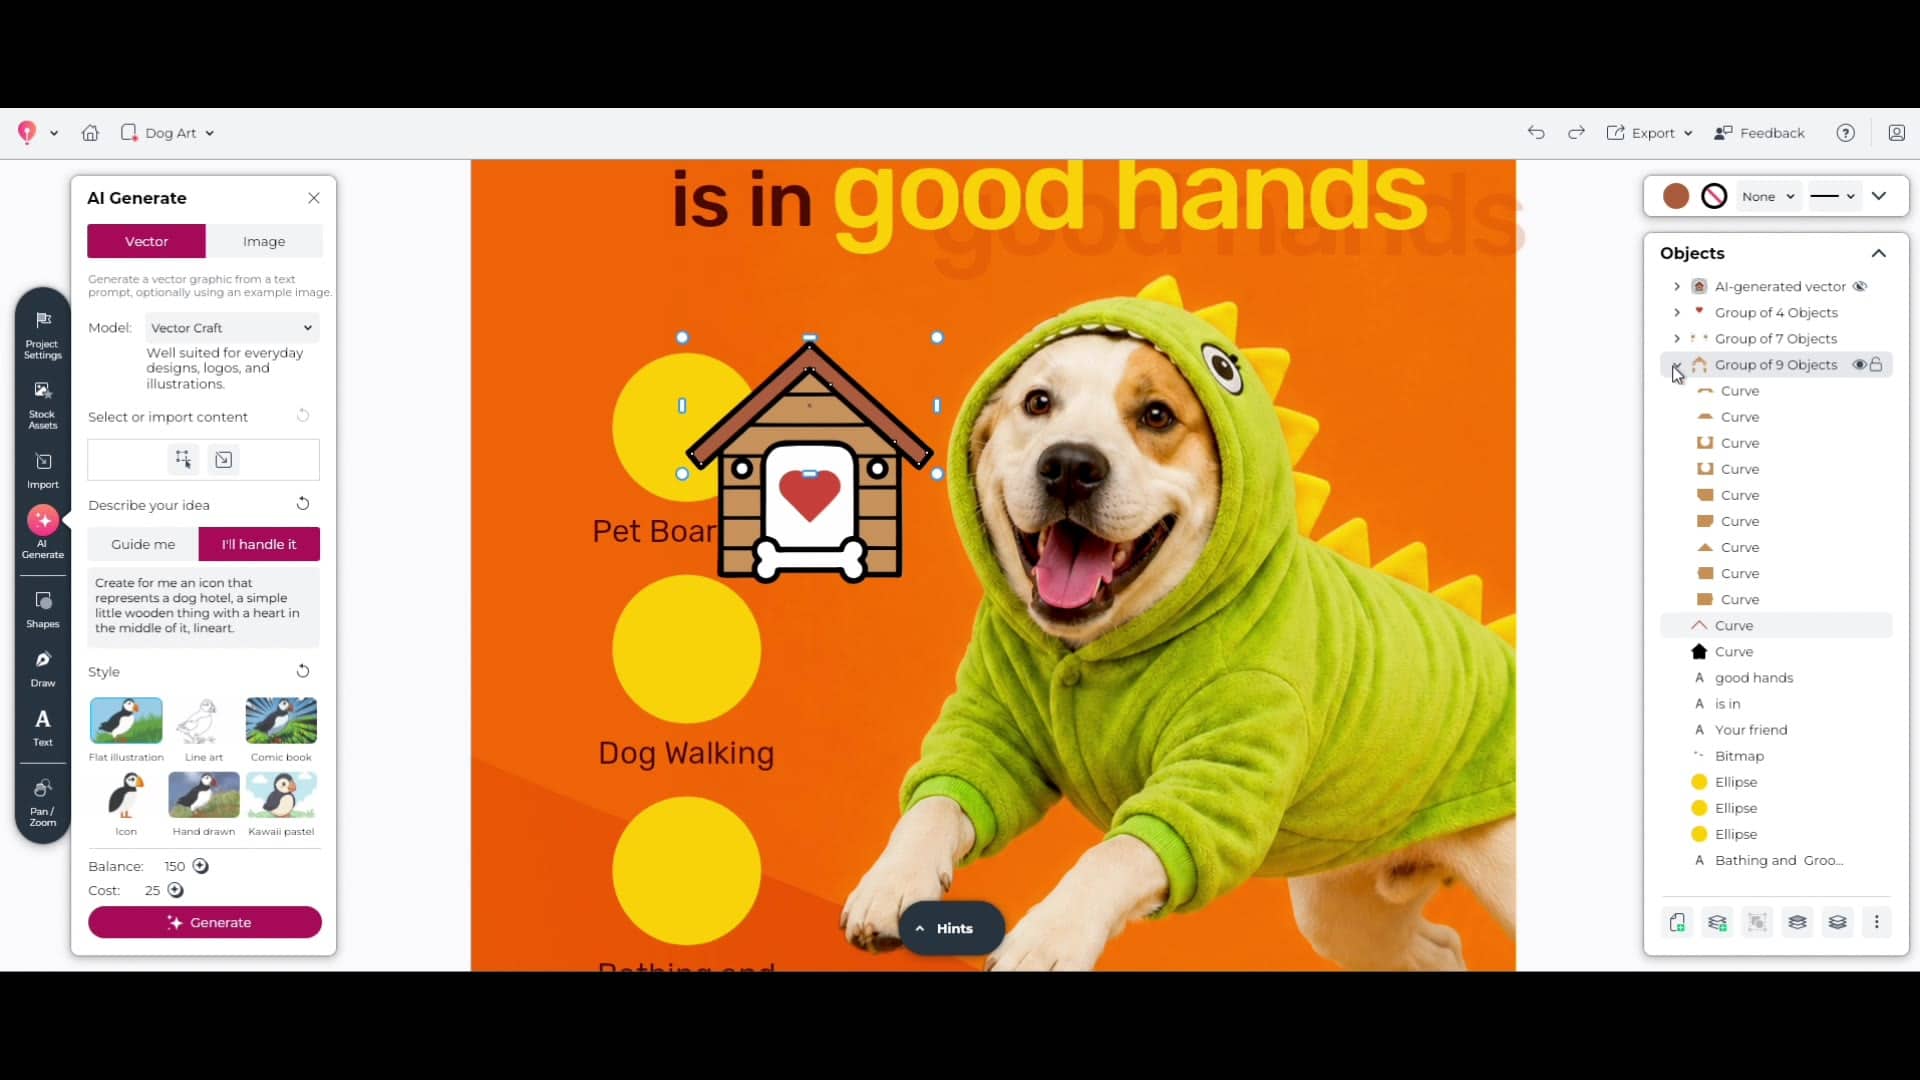
1. Open the AI Generate panel
Click the AI Generate icon in the toolbar on the left side of your workspace. This opens the AI Generate panel, where you can choose between generating a Vector or an Image.
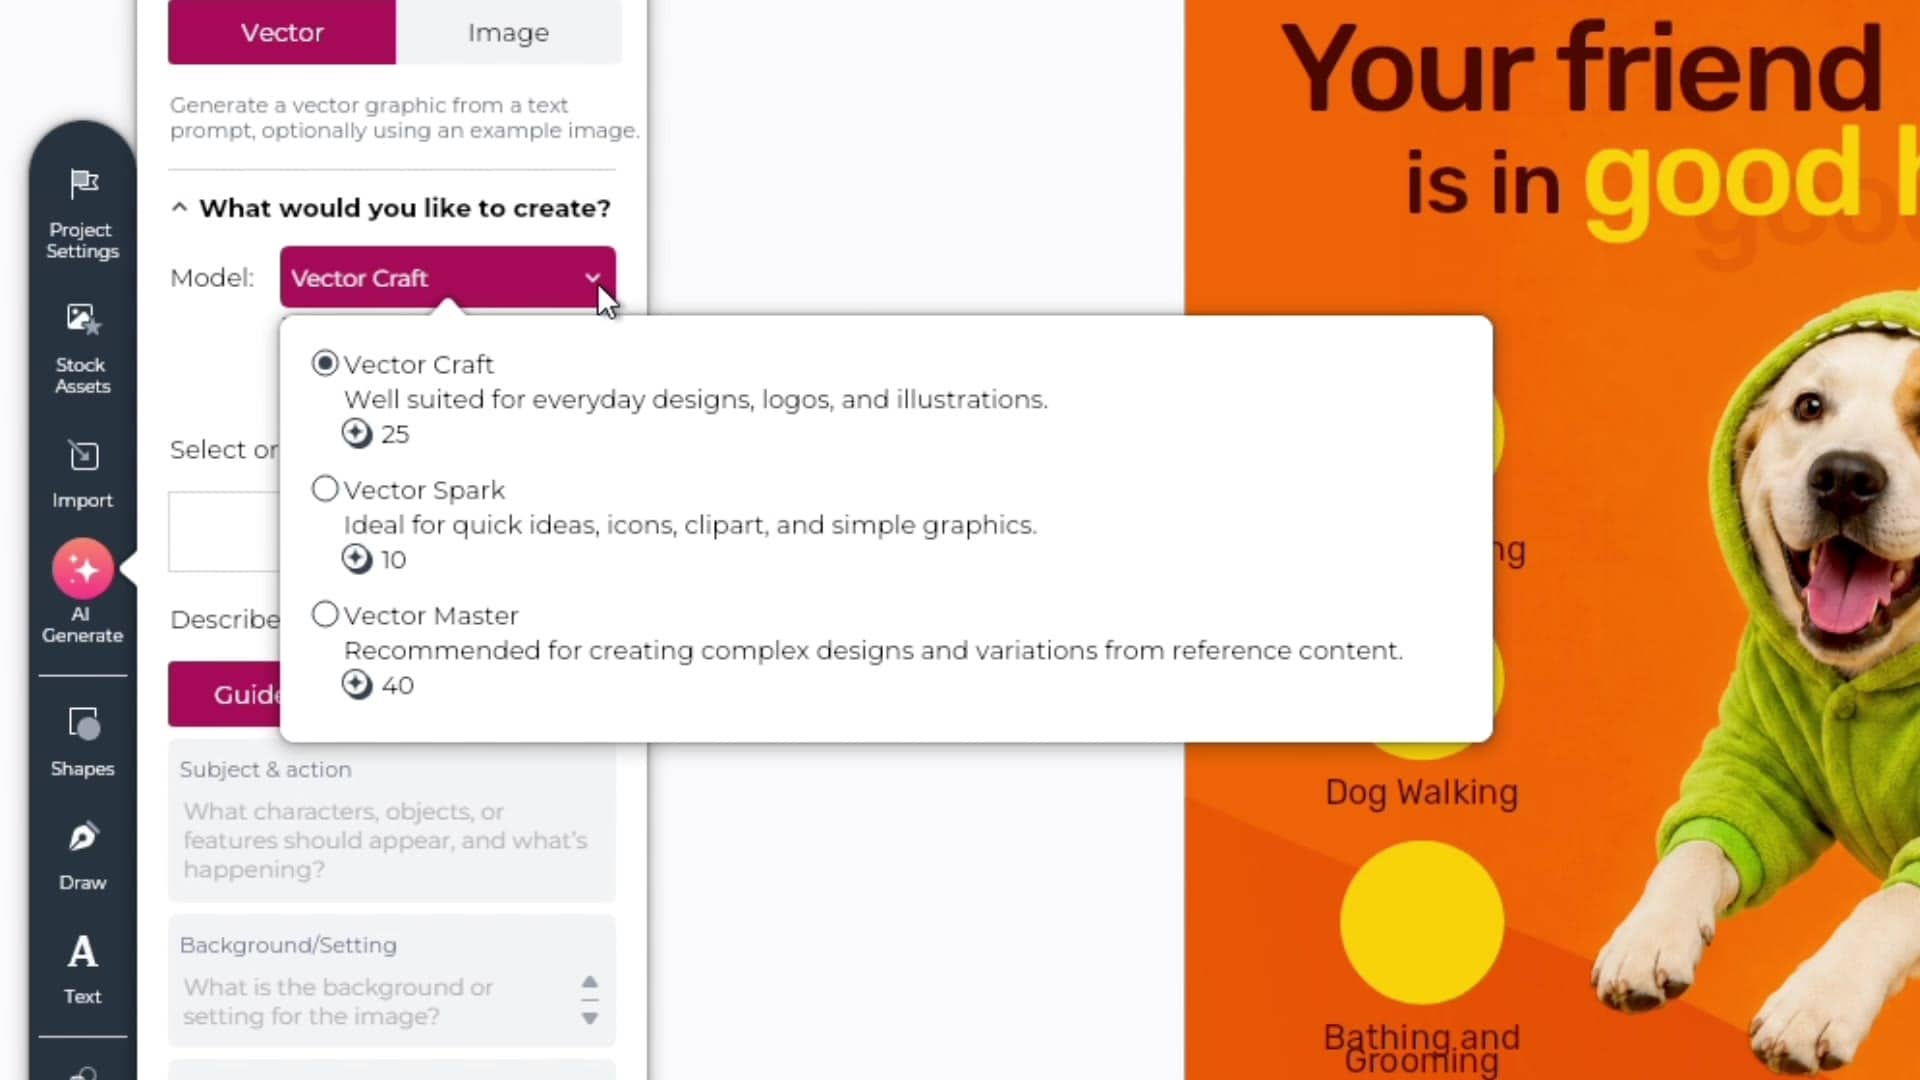
2. Choose a vector model
Select the Vector tab, then choose a model depending on what you're creating:
- Vector Craft is useful for everyday projects like logos
- Vector Spark helps with iterating on ideas and creating icons
- Vector Master is great for more complex designs and creating variations based on reference content
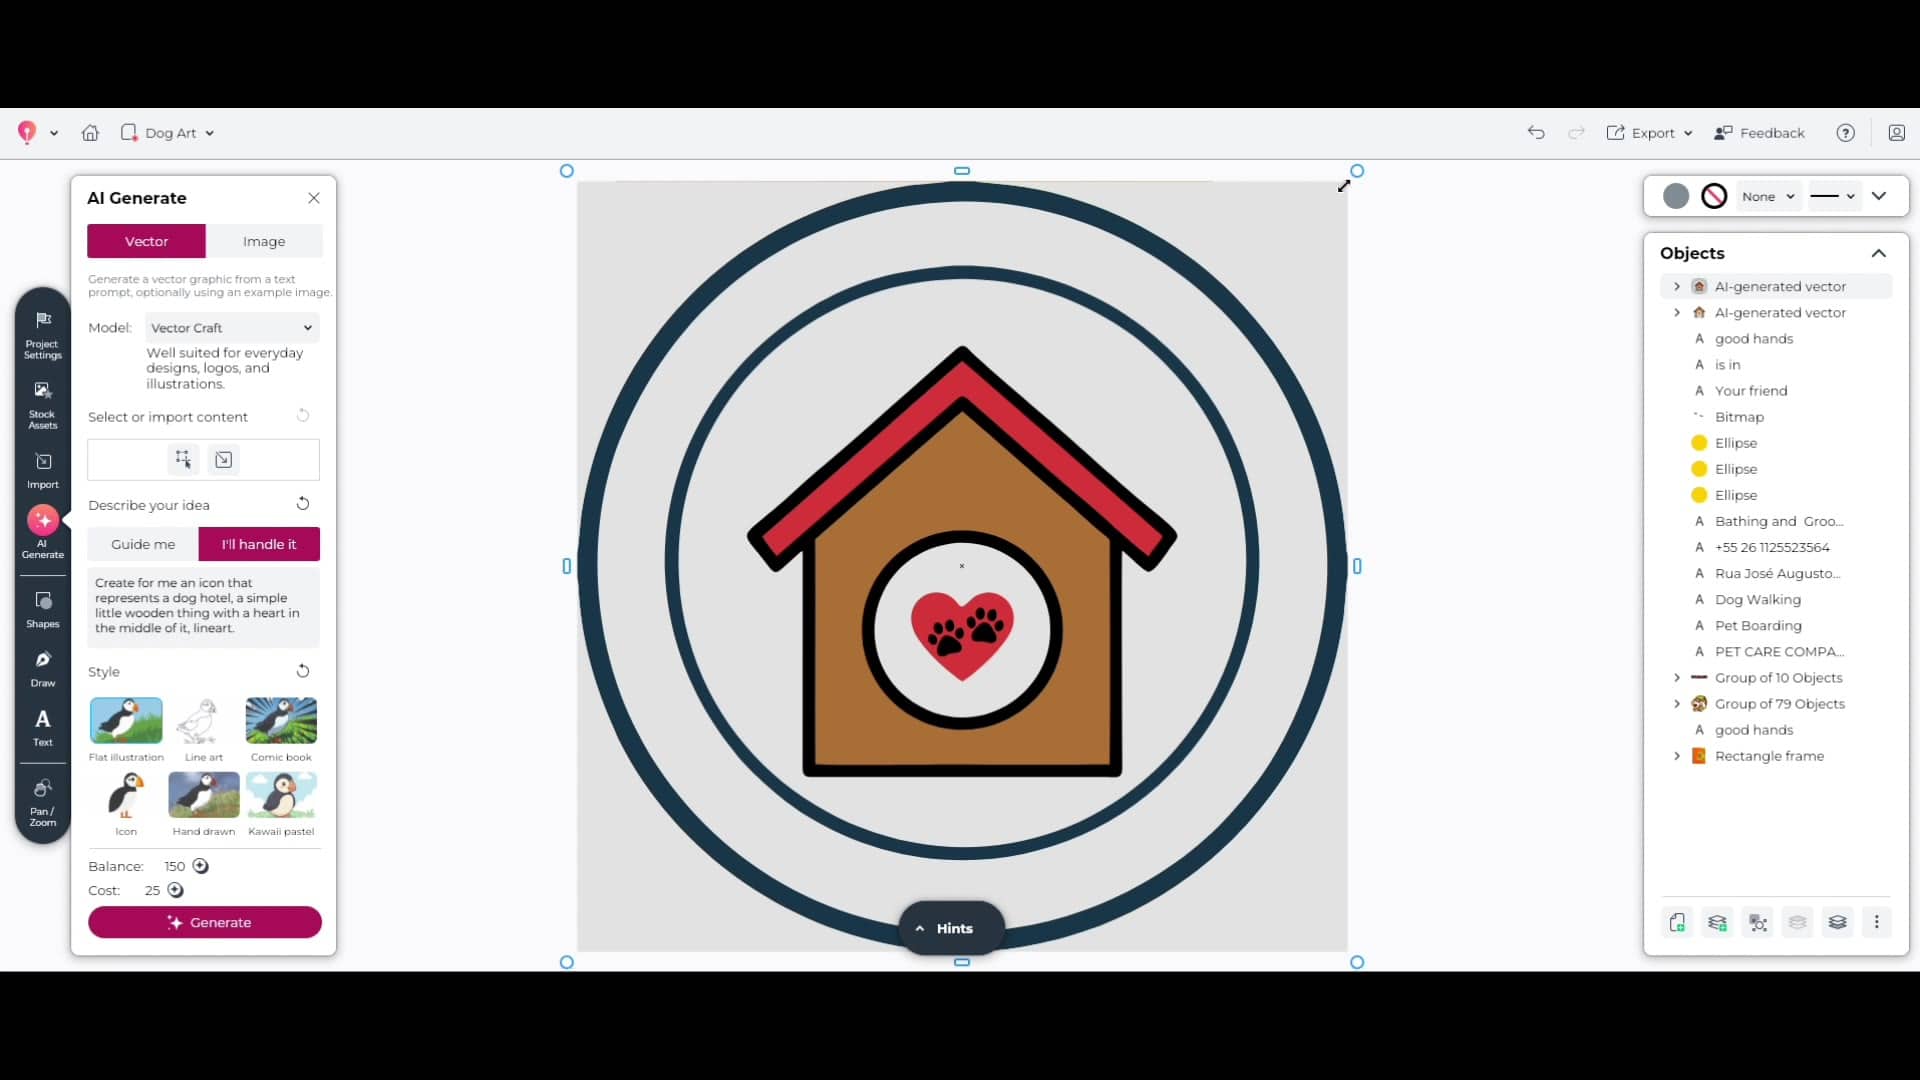
3. Write a prompt and generate your icon
Select the I'll handle it option to write your own prompt or use the Guide me feature for step-by-step prompt building with fields for subject, background, and style details. Choose a style, like Icon or Flat Illustration, then click Generate.
- Try the same prompt with a different style or model to compare results before deciding which one to use
4. Edit and place your vector
Every result comes out as fully editable vector curves. Move your generated vector into place in your design, then ungroup, recolor, or resize any part of it to match your layout.
5. Add ready-made icons from the Stock Assets panel
For simple elements like phone or address icons, you don't need to generate anything new. Open the Stock Assets panel, switch to Vectors, and search for what you need, then drag it straight onto your canvas.
Ready to create your own vectors with AI?
Now you know how to turn a text prompt into an editable vector icon in CorelDRAW Go, so it's time to put it to work in your own designs.
Try CorelDRAW Go now