1. Open an image
Open the CorelDRAW application or download your free trial to get started. You can import the photo you want to edit or open an image from within CorelDRAW.
Your favorite photos deserve the best! Count on the built-in photo editor in CorelDRAW® Graphics Suite to help you apply image effects. Choose from over 100 photo effects to match your mood, aesthetic, or creativity.

Join millions of users across thousands of global organizations who use CorelDRAW.


Leave it to the pro tools in CorelDRAW to help you apply high-quality effects to your images. It takes a few quick steps to achieve a fresh look and feel for your photos:
Open the CorelDRAW application or download your free trial to get started. You can import the photo you want to edit or open an image from within CorelDRAW.
As you explore the workspace, you will find the Effects menu. Its submenus display various effects, such as Crystalize, Mosaic, Vignette, and more.
Apply the desired effect to your photo. Play with the layout. Try adding colors and shadows. Please save the file once the effects are where you want them.
You can post, share, export, or save it to your photo gallery.
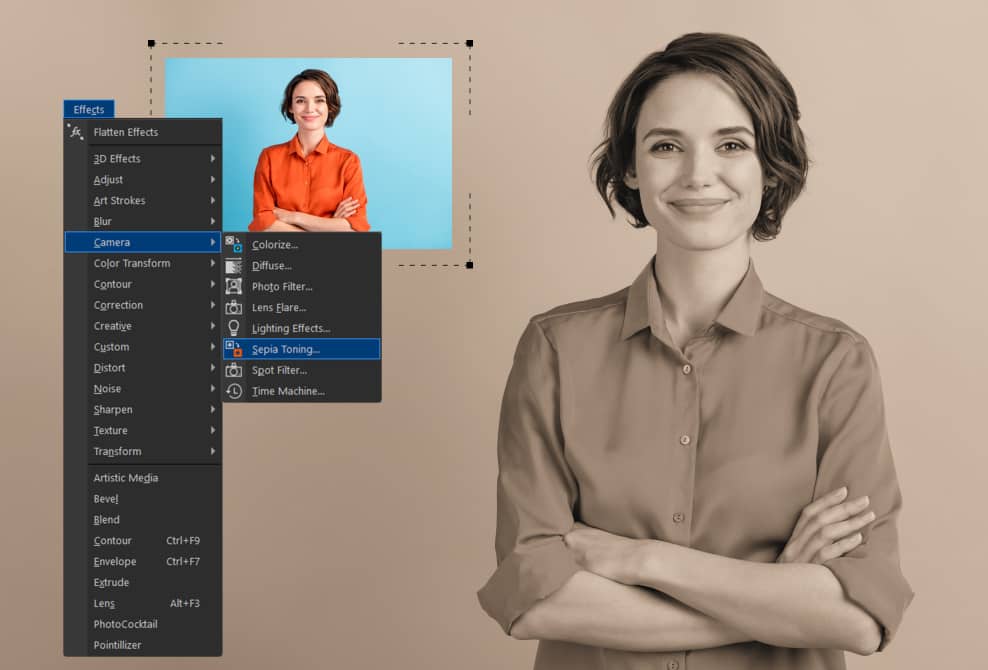
Apply special effects and camera filters, such as Colorize, Diffuse, Lens Flare, and Sepia Tone, to transform your images.
You can enhance photo colors to improve brightness or adjust intensity up or down until you get the color you want. Then, you're ready to post or share your revised photo with the effects.
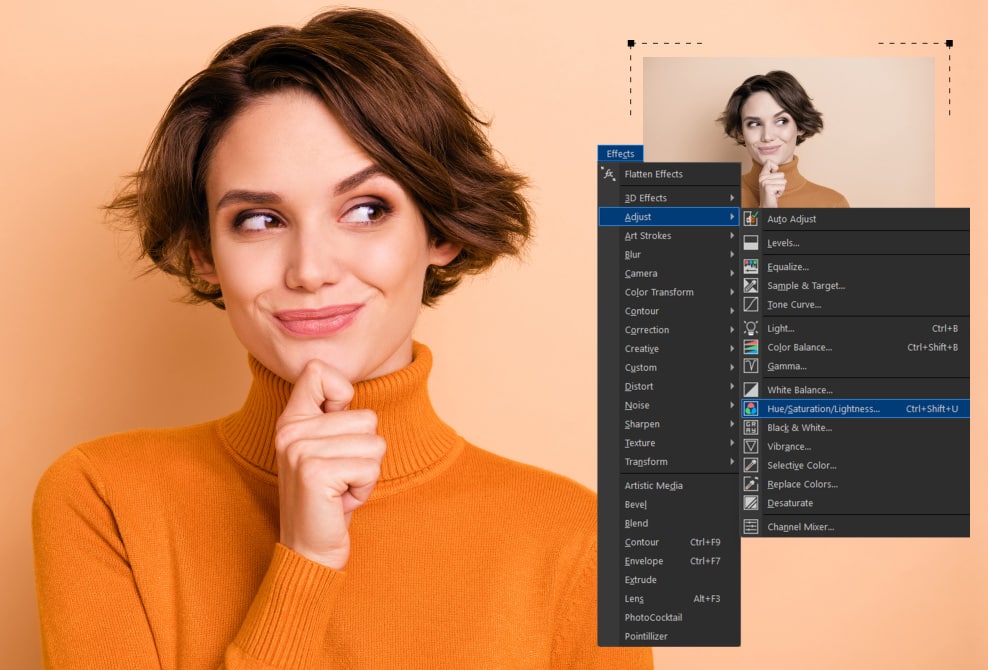
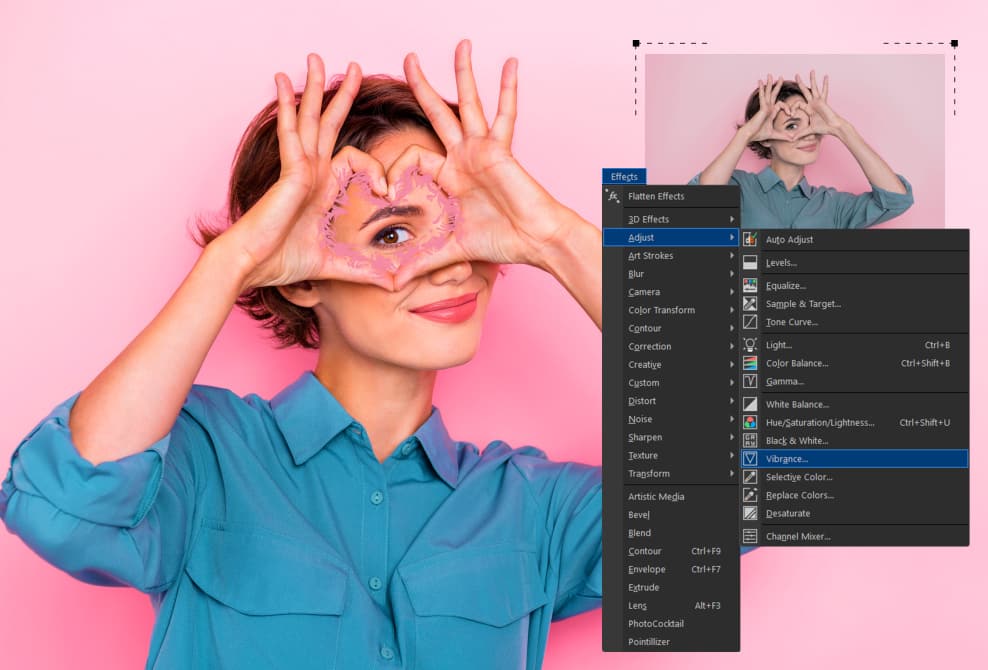
You can add more professional effects like Highlights using the Vibrance filter, which allows you to change the saturation, or the Photo filter, which simulates the photographic filters on a camera.
To start, open CorelDRAW and click the “Add effect” button. Find the selection you want from the drop-down menu. You will see many options for effects like the Vignette effect and the Lens Flare effect.
CorelDRAW also includes an Effects docker that keeps everything organized in one place. Plus, you can apply multiple effects to one object and then turn the effects on or off.
If you change your mind or want to try something else, you can reset or flatten an effect with a single click.
Yes, you can. One of the premiere tools within the CorelDRAW Suite is Corel PHOTO-PAINT. This advanced photo-editing application lets you make edits and enhancements and add realistic special effects.
Indeed, Corel PHOTO-PAINT is a versatile application that caters to a wide range of photo editing tasks. It allows you to apply photo effects, correct basic imperfections, make quick adjustments, and create compositions, all in one comprehensive package.
It goes beyond basic photo editing features with advanced tools that help you stitch images together, use clip masks, and work with RAW files.
Absolutely! One of the best parts of using the layer-based photo editing tools in CorelDRAW is the ability to make non-destructive edits.
As you apply different edits to your images, such as block shadows, brightness, and saturation adjustments, you won’t harm the original image. Essentially, you can undo whatever new look you’ve applied to your photo.