The applications and features described in this tutorial require CorelDRAW Graphics Suite X3 or newer to be installed.
Did you know that you can automatically reduce the number of nodes in curve objects? Often, complex curve objects contain overlapping or redundant nodes that are not necessary for editing the object. By reducing the number of nodes in a curve object, you can more easily edit and prepare it for output to a variety of devices and file formats.
The steps below show you how easy it is to automatically reduce the number of nodes in a curve object without compromising the object's quality.

Figure 1
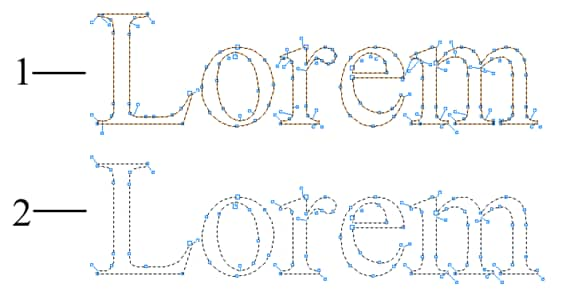
This curve object was created in another program and imported into CorelDRAW®.
Duplicate the object by pressing Ctrl + D, so that you can later compare the two curves.
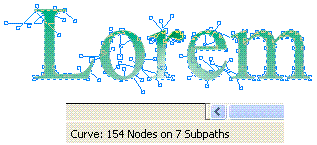
Figure 2
The status bar, at the bottom of the program window, displays the number of nodes in the selected object.
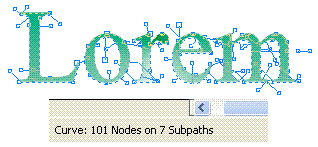
Figure 3
The number of nodes in the object has been significantly reduced.
Click anywhere in the drawing window to deselect the curve. Notice that the original object does not appear to be significantly altered. Next, we'll view the curve object in wireframe mode, in order to see the nodes more clearly.
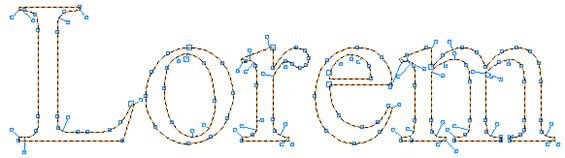
Figure 4
Wireframe mode lets you view the nodes more clearly.
The Reduce nodes command removes overlapping and redundant nodes from the curve object, yet it allows you to retain the same level of control over the object. In our example, the original object (1) contains 154 nodes, whereas the edition version (2) contains only 101 nodes.