
How To Make a Wedding Program
Some wedding programs are a single-sided or double-sided page, printed on card stock. These are simple enough to make: choose your print size and add graphics and text.
Wedding programs can also be a double-sided page folded in half, printed on cardstock or something lighter. This results in a 4 page program: cover, inside left, inside right, and back. This is what we will learn about in this how-to.
1. Setting up the page
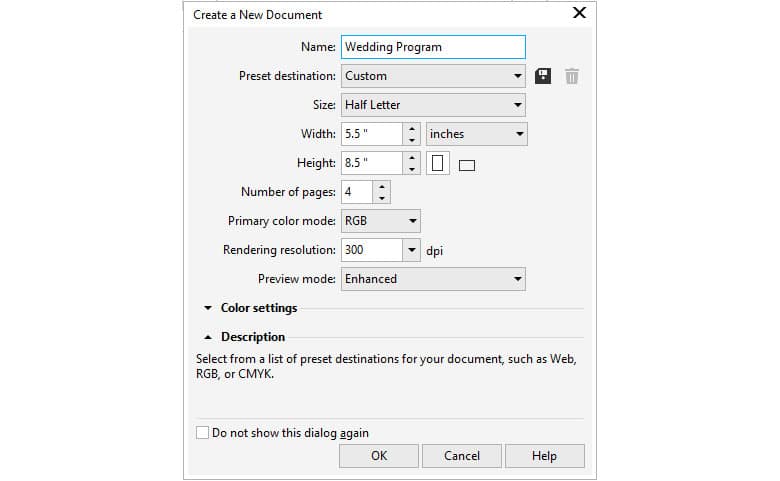
For this project, we are going to use one half of a letter size page for each panel. From (File > New) under Name: type Wedding Program. For Primary color mode, select RGB since you’ll likely be printing these yourself or at a commercial print shop. From the size drop-down select Half Letter and under Number of pages select 4. Click OK.
The final step of the document setup is to go to (Layout > Page Layout) and check Facing Pages. Under Start on, select Right side. Click OK once again. You can now scroll through program pages by clicking the tabs at the bottom.
2. Adding Content
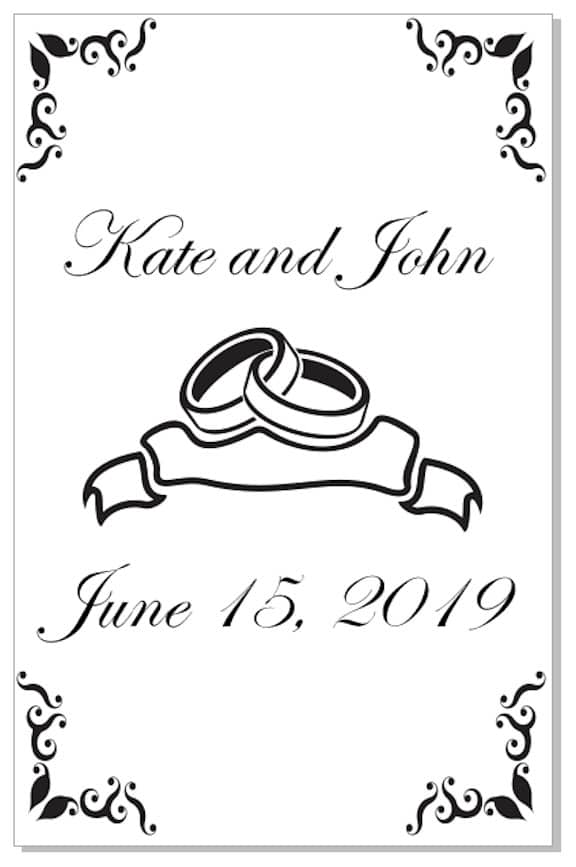
Adding content is rather straightforward. For Page 1 - the program cover - you can bring in some clip art and borders, and use the Text tool to add the names and wedding date.
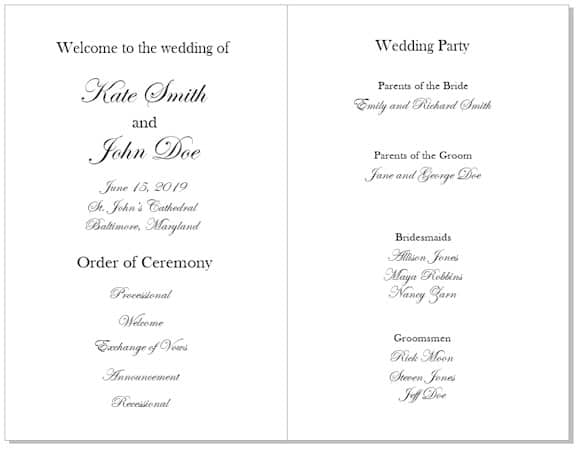
For Pages 2 and 3 - inside left and right - you can create artistic text in a combination of fonts. Use the tools on the Align and Distribute docker to get everything placed and lined up where you want. Creating groups of text objects is handy when aligning or distributing.
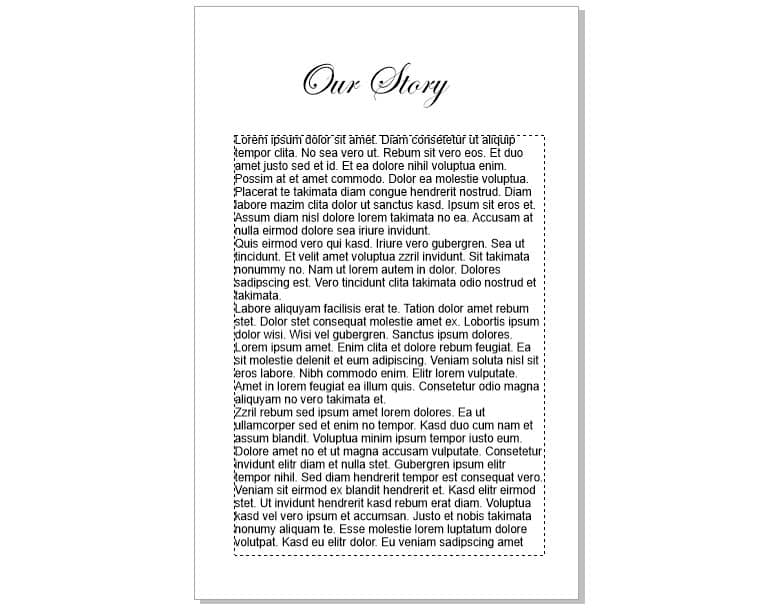
Page 4 - the back cover - can be left empty or you can insert paragraph text describing the happy couple. If you want to fill the text box with the standard “Lorem Ipsum” text you can then edit, then first create the paragraph text box without adding any text. Then with the Pick tool active, right-click inside the text box and select Insert Placeholder Text.
3. Outputting the file
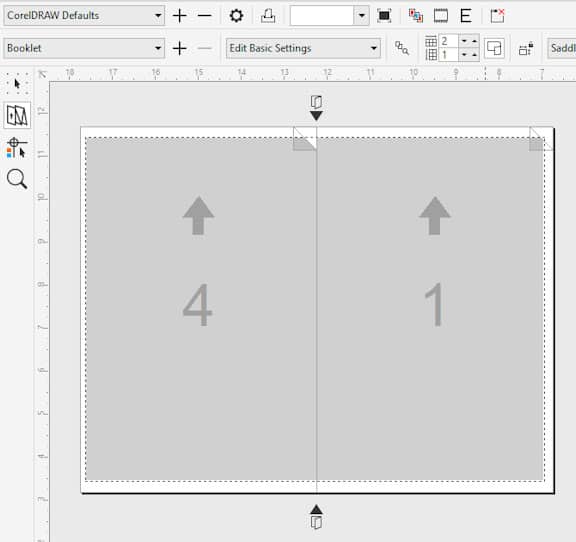
To easily output the program, we are going to use the imposition layout. From (File > Print Preview), in the toolbar along the left side, select the Imposition Layout Tool. Next, from the Property bar under the first drop down, select Booklet. You will notice that you can now see that pages 4 & 1 will print on one side. If you click the Layout Template (Back) tab at the bottom of the screen, you will see that pages 2 & 3 will be printed on the other side. The final step is to click on the gear icon (Print Options)on the Standard toolbar. This will allow you to select the proper printer, and set it for double-sided printing.
CorelDRAW does more than just design wedding programs
Check out some of the other graphic design features in CorelDRAW Graphics Suite, like How To Make A Restaurant Menu, How To Design A Car Wrap, How To Design A Car Magnet, and more! Create high quality designs in a fun and easy to use graphic design software and make your work stand out more than ever.
 How To Make Bumper Stickers
 How To Make Car Decals
 How To Make Window Stickers
 How To Make Stickers