How To Design a Car Wrap
Car or truck wraps are an eye-catching way to garner attention for your business while you’re out and about. And with Corel’s library of vehicle templates, it’s easy to place just what you want where you want it.
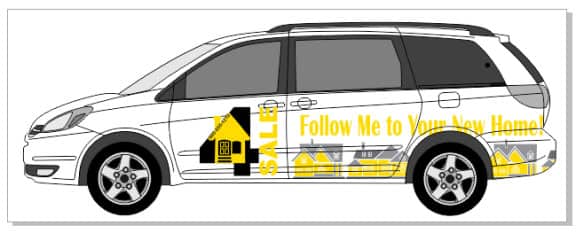
In this how-to, we’ll create a wrap for one side of a Toyota Sienna minivan.
1. Get the Template
According to vehicle specs, this minivan is about 200” long and about 70” high. So we’ll need to use a paper size large enough to accomodate. From (File > New) under Name: type Sienna. Set the width to 210” and height to 80”, and choose RGB for the color mode.

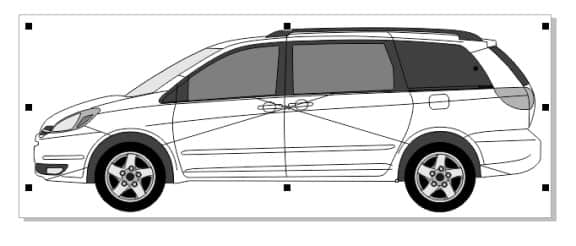
To find the correct template, open Window > Dockers > CONNECT. Search for “Sienna,” and you’ll find a template with four views: front, back, left, and right. Drag this clip art onto your page. Because only one view of the four is needed, ungroup the template by right-clicking on it and selecting Ungroup Objects. Then you can erase all but the view of the side we’ll be wrapping. For this template, set its width to 200” in the Interactive Property Bar, making sure the aspect ratio is maintained, and place it within the paper borders.
Tip: When supplying art work for a vehicle wrap to a print shop, be sure that the flat distance between the wheels matches that measurement on the actual car. This is the easiest distance to measure on a car.

2. Create the Power Clip
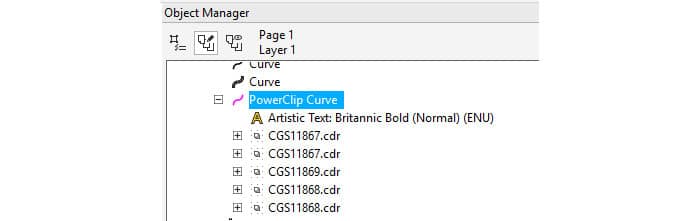
Now we want to use the vehicle outline to define the boundary for content we’ll add to the wrap. With the Pick tool, right-click on the outermost curve of the template and choose Frame Type > Create Empty PowerClip Frame. (You can also find this curve at the end of the object list in the Object Manager.) The PowerClip frame is indicated by the large X.
3. Add the Content
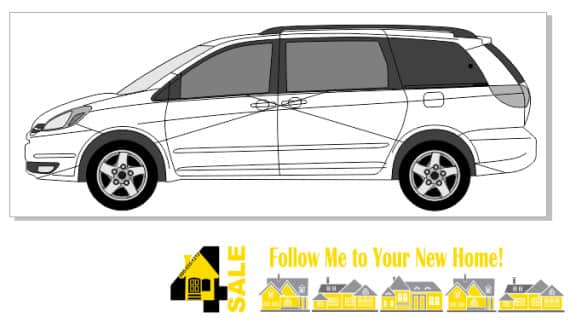
Now we can create or bring in the elements we want to appear on the vehicle: logo, phone number, catch phrase, clip art - you name it. It’s helpful to lay out all objects in empty space first, approximately matching where they will go on the car itself.
4. Move the Content into the Frame
Select the first element to move - in this case the stylized houses along the bottom. When moving objects inside a PowerClip, you’ll notice the frame turns grayish-blue. When you complete the move, the objects are trimmed along the edges of the PowerClip.
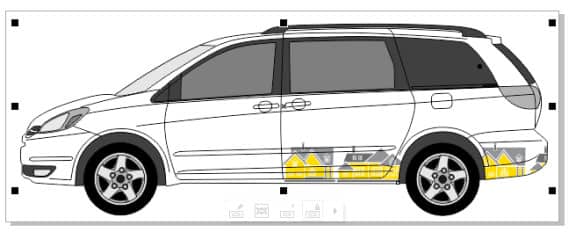
Moving subsequent objects into the frame works the same way - just be sure to press the W key while moving objects, to place them within the PowerClip
5. Isolate the Frame
The PowerClip and its contents are what will be sent to the print shop. You can easily find these objects in the Object Manager.
From here, you can copy these objects into a new file, or place them on their own layer. Now you can save the file as an EPS, or publish to PDF, and send it to your print shop.
CorelDRAW does more than just make car wraps
Check out some of the other graphic design features in CorelDRAW Graphics Suite, like How To Design A Car Magnet, How To Make Bumper Stickers, How To Make Car Decals, and more! Create high quality designs in a fun and easy to use graphic design software and make your work stand out more than ever.
 How To Make Window Stickers
 How To Make Stickers
 How To Make A Schematic Diagram
 How To Vectorize An Image