
How To Make Your Own Bumper Stickers
It’s hard to find a car on the road that isn’t sporting some type of bumper sticker. And with the current wealth of printing options, it’s easier than ever to design and print any sort of custom bumper sticker, at pretty much any size that fits your car.
When designing your own sticker, keep in mind that fonts should be large, images should be simple and eye-catching, and you should avoid using too many colors.
In this how-to, we’ll design a rectangular bumper sticker that has some basic patterns, text, and graphics.
1. Create the Background Rectangle
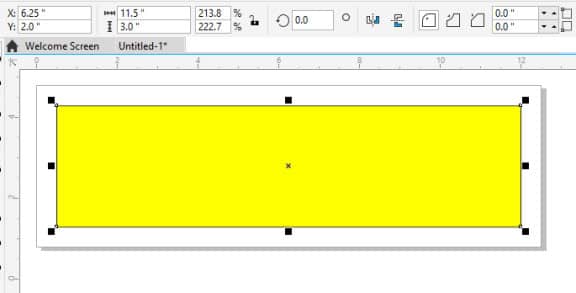
Bumper stickers are available in a wide range of sizes, but the most common seems to be 11.5” x 3”.
From (File > New) under Name: type Bumper Sticker. Set the paper size to 12.5” x 4”, to accommodate our sticker size. Use RGB for color mode.
Use the Rectangle tool (F6) to draw a rectangle of any size. In the Interactive Property Bar, unlock the aspect ratio. Set the rectangle width to 11.5” and the height to 3”. In this example, the rectangle is filled with a bright and cheerful yellow - hard to miss on the road.
2. Add a Pattern
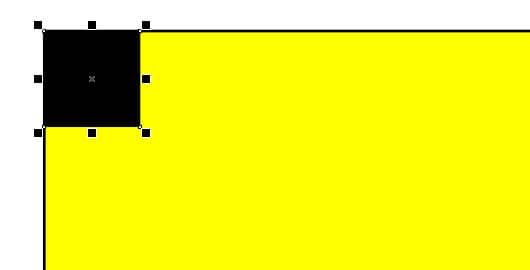
This step will describe how to add a taxi-checkerboard pattern across the top and bottom of the sticker. To get the object placements just right, be sure that View > Snap Off is not enabled, and turn on View > Snap To > Objects.
Create a new rectangle with dimensions ¼” x ¼”. Use the Pick tool to select this rectangle, and move the mouse to its top left corner. Click when you see the “Node” popup, and drag to place this corner at the top left corner of the yellow rectangle. Give this rectangle a black fill (left-click the black swatch) and no outline (right-click the empty color swatch).
With the black rectangle still selected, press Ctrl + D to duplicate it. Place the copy directly to the right. Then repeat to duplicate both rectangles straight down. Alternate black and white fills.
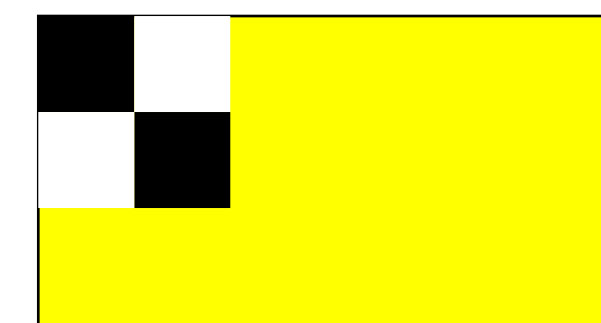
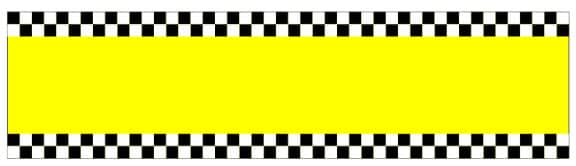
Select all four rectangles and press Ctrl + G to group them. Then with the group selected, press Ctrl + Shift + D to open the Step and Repeat docker. The horizontal offset should be ½”, and if you don’t know the exact number of copies needed (or can’t find your calculator), just set a high number like 25. Any extra copies can be deleted. When the top stripe is complete, group the whole thing (a group of groups), then duplicate the group to create the bottom stripe.
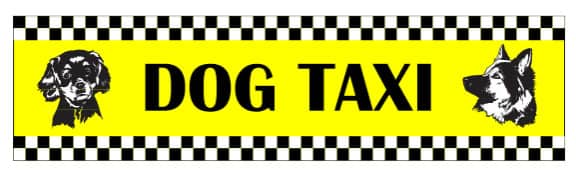
3. Add Content
In this example, some bold text was added in the center, and two dog images were imported from the CONNECT docker.
4. Prep for Printing
Most print shops that produce bumper stickers can take your graphic file in a number of formats. Find out what graphic formats they take - most likely EPS, PDF, JPG, TIF, etc. You can convert your CorelDraw file to the required format by using either File > Export or File > As.
CorelDRAW does more than just make bumper stickers
Check out some of the other graphic design features in CorelDRAW Graphics Suite, like How To Make Car Decals, How To Make Window Stickers, How To Make Stickers, and more! Create high quality designs in a fun and easy to use graphic design software and make your work stand out more than ever.
 How To Make A Schematic Diagram
 How To Vectorize An Image
 How To Test Your Tattoo