How To Make a Car Magnet
Car magnets are everywhere, and come in a wealth of shapes and sizes. Some of the larger ones advertise businesses, and can have complex shapes and multiple colors. Others are smaller, showing off a school name or a visited country.
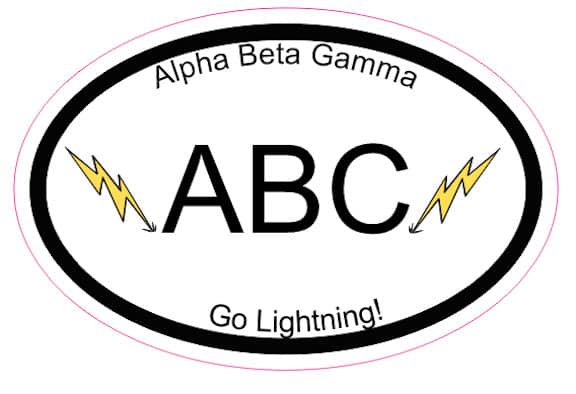
In this how-to, we’ll design a simple car magnet with an oval shape.
1. Create the Outline
From (File > New) under Name: type Car Magnet. Choose or set a paper size that can accomodate a 6” x 4” oval shape, and use RGB for color mode.
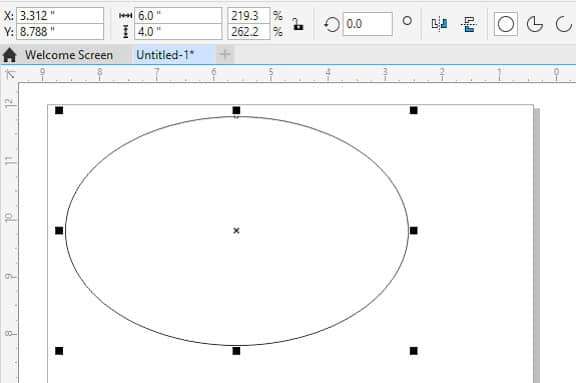
Use the Ellipse tool (F7) to draw an ellipse of any size. In the Interactive Property Bar, set the width to 6” and the height to 4”.
2. Add a Border
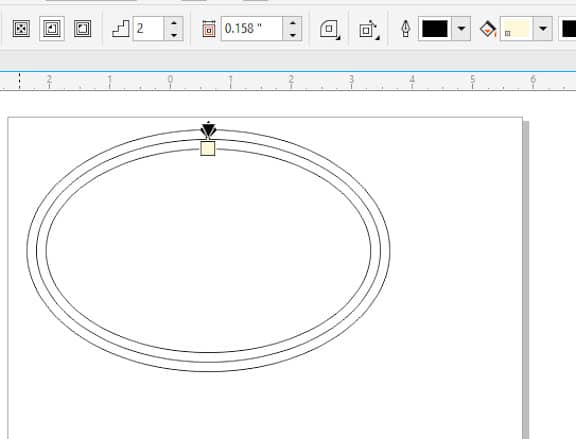
Select the Contour tool, and click the oval as the object to contour. Set Inside Contour and 2 Contour Steps. Click again on the oval, drag the mouse to where you want the inner contour, and when the mouse button is released, you’ll have two evenly-spaced contours.
To fill in the thin border strip, use the Smart Fill tool.
3. Add Content
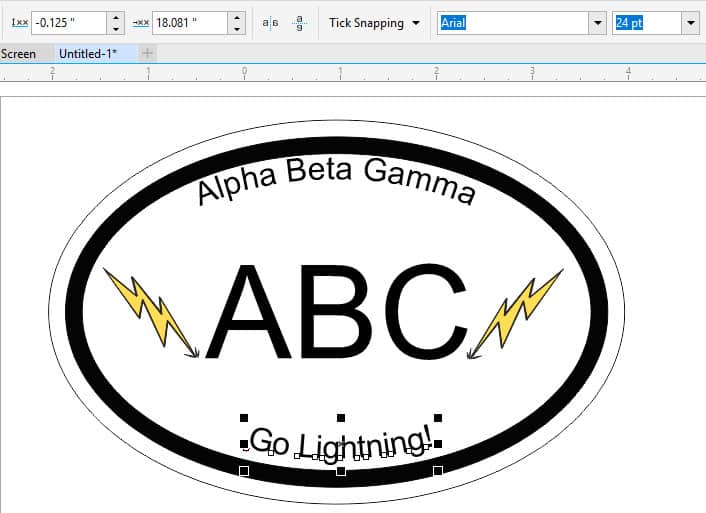
Now we can bring in or create the text and graphics for our magnet. The text in this example is straight, for now.
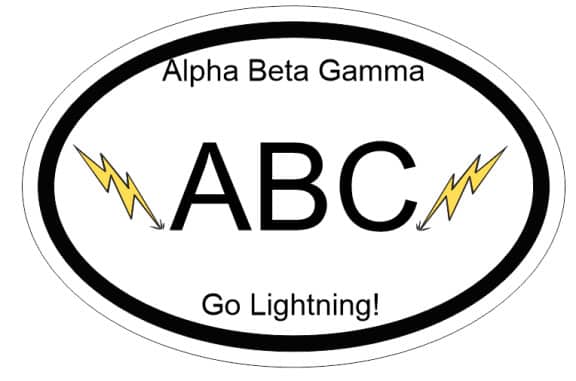
Most oval car magnets like this one have curved text along the top and bottom. To do this, use Pick to select the text you want to bend. Then select Text > Fit Text to Path, and move your mouse to the curve to which the text will align. For the lower text, that flips upside down when linked to the ellipse, use the Mirror icons on the Interactive Property Bar.
4. Prep for Printing
The print curve will follow the original ellipse. But because of the Contour and Fit to Text operations, our ellipse is now grouped with the text and contours that were created using it. This is easiest to see in the Object Manager docker.
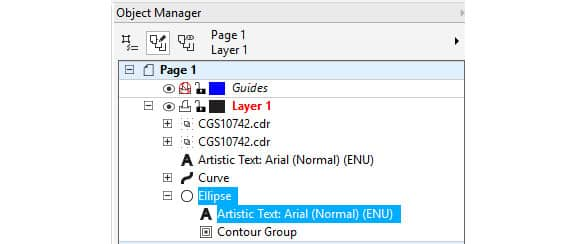
To separate out the ellipse from these other objects, first highlight the text and press Ctrl + K to break it apart. Then with the Ellipse and Contour Group selected, press Ctrl + K again.
Now that the ellipse is no longer grouped with any other object, we can use the Object Properties docker to assign it the properties required by the cutting machine that will be used. Typically this involves assigning a Hairline thickness and a printer-specific color.
CorelDRAW does more than just make vehicle magnets
Check out some of the other graphic design features in CorelDRAW Graphics Suite, like How To Make Bumper Stickers, How To Make Car Decals, How To Make Window Stickers, and more! Create high quality designs in a fun and easy to use graphic design software and make your work stand out more than ever.
 How To Make Stickers
 How To Make A Schematic Diagram
 How To Vectorize An Image
 How To Test Your Tattoo