Purchase options
One low price for access to the latest version and collaboration tools.
Buy it once, own it forever
CorelSure software maintenance is included with your purchase. Get new versions upon release, as well as other benefits, including dedicated support, global licensing and centralized control.
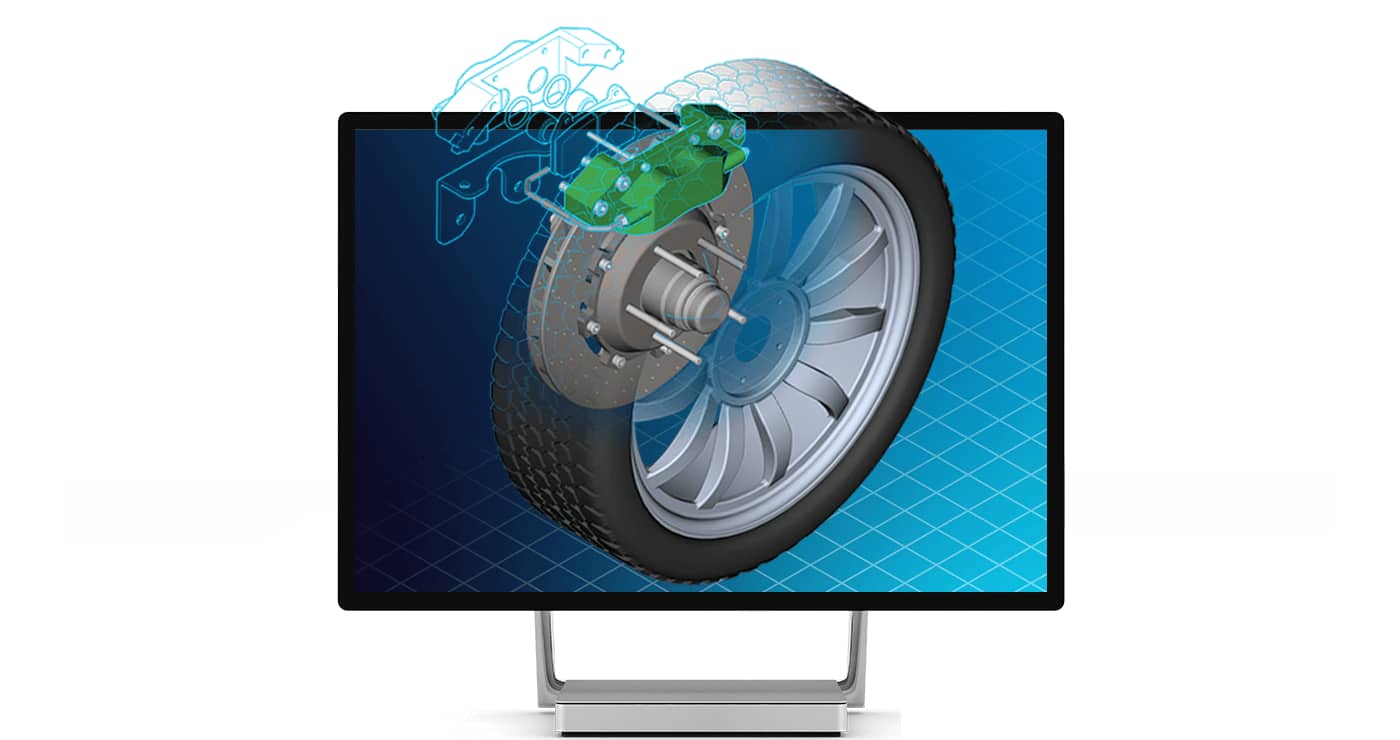
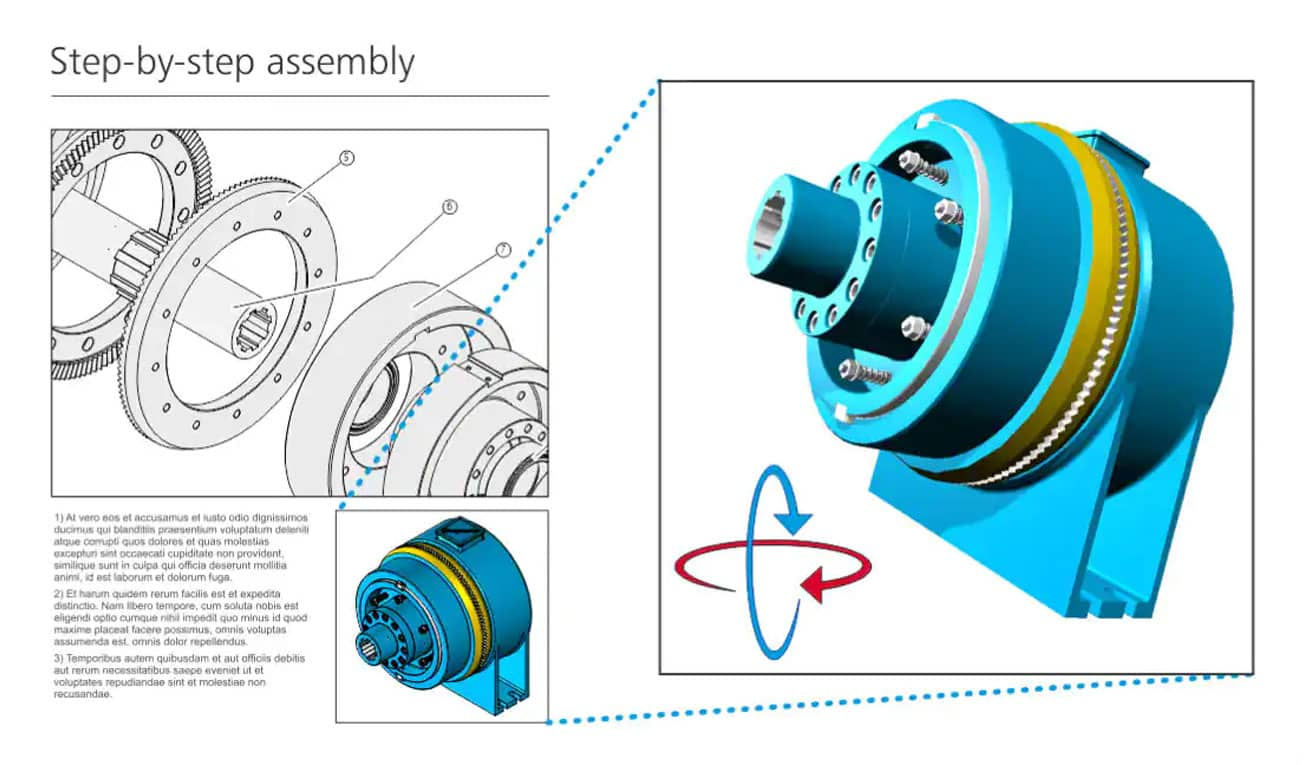
Redefine what’s possible in visual communication with CorelDRAW® Technical Suite, a comprehensive collection of applications for high-impact technical design and documentation.
Find a range of precise illustration and design tools to create detailed technical documentation with exact specifications.
Enjoy a seamless workflow from opening 2D and 3D source files, photos, documents and data, to producing, reviewing, and publishing technical communications.
Rely on this complete suite of professional design applications for authoring technical documentation, reviewing, and publishing detailed illustrations with ease.
Lowest upfront cost
Own it outright
Lowest upfront cost
Own it outright
Government agencies, charities, non-profits, and educational institutions are also eligible for special pricing, regardless of seat count.
Contact us to find out more.
CompareEnjoy a collection of versatile design and drafting applications
Technical design and illustration - Achieve accurate results with powerful technical design and illustration tools.
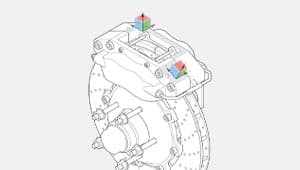
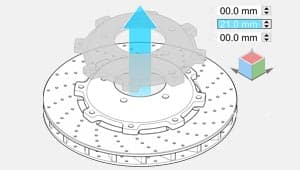
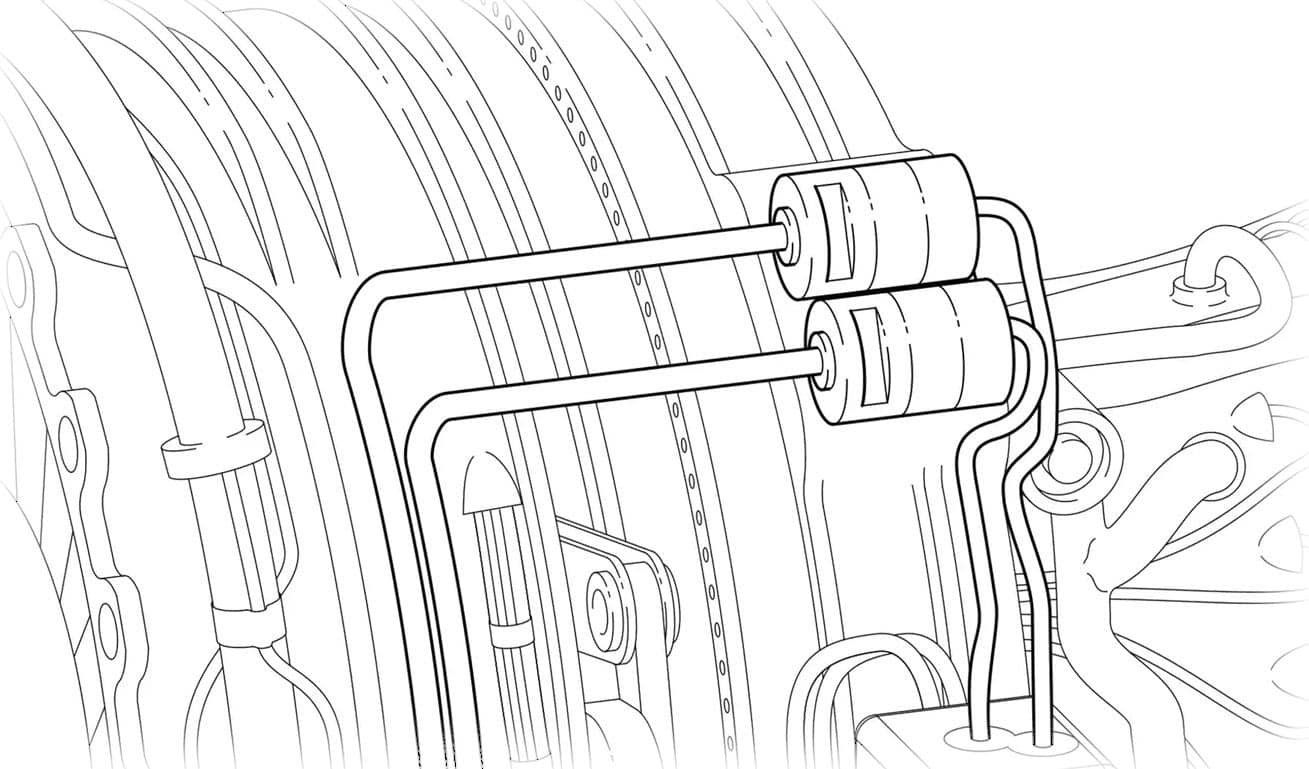
3D repurposing - Add context to your technical projects by using 3D views and models in your illustrations.
Advanced 3D repurposing - Add context and precision to your technical projects with powerful 3D CAD visualization, snapshots, animations, and native CAD format support.
Graphics and layout design - Tackle any project with this complete graphic design application for vector illustration, page layout, and more.
Photo editing and digital painting - Make the most of your photos with the robust photo-editing capabilities of Corel PHOTO-PAINT. Enjoy an integrated workflow with Corel DESIGNER and CorelDRAW.
Browser-based vector illustration and graphic design - Design on the go with CorelDRAW Web. Save your projects to the cloud and access them online, from any web browser. Sign in
Font exploration and management tool - Organize and manage your font library with the simple yet intuitive Corel Font Manager and use your favorite fonts without needing to install them.
Achieve accurate results with powerful technical design and illustration tools.
Tackle any project with this complete graphic design application for vector illustration, page layout and more.
Add context to your technical projects by using 3D views and models in your illustrations.
Add context and precision to your technical projects with powerful 3D CAD visualization, snapshots, animations, and native CAD format support.
Make the most of your photos with the robust photo-editing capabilities of Corel PHOTO-PAINT. Enjoy an integrated workflow with Corel DESIGNER and CorelDRAW.
Design on the go with CorelDRAW Web. Save your projects to the cloud and access them online, from any web browser. Sign in
Organize and manage your font library with the simple yet intuitive Corel Font Manager and use your favorite fonts without needing to install them.
This suite will take your technical illustrations from concept to compliance.
Packed with innovative new apps, features, content, and enhancements, CorelDRAW Technical Suite opens a world of endless design possibilities with unmatched speed and control.
Turn repurposed 3D engineering data into detailed technical illustrations with ease.
Experience streamlined technical illustration with professional design and documentation features. Find your frequently used tools concentrated where they matter most—at your fingertips—in a significantly more stable product.
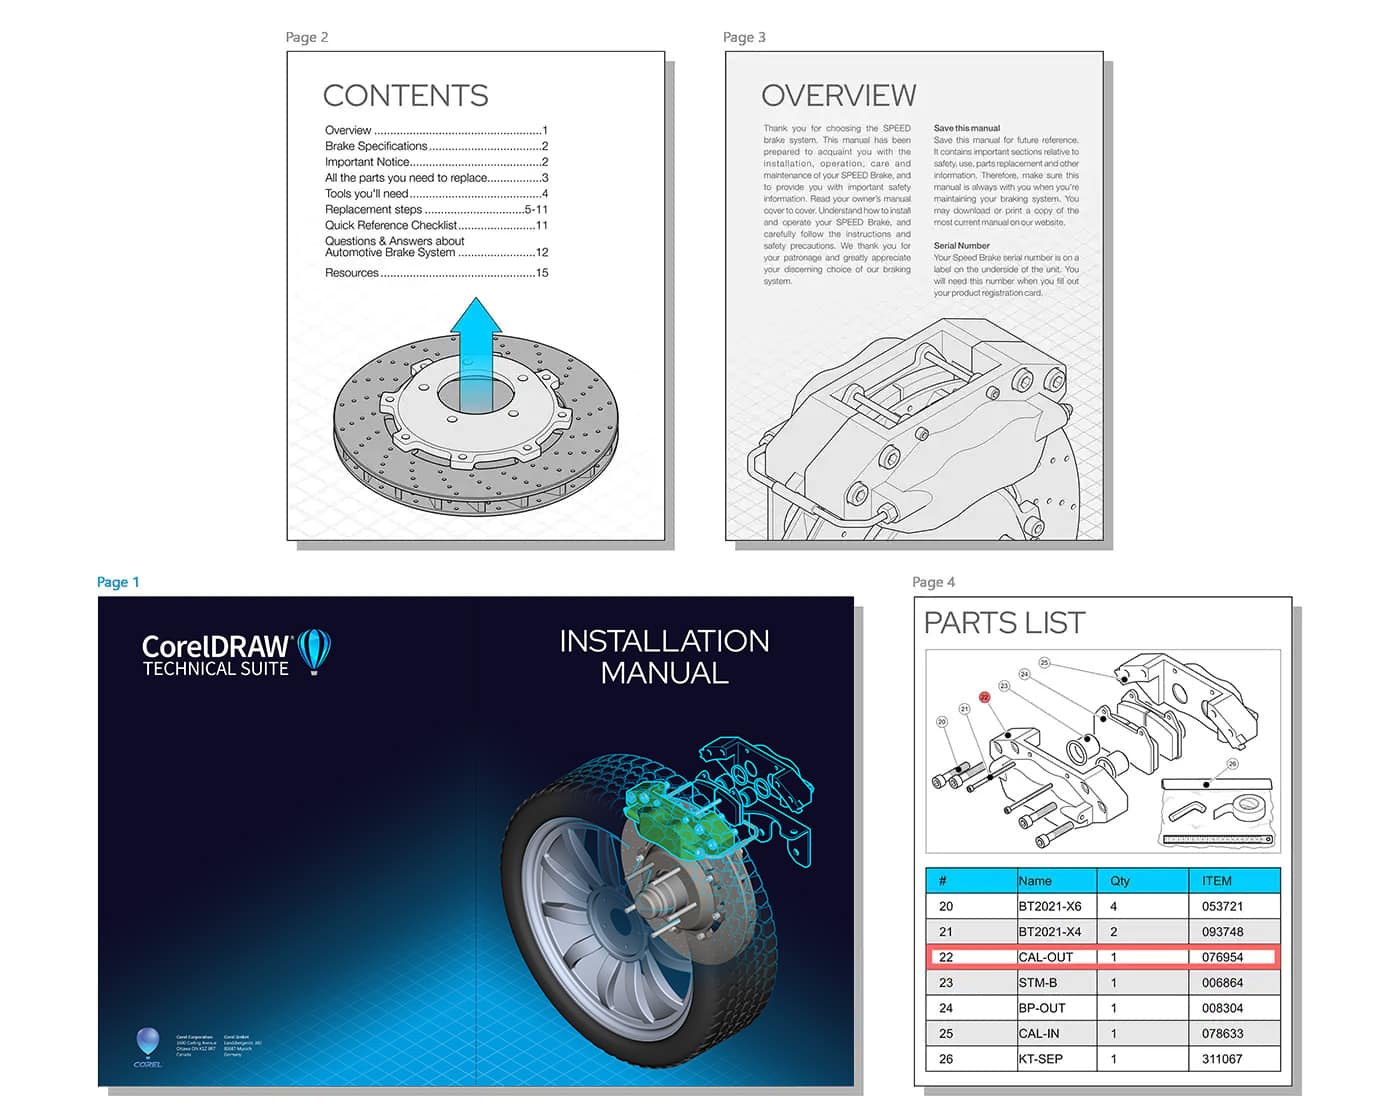
Produce detailed spare parts pages with complete control, thanks to a series of noteworthy features purpose-built to power discrete manufacturing workflows.
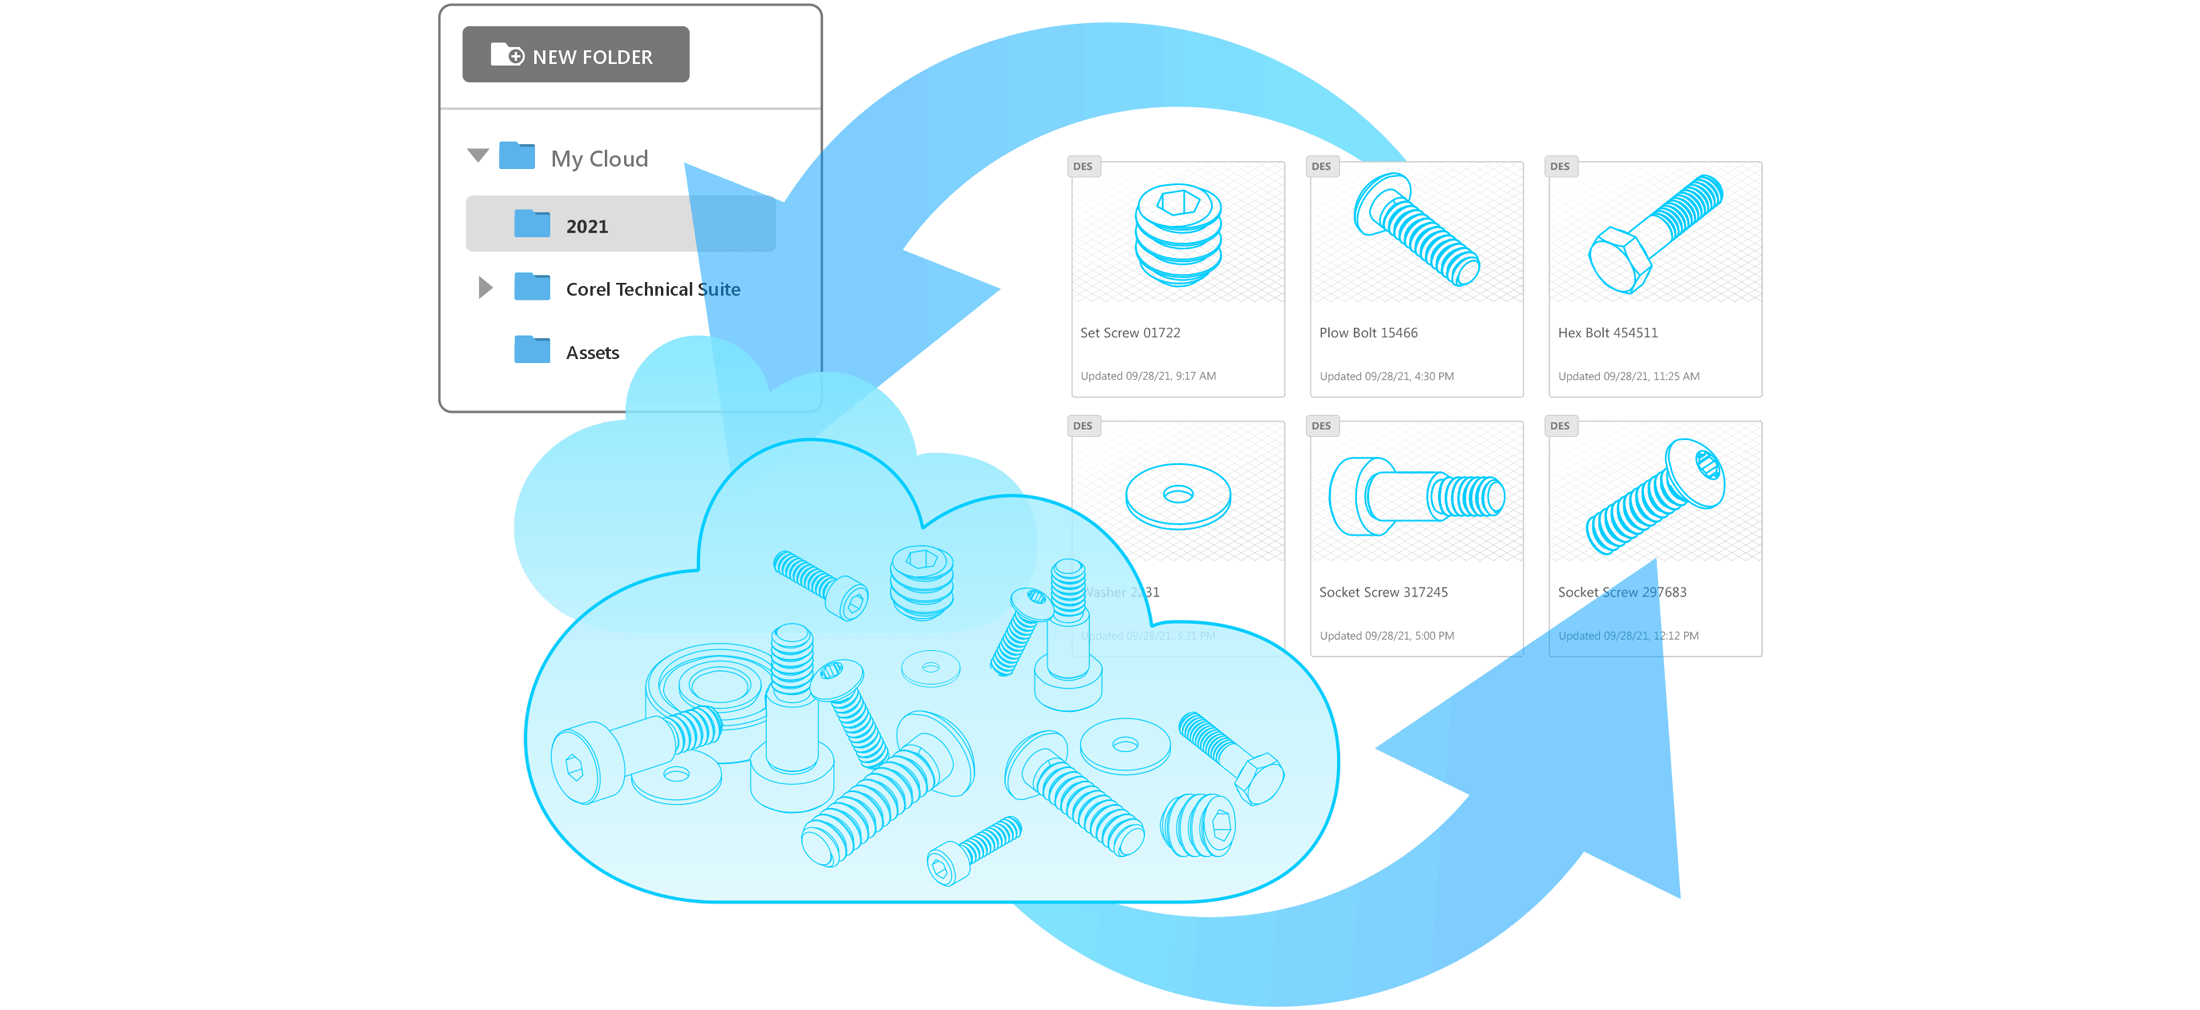
Ensure you’re always working with the most current symbols, thanks to an impressive new asset management workflow. Create a single source of truth for design assets by sharing symbols across projects and syncing updates when changes are made by you.
This fully loaded suite of dedicated applications extends the reach of visual communications.
Remove backgrounds instantly with one-click AI precision, delivering clean, ready-to-use results around detailed contours and technical elements.
Quickly create supporting visuals from a text prompt, reference image, or technical drawing, and refine existing images with simple text commands.
Add creative touches in 1, 2 or 3-point perspective, in Corel DESIGNER and CorelDRAW, using the Draw in Perspective feature.
View, manage, and edit all your project’s digital assets in one flexible design space.
From aerospace and automotive to engineering, architecture and high tech, we’ve got you covered with timesaving illustration features and game-changing tools to help reach new levels of productivity.
Step up to advanced 3D CAD with CorelDRAW Technical Suite 3D CAD
If your projects demand advanced 3D CAD visualization and authoring, choose CorelDRAW Technical Suite 3D CAD. This edition goes beyond the core 3D tools in CorelDRAW Technical Suite, supporting a wide range of CAD formats and transforming complex 3D assemblies into precise illustrations, animations, and technical outputs.
CorelDRAW Technical Suite version comparison
See what’s new in CorelDRAW Technical Suite compared to previous versions, and how the feature set compares to CorelDRAW Graphics Suite.
- limited functionality
CorelDRAW Technical SuiteXVL Studio Corel Edition |
CorelDRAW Technical Suite 3D CADXVL Studio 3D CAD Corel Edition |
|
|---|---|---|
Features |
||
| Improved vector fill accuracy for 3D-to-2D workflows | ||
| Updated! 3D CAD import support | ||
| Open and import 3D files from 3DStudio (3DS), U3D (Adobe PDF) and VRML | ||
| DXF and DWG file support | ||
| IGES file format support | Advanced! |
|
| Open/import 3D PDF files for editing | ||
| Open and import native 3D CAD files (including CATIA, PTC Creo, NX, Inventor, SOLIDWORKS and other formats) | ||
| STEP, Parasolid, JT support | ||
| Save 3D views and component positions as snapshots | ||
| Cross sections | ||
| 3D animation tools | ||
| Advanced process animation capabilities to generate step-by-step instructions | ||
| Enhanced Assembly evaluation tools | ||
| 3D measurement tools | ||
| Enhanced Automated update functionality for modified 3D CAD source files | ||
| Enhanced Vector illustration output with direct connection to Corel DESIGNER™ for technical illustration | Advanced! |
|
| Thick/thin line output in vector illustration (Advanced includes customizable settings) | Advanced! |
|
| Enhanced Combined vector illustration and shaded view (bitmap rendering) output | ||
| Enhanced Output multiple snapshots as vector illustrations at once | ||
| Vector illustration output with direct connection to CorelDRAW for creative design | ||
| Shaded view (bitmap rendering) output with direct connection to Corel PHOTO-PAINT™ for photo editing | ||
| S1000D color palette in XVL Studio | ||
| S1000D illustration output preset | ||
| 3D output (IGES, U3D, VRML and more) | ||
| 3D PDF output, including animations | ||
| Enhanced 3D visualization tools add-on options with CorelDRAW Technical Suite 3D CAD: | * |
|
| Advanced 3D PDF output options with the “Process PDF Template” option for CorelDRAW Technical Suite 3D CAD | OPTIONAL* | |
| “Electrical Routing” option to add accurate electrical routing (including wires, cables, harnesses and connectors) in 3D | OPTIONAL* | |
CAD system / 3D model file formats supported |
||
| 3D XML (.3dxml) |
V5-6R2023 - V5-6R2025 |
|
| Autodesk Inventor (.ipt, .iam) |
2025, 2026 |
|
| CATIA Graphical Representation (.cgr) |
V5-6R2023 - V5-6R2025 |
|
| CATIA V4 (.model, .session, .dlv, .exp) |
4.2.5 |
|
| CATIA V5 (.CATProduct, .CATPart) |
V5-6R2023 - V5-6R2025 |
|
| Creo Parametric (.asm, .neu, .prt, .xas, .xpr) |
11.0, 12.4 |
|
| Industry Foundation Classes (.ifc) |
IFC2x Editions 2, 3, 4 |
|
| JT (.jt) |
6.4 - 10.9 |
|
| NX I-deas (.mf1, .arc, .unv, .pkg) |
NX I-deas 6 |
|
| NX, Siemens PLM Solutions (.prt) |
NX2412, NX2506 |
|
| Parasolid (.x_t, .x_b) |
Up to v38 |
|
| PRC (.prc) |
All versions |
|
| Solid Edge (.asm, .par, .pwd, .psm) |
2024, 2025 |
|
| SOLIDWORKS (.sldasm, .sldprt) |
2024, 2025 |
|
| STEP (.stp, .step) |
AP 203 E1/E2, AP 214, AP242 |
|
| 3D Studio Scene, 3DS (.3ds) |
Polygon models only |
Polygon models only |
| AutoCAD DWG (.dwg) |
Polygon models only |
Up to AutoCAD 2026 |
| DXF (.dxf) |
Polygon models only |
Polygon models only |
| OBJ (.obj) | ||
| Stereolithography file (.stl) | ||
| Universal 3D (.u3d) |
ECMA-363 (1st, 2nd & 3rd editions) |
ECMA-363 (1st, 2nd & 3rd editions) |
| Virtual Reality Model language, VRML2 (.wrl) | ||
| IGES (.igs, .iges) |
5.1, 5.2, 5.3 |
5.1, 5.2, 5.3 |
* XVL Studio add-on options can be licensed separately to access additional functionality within CorelDRAW Technical Suite 3D CAD. For more information, please contact a Corel Sales representative.
* XVL Studio add-on options can be licensed separately to access additional functionality within CorelDRAW Technical Suite 3D CAD. For more information, please contact a Corel Sales representative.
Features |
CorelDRAW Technical Suite |
CorelDRAW Graphics Suite |
|---|---|---|
Create technical illustrations with precision |
||
| AI Generate | ||
| Focus Mode | ||
| Variable Outline tool | ||
| Scaling tool | ||
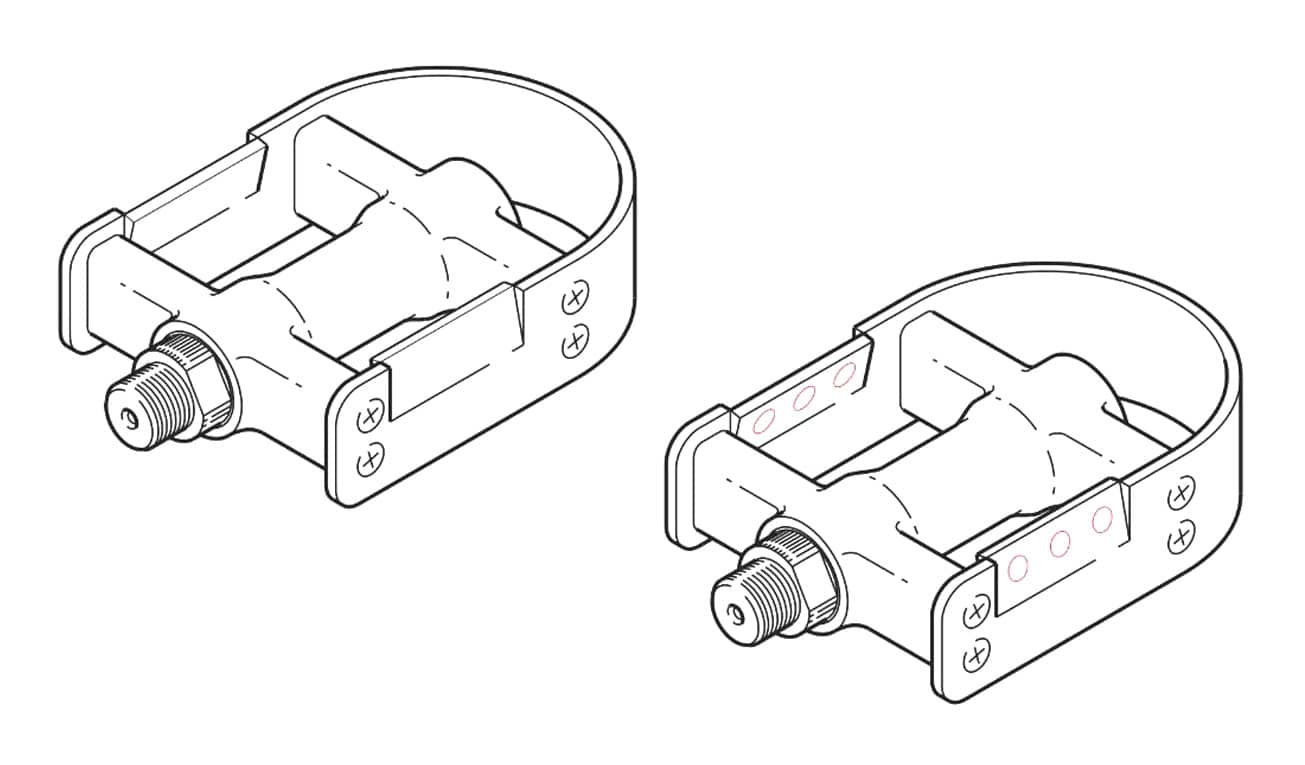
| Create interactive spare parts pages | ||
| Thread and well shapes without borders | ||
| Projection bookmarks | ||
| Draw in Perspective | ||
| Add Perspective effect | ||
| Projected drawing tools | ||
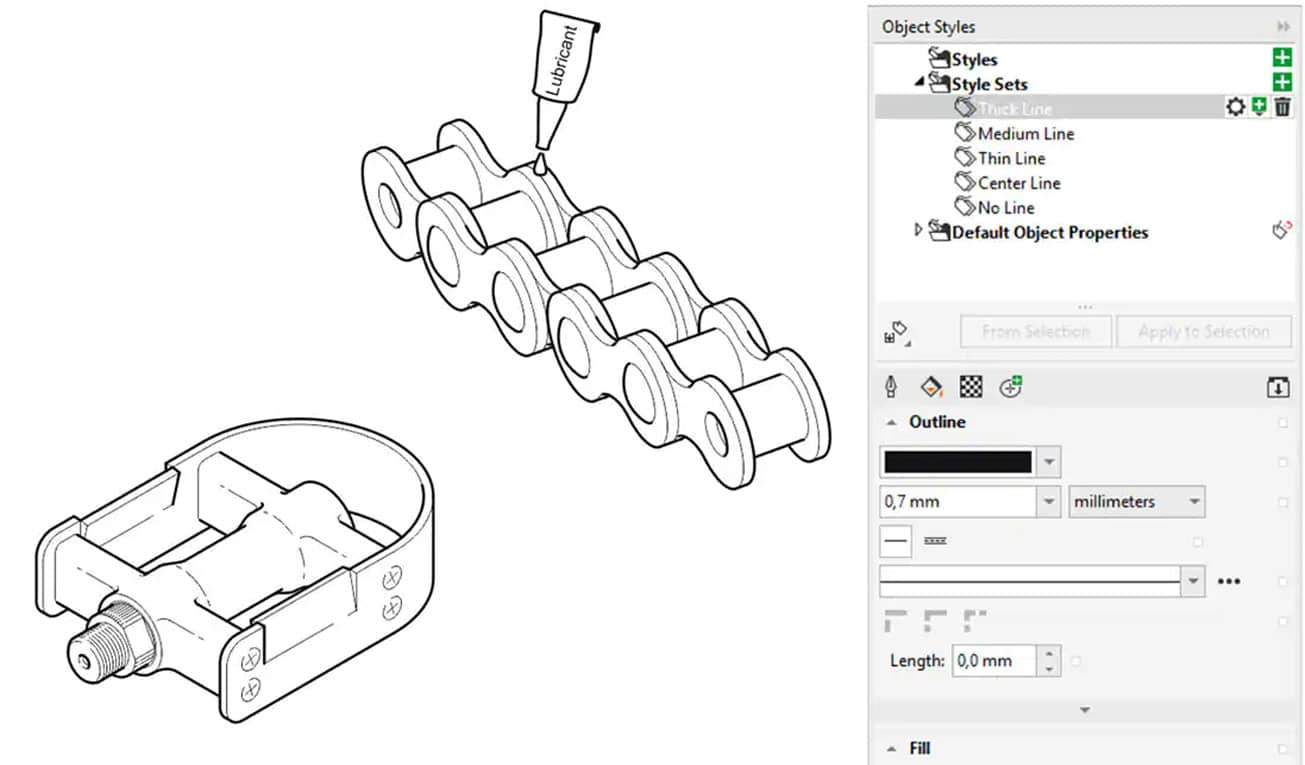
| Thick and Thin Lines | ||
| Wrap tool | ||
| Callout tools | Advanced! |
|
| Legless Callouts | ||
| Hotspot capabilities | ||
| Automatic Hotspots | ||
| Halos on curves | ||
| Technical illustrations from 3D | ||
| Marketing graphics from 3D | ||
| Non-destructive bitmap effects | ||
| Transform docker | ||
| Art Style effects | ||
| Technical illustration line style sets | ||
| Objects docker | ||
| Insert 3D model | ||
| Pixel-perfect workflow | ||
| Projected dimensions | ||
| Projected Arrowheads | ||
| Live guides and alignment tools | Advanced! |
|
| Boundary tools | ||
| Parallel line drawing tool | ||
| Hatch fills | ||
| Equation Editor | ||
| Connector line tools | Advanced! |
|
| Drawing scale control | ||
| Geometric information dialog box | ||
| Symmetry drawing mode | ||
| LiveSketch drawing tool | ||
| Apply envelopes to bitmaps | ||
| Tables | ||
| QR Code generator | ||
Image editing |
||
| AI-powered background removal | ||
| Mask images with AI in Corel PHOTO-PAINT | ||
| Image Adjustments Docker | ||
| Replace Colors | ||
| Smart Selection Mask | ||
| AI-powered upsampling | ||
| JPEG artifact removal | ||
| Non-destructive bitmap effects in Corel PHOTO-PAINT | ||
| Straighten photos and adjust photo perspective interactively | ||
| High-quality renderings from 3D projects | ||
| Smart Carver™ | ||
| Tone curve adjustments | ||
| Image Adjustment Lab | ||
Maintain style consistency |
||
| Corel Font Manager | ||
| Font list box | ||
| Variable Fonts support | ||
| Numbered lists & Bulleted lists | ||
| Object Styles and Style Sets | ||
| Color Harmonies | ||
| Color management and support | ||
| Advanced OpenType support | ||
| Master Layers | ||
Access and repurpose technical design assets |
||
| Find and Replace docker | ||
| Compatibility with latest file formats | Enhanced! |
Enhanced! |
| 3D CAD import support in XVL Studio 3D CAD Corel Edition | Updated! |
|
| AutoCAD .DWG / .DXF support | Advanced! |
|
| OPTIONAL (Add-on): Native 3D CAD support | ||
| RAW camera support | ||
| Vectorization of scanned blueprints (PowerTRACE leveraging AI) | ||
| Micrografx Designer support (DSF, DRW, DS4) | ||
| 3D import | ||
Publish to technical communication standards |
||
| Project Dashboard | ||
| Multi-asset export | ||
| Comments docker | ||
| PDF output | ||
| Print to PDF | ||
| 3D PDF Publishing | ||
| Publish to WordPress | ||
| Translation Memory System (TMS) support | ||
| CGM V4 (WebCGM, ATA Grexchange, ActiveCGM) | ||
| WebCGM 2.0, 2.1 + S1000D support | Enhanced! |
|
| Interactive SVG output | ||
| Publish 3D online and to mobile devices | ||
User interface |
||
| CorelDRAW Web | ||
| Technical Illustration workspace | ||
| Diagramming workspace | ||
| Support for UltraHD display | ||
| Fully scalable and customizable UI | ||
| Touch-friendly user interface | ||
Content |
||
| Symbol libraries | ||
| Professional clipart* | ||
| High-quality photos* | ||
| Specialized fonts* | ||
| Design templates* | ||
*In order to access this collection of tools, you need to be connected to the internet. Purchase and authentication of CorelDRAW Technical Suite or CorelDRAW Graphics Suite are required.
Corel, CorelDRAW, the CorelDRAW balloon logo, Corel PHOTO-PAINT, LiveSketch, SmartCarver, PhotoCocktail, Pointillizer, and PowerTRACE are trademarks or registered trademarks of Corel Corporation in Canada, the US, and elsewhere. All other company, product and service names, logos, brands and any registered or unregistered trademarks mentioned are used for identification purposes only and remain the exclusive property of their respective owners. Use of any brands, names, logos or any other information, imagery or materials pertaining to a third party does not imply endorsement. We disclaim any proprietary interest in such third-party information, imagery, materials, marks and names of others. For all notices and information about patents please visit www.corel.com/patents
©️2026 Corel Corporation. 03/26
*In order to access this collection of tools, you need to be connected to the internet. Purchase and authentication of CorelDRAW Technical Suite or CorelDRAW Graphics Suite are required.
©️2026 Corel Corporation. 03/26
Features |
Subscription or license with maintenance |
2020 |
2019 |
2018 |
2017 |
|---|---|---|---|---|---|
What’s new in 2026 |
|||||
| S1000D SVG 6.0 profile support | |||||
| CGM export | Enhanced! |
||||
| AI Generate | (+2,000 monthly credits) |
||||
| AI-powered background removal | |||||
| Mask images with AI in Corel PHOTO-PAINT | |||||
| App launch performance (around 3x as fast or faster) | Enhanced! |
||||
| Stability improvements | Enhanced! |
||||
| Refreshed interface | |||||
| Updated 3D CAD import in XVL Studio 3D CAD Corel Edition | Enhanced! |
||||
| Improved vector fill accuracy for 3D-to-2D in XVL Studio 3D CAD Corel Edition | Enhanced! |
||||
Create technical illustrations with precision |
|||||
| Focus Mode | |||||
| Variable Outline tool | |||||
| Scaling tool | |||||
| Create interactive spare parts pages | |||||
| Multipage view | |||||
| Projected drawing tools | Enhanced! |
||||
| Thick and Thin Lines | |||||
| Projection bookmarks | |||||
| Move objects with the Projected Axes docker | |||||
| Wrap tool | |||||
| Callout tools | Enhanced! |
||||
| Legless Callouts | |||||
| Hotspot capabilities | Enhanced! |
||||
| Automatic Hotspots | |||||
| Halos on curves | Enhanced! |
||||
| Technical illustrations from 3D | Enhanced! |
||||
| Marketing graphics from 3D | Enhanced! |
||||
| Non-destructive bitmap effects | Enhanced! |
||||
| Transform docker | Enhanced! |
||||
| Thread and well shapes without borders | |||||
| Line style sets | |||||
| Objects docker | (‘Object Manager’) |
(‘Object Manager’) |
|||
| Insert 3D model | |||||
| Pixel-perfect workflow | |||||
| Projected dimensions | |||||
| Projected Arrowheads | |||||
| Live guides and alignment tools | Enhanced! |
||||
| Boundary tools | |||||
| Parallel line drawing tool | |||||
| Hatch fills | |||||
| Equation Editor | |||||
| Connector line tools | |||||
| Geometric information dialog box | |||||
| Draw in Perspective | |||||
| Symmetry drawing mode | |||||
| LiveSketch™ drawing tool | |||||
| Add Perspective effect | |||||
| Apply envelopes to bitmaps | |||||
| Align and distribute nodes | |||||
| Tables | Enhanced! |
||||
| QR Code generator | |||||
Image editing |
|||||
| Image Adjustments docker | |||||
| Smart Selection Mask | |||||
| Replace colors | |||||
| AI-powered upsampling | |||||
| JPEG artifact removal | |||||
| Non-destructive effects in Corel PHOTO-PAINT | |||||
| Straighten photos and adjust photo perspective interactively | |||||
| High-quality renderings from 3D | |||||
| Tone curve adjustments | |||||
| Image Adjustment Lab | |||||
Maintain style and consistency |
|||||
| Corel Font Manager | Enhanced! |
||||
| Access to Google Fonts online | |||||
| Export or import font collections | |||||
| Variable Fonts support | |||||
| Numbered lists | |||||
| Bulleted lists | Enhanced! |
||||
| Object Styles and Style Sets | Enhanced! |
||||
| Paste in View | |||||
| Pages docker | |||||
| Autofit Page | |||||
| Color Harmonies | |||||
| Color management and support | |||||
| Advanced OpenType support | |||||
| Master Layers | |||||
Access and repurpose technical design assets |
|||||
| CorelDRAW Web | |||||
| Find and Replace docker | Enhanced! |
||||
| Compatibility with latest file formats | Updated! |
||||
| AutoCAD .DWG / .DXF support | |||||
| OPTIONAL (Add-on): Native 3D CAD support | Updated! |
||||
| RAW camera support | |||||
| Vectorization of scanned blueprints (PowerTRACE™ leveraging AI) | Enhanced! |
||||
| Micrografx Designer support (DSF, DRW, DS4) | |||||
| 3D import | |||||
Publish to technical communication standards |
|||||
| Comments docker | Enhanced! |
||||
| PDF output | Enhanced! |
||||
| 3D PDF Publishing | Enhanced! |
||||
| Print to PDF | |||||
| Publish to WordPress | |||||
| Translation Memory System (TMS) support | |||||
| CGM V4 (WebCGM, ATA Grexchange, ActiveCGM) | Enhanced! |
||||
| WebCGM 2.0, 2.1 + S1000D support | (S1000D Issue 6.0) |
(S1000D Issue 5.0) |
(S1000D Issue 4.2) |
(S1000D Issue 4.2) |
(Up to S1000D Issue 4.1) |
| Interactive SVG output | |||||
| Multi-asset export | |||||
| Publish 3D online and to mobile devices | |||||
| Save files to the Cloud | |||||
User interface |
|||||
| Technical Illustration workspace | |||||
| Diagramming workspace | |||||
| Support for UltraHD display | |||||
| Fully scalable and customizable UI | |||||
| Touch-friendly user interface | |||||
Performance, speed and efficiency |
|||||
| Performance | Enhanced! |
||||
| GPU accelerated vector preview | Enhanced! |
||||
| GPU-accelerated display performance, including Pan and Zoom | |||||
| Optimized for Windows 10 | (v1903 - 21H1) |
(v1803 - v2004) |
(v1607 - v1809) |
(Up to v1709) |
|
| Support for Windows 11 | |||||
| Automation capabilities | Enhanced!(VSTA 2024 & VBA 7.1; JavaScript) |
(VSTA 2019 & VBA 7.1; JavaScript) |
(VSTA 2017 & VBA 7.1; JavaScript) |
(VSTA 2017 & VBA 7.1) |
(VSTA 2015 & VBA 7.1) |
Content |
|||||
| Symbols (referenced graphics objects) | Enhanced! |
||||
| Professional clipart* | |||||
| High-quality photos* | |||||
| Specialized fonts* | Enhanced! |
||||
| Design templates* | Enhanced! |
||||
| Painterly brushes* | |||||
*In order to access this collection of tools, you need to be connected to the internet. Purchase and authentication of CorelDRAW Technical Suite or CorelDRAW Graphics Suite are required.
Corel, CorelDRAW, the CorelDRAW balloon logo, Corel PHOTO-PAINT, LiveSketch, SmartCarver, PhotoCocktail, Pointillizer, and PowerTRACE are trademarks or registered trademarks of Corel Corporation in Canada, the US, and elsewhere. All other company, product and service names, logos, brands and any registered or unregistered trademarks mentioned are used for identification purposes only and remain the exclusive property of their respective owners. Use of any brands, names, logos or any other information, imagery or materials pertaining to a third party does not imply endorsement. We disclaim any proprietary interest in such third-party information, imagery, materials, marks and names of others. For all notices and information about patents please visit www.corel.com/patents
©️2026 Corel Corporation. 03/26
*In order to access this collection of tools, you need to be connected to the internet. Purchase and authentication of CorelDRAW Technical Suite or CorelDRAW Graphics Suite are required.
©️2026 Corel Corporation. 03/26
CorelDRAW Technical Suite is the ultimate powerhouse for professional visual communication and a hub for all graphic input and output. It includes a wealth of dedicated tools for 3D repurposing, technical and creative illustration, page layout, image editing, font management, collaborative review and approval, and so much more.
CorelDRAW Technical Suite offers technical communication professionals and technical graphics users everything they need to create expert technical illustration and design projects all-in-one suite:
*For advanced 3D repurposing, XVL Studio 3D CAD Corel Edition is available with the CorelDRAW Technical Suite 3D CAD product edition.
Learn moreCorelDRAW Graphics Suite is a complete suite of professional graphic design software, including superior vector illustration and page layout applications, advanced photo-editing capabilities, and more.
CorelDRAW Technical Suite combines the graphic design power that's already included in the graphics suite with two additional dedicated applications for professional technical design and documentation.
Corel DESIGNER is a technical illustration application that is used to create detailed technical documentation with exact specifications. XVL Studio Corel Edition enables you to add context to your technical projects by using 3D views and models in your illustrations.
Learn moreYes. CorelDRAW Technical Suite offers generative AI features that help you create visuals more efficiently. With AI Generate, you can produce images from short text prompts, begin with a reference file, or develop visuals from a simple sketch. You can also refine existing graphics by removing elements, changing colors, replacing objects, or generating alternative versions to support your technical documentation or illustration work.
CorelDRAW Technical Suite also has other intelligent features, such as AI-powered background removal, object selection, and clip mask tools, making it easy to isolate machinery, components, and other elements for clear, precise visuals.
Learn more about AI features available in CorelDRAW here.
AI credits are the units used to run prompt-based image generation tasks inside CorelDRAW Technical Suite. Credits are used when you create a new image or make prompt-driven adjustments to existing artwork. They are linked to your Corel Account and can be used across all CorelDRAW products that include generative AI capabilities, including CorelDRAW Graphics Suite, CorelDRAW Go, and CorelDRAW Technical Suite.
Subscriptions and maintenance plans receive a monthly credit allocation, while perpetual licenses come with a fixed, non-expiring balance.
Find more information about AI credits here.
CorelDRAW Technical Suite is designed to create precise technical illustrations and documentation. It includes Corel DESIGNER, CorelDRAW, PHOTO‑PAINT, and basic 3D support via XVL Studio Corel Edition, which allows you to import and visualize standard 3D file formats.
CorelDRAW Technical Suite 3D CAD includes all the features of the standard suite but adds advanced 3D CAD authoring through XVL Studio 3D CAD Corel Edition. This version supports native CAD formats (like SOLIDWORKS, CATIA, and STEP), offers detailed 3D visualization, measurement, animation tools, and enables the creation of interactive 3D PDFs for complex engineering workflows.
Yes, you can purchase CorelDRAW Technical Suite without a subscription.
Purchase a CorelDRAW Technical Suite License with Maintenance: Maintenance is a low-cost annual payment plan attached to your perpetual license purchase that ensures you are eligible for the most up-to-date version of CorelDRAW Technical Suite. As long as you keep your maintenance active, you’re guaranteed access to the latest software, exclusive features, content, and more, at no additional cost. Unlike a subscription, if you choose to discontinue your maintenance, you still get to keep the last version of the software that you received, forever.
Learn more about purchasing options.
Yes, CorelDRAW Technical Suite can open DWG files, in addition to many other file formats. DWG file extension represents a binary file format used for CAD (Computer Aided Design) drawings.
Yes, many architects rely on CorelDRAW to bring their plans to life. Architects can create precise blueprints and technical drawings that meet exact specifications with our professional software for technical design and drafting. Learn more about CorelDRAW for planning and architecture .
AutoCAD is a CAD software developed specifically for architects, engineers, and construction professionals. It is widely used to create precise 2D and 3D models of buildings, machinery, and other objects. AutoCAD provides a complex set of tools for drafting, modeling, and documentation.
CorelDRAW Technical Suite is a comprehensive collection of applications for technical communication professionals and technical graphics users. It provides seamless technical illustration and design workflows from opening 2D and 3D source files, photos, documents and data, to producing, collaborating on, and publishing technical communications. CorelDRAW Technical Suite is widely used in discrete manufacturing, automotive, aerospace, high tech, telecommunications, AEC, and apparel industries, for creating parts illustrations, maps, schematics, blueprints, technical documentation, and much more.
When comparing CorelDRAW Technical Suite to CAD applications like AutoCAD, it’s important to note that CorelDRAW Technical Suite includes an additional set of tools to close gaps in technical drawing and design workflows, such as photo editing, layout, and creative design applications, making it the most comprehensive solution for visual information processing. It supports an extensive list of file formats on import and export, including DWG and DXF for collaboration with CAD apps, and it delivers all the power and precision of a dedicated CAD software, without the complex CAD experience.