
How To Make an Infographic
The term “infographic” covers a wide swath within design and presentation. For whatever information or message you’re trying to convey, the idea behind an infographic is to present the material in a way that catches the eye, grabs attention, and explains clearly.
CorelDRAW makes it easy to create graphical elements that “pop,” and get your message across with text, callouts, arrows, and connectors. Deciding how to combine the many tools and features is up to you.
In this how-to, we’ll create a simple infographic that uses just a few of these features.
1. Create the Basic Shapes
From (File > New) under Name: type Infographic. For Preset destination, select Default RGB, which gives us a letter-size page to work with.
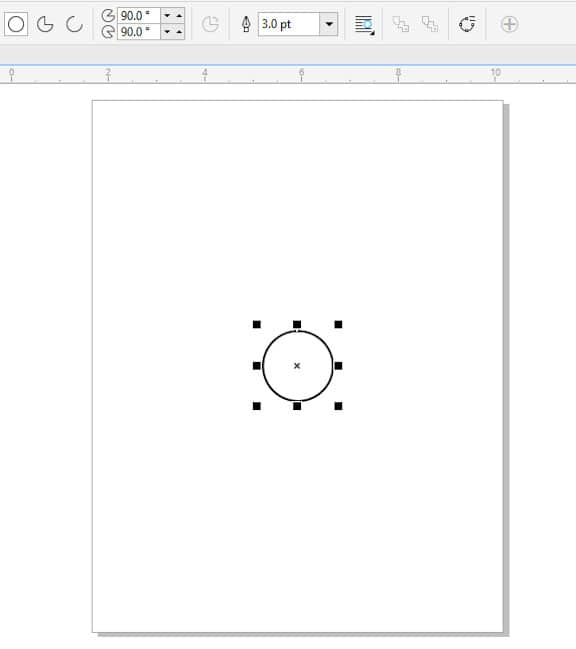
Our infographic will consist of four basic shapes. We’ll start with the Ellipse tool (F7). Before drawing anything, change the line weight to 3 pt. This will set this property for all future graphic elements. Click and drag while pressing the Ctrl key, to create a circle in the middle of the page.
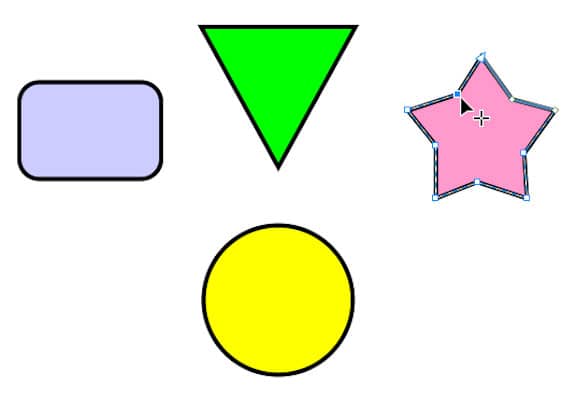
Add a few more shapes, using other drawings tools. In this example, a rectangle was created with the Rectangle tool (F6), and a triangle and pentagon with the Polygontool (Y). To fill in each shape, select it with the Pick tool and left-click a color swatch.
Shape modification can be done with the Shape tool (F10). This tool can round the edges of a rectangle by dragging a corner inward. And this tool can make a pentagon into a star by dragging inward the midpoint of any edge.
2. Add Graphic Elements
In this example, each shape is to contain a simple, black-line graphic element. CorelCONNECT is a great place to find and bring in objects, and you can also find symbols in the Insert Character docker (Ctrl + F11).
In this example, the CorelCONNECT objects, such as the light bulb, came in with background rectangles. These can be deleted by using the Pick tool with the Ctrl key to select the rectangle, then pressing the Delete key. For any elements that have holes to erase, select the object and press Ctrl + U to ungroup, Ctrl + L to combine, then Ctrl + G to regroup.
For each shape, select it plus the graphic element inside it, and press Ctrl + G to group.

3. Add Connectors
There are several types of connector lines we can use, but for this example, select the Right-Angle Connector tool. The connector nodes for each symbol are highlighted, and all you have to do is click and drag from a start point to an end point. You can also set an arrowhead to appear at once side of the connector.
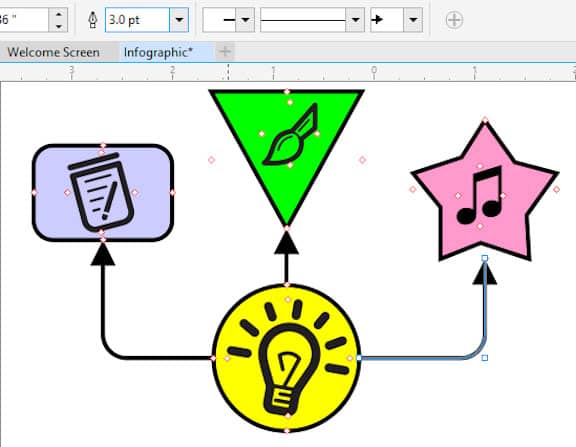
Connectors can be edited with the Shape tool - you can change the start end locations, add nodes, etc. And if you move one of the shape groups, the connector will follow.

4. Add Text
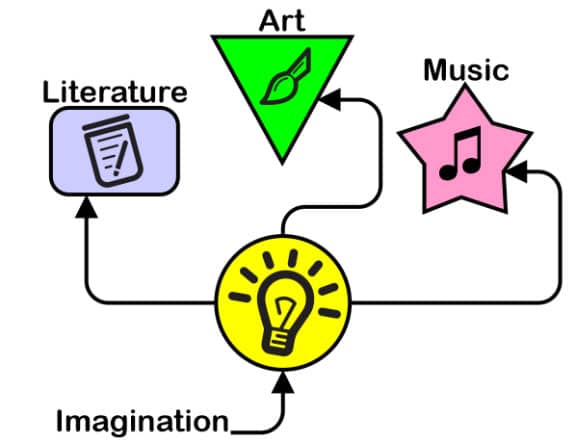
Select the Text tool (F8) and set the font and size you want. This will become the default for all artistic text.
Text can be left as it, fitted to a curve, or attached to a shape using a connector.
CorelDRAW does more than just create infographics
Check out some of the other graphic design features in CorelDRAW Graphics Suite, like How To Make A Card, How To Make A Wedding Program, How To Make A Restaurant Menu, and more! Create high quality designs in a fun and easy to use graphic design software and make your work stand out more than ever.
 How To Design A Car Wrap
 How To Design A Car Magnet
 How To Make Bumper Stickers
 How To Make Car Decals