
How To Add a Vignette Effect
The Vignette effect has been around as long as photography. Originally it was used to hide objects and bring focus to the subject. These days it can be used to hide objects but is also used to enhance the image as well.
For this guide we’ll be using CorelPHOTO-PAINT, included in CorelDRAW Graphics Suite
1. Open the Image
There are a couple of ways to open the image. From the Welcome Screen, select Get Started and then click on the button to Open Document, alternatively, from File > Open.

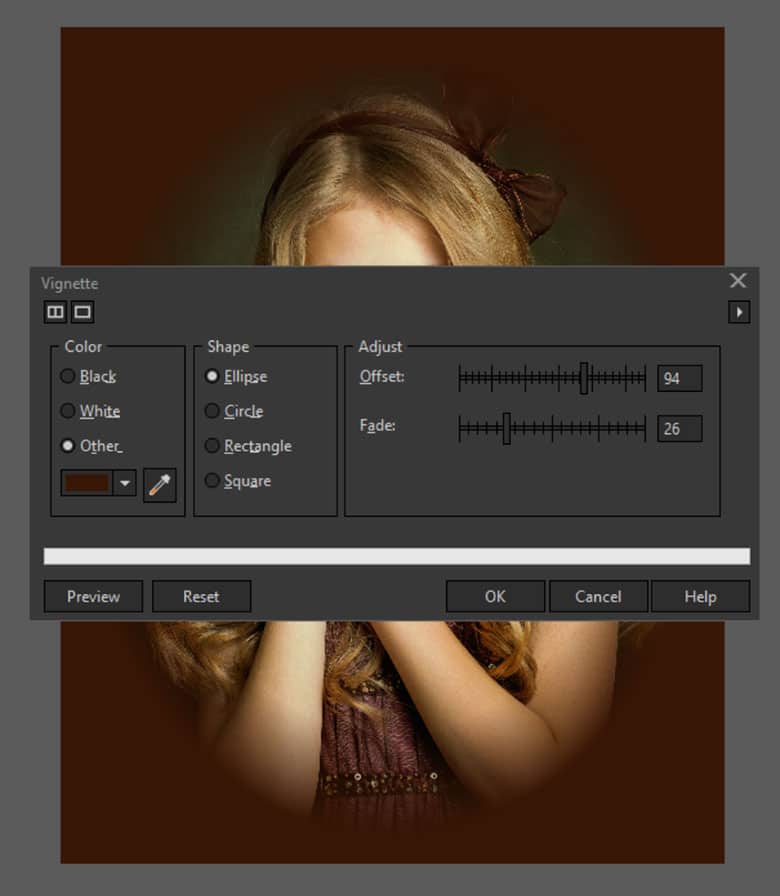
2. Adding the Vignette
This is done by going Effects > Creative > Vignette. In the Vignette dialog, Start by selecting Other under Color and use the eyedropper tool to pick up the color of brown in the hair ribbon. For Shape, select Ellipse. With the adjustment sliders there is the option to change the Offset and the Fade. Play with these until you get the desired effect, then click OK.
3. Next Steps
Now that you have applied the effect, you can save the file out or continuing to edit your image in other ways

CorelDRAW Graphics Suite does more than just allow you to add
a vignette to your photos
Check out some of the other graphic design features in CorelDRAW Graphics Suite, like How To Make Vintage Photos, How To Correct Image Perspective, How To Correct Perspective Distortion, and more! Create high quality designs in a fun and easy to use graphic design software and make your work stand out more than ever.
 How To Use Layers
 How To Clone an Image
 How To Create A Transparent Image Gradient
 How To Bulk Edit Images