BLACK FRIDAY! Up to 30% off. See offers
We’ve all been there. You take what feels like it could have been the perfect photo, but when you go to share it, it isn’t quite what you thought.
The lighting is off.
The colors look dull.
And now you’re wondering if it’d maybe look better in black and white.
Don’t worry, you’re not going crazy. No one just takes the perfect Instagram shot on the first try. Editing is as much a part of photography as the photos themselves. And you don’t need to be a pro to be a great photo editor.
Photo editing skills are a must for anyone who wants to make their latest snap tell a story, pop off the screen, or reflect a feeling. Maybe you want your photos to draw more attention on social media, or there’s a specific chapter in a photo album you want to highlight.
All you’ll need is your curiosity and creativity, a few handy tools, and some tricks and techniques you can apply.
So let’s check off that list for you, shall we?
Want to follow along with this article and edit your own photos? Explore settings, options, and extras with a 15-day free trial of CorelDRAW Go.
This might make you hungry, but bear with me for a moment.
Imagine your photo is your next dinner. The meal you're making could stand on its own, but it also could be better with a little extra seasoning. You won't know until you try.
Photo editing is your seasoning. It’s the flavor you add on top to add to the original dish, bringing out the best flavor. And the same approach won’t work for every photo.
Let’s start your photo editing journey with the basics to guide you in choosing the right seasonings every time.
Before you start any photo editing, there are two things you should always do.
1. Back up your photos
When you’re getting ready to edit your photos, save a backup of the original files. This way, you’ll always have your starting point, so if your computer crashes, for example, and your photo auto-saves, you aren’t stuck with those edits and without a way to reverse them.
2. Calibrate your monitor
Color and brightness will vary depending on the device you use. Your operating system and photo editing software may have a function to calibrate your screen so photos look how they should.
If not, though, you can also look into a colorimeter or other tool to help with your setup, though quality ones can be on the pricey side.
No matter how you want to edit your photos or what software you use to get the job done, there are fundamental skills to learn.
Look for tutorials you can follow on YouTube, or track down courses in platforms like Skillshare™ and LinkedIn Learning to get an idea of how to work with lighting, color, and contrast. You can also find an extensive library of tutorials and downloadables in the CorelDRAW Academy.
Then, dive into your software and see for yourself. Move sliders around, test out effects, and try to mimic styles you like.
This will help you translate your rough ideas into aesthetics more easily.
Once you have an idea of how different functions affect your photos, think about how you want to use them. What types of aesthetics do you like? Is there a mood you want your images to convey?
Having this vision in mind (or on a moodboard, if you’re a visual person) will help you stay on target with your edits, even when your photos aren’t similar.
And don’t worry, if you’re not sure what the possibilities for mood and style are, we’ll cover that later.
As you experiment with your editing style, share your concepts with folks you trust and see what they think. Then, you can use their feedback to refine your style.
You’ve got the basics under your belt. Now, let’s put them to work. Here’s a look at what a photo editing process looks like:
Photos rarely end up with perfect geometry. Use cropping and straightening tools to line up your image how you want it.
Pro tip: Use the rule of thirds to keep visual interest and direct viewers’ eyes to key areas in your photo.
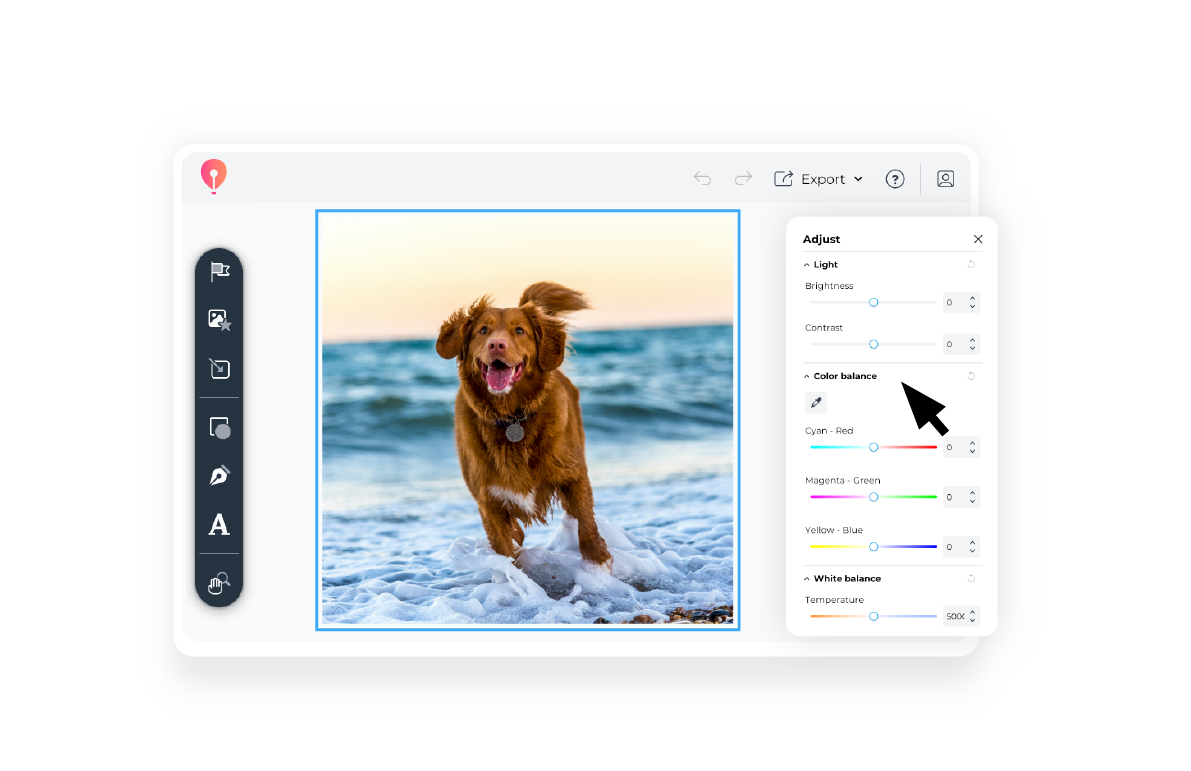
Use your photo editing software’s sliders to adjust brightness, contrast, highlights, shadows, and exposure.
You can use white balance sliders to neutralize your photo’s overall tints, correct colors that aren’t quite right, and change temperature and tone.
You can also use your saturation and vibrancy sliders to change how bold or muted your photo is.
Use sharpening tools to improve your image’s clarity, especially around important features. You can also use blurring techniques to draw attention away from less important details and direct focus to the core story of your photo.
Pro tip: Sharpening and blurring aren’t an either-or choice—you can use both techniques together for extra emphasis.
Play around with your photo editing software to see what neat effects you can apply to photos. It may have filters or presets for black-and-white photos, sepia, or color filters.
You may also be able to add fun details like vector graphics and typography to your photos.
You’ve got the basics. You know the process. And yet, there are still ways you can expand your knowledge of photo editing.
Here are a few methods you can apply to your photo editing to make it easier for yourself—and to help your photos look even better.
Earlier, you learned about framing your composition with the rule of thirds. Those basics won’t fail you—but you can also level up your framing game with features like perspective warps.
Perspective warps are typically sliders that will let you change the horizontal or vertical angle of your photo. For example, if you took a picture with a wall in it, and the wall is on a weird angle, but rotating throws everything else off, vertical perspective warp is usually the answer.
Heads up: Though you can do most of your composition in software like CorelDRAW Go, you’ll need something more heavyweight like CorelDRAW Graphics Suite to handle perspective warping.
A surprise squirrel in your park shot doesn’t have to mean a do-over. Photo editing tools often include ways for you to remove pieces of your photo without taking away from the subject.
They can even allow you to completely remove or replace backgrounds, so you can redefine your photo’s scene and mood.
Ever made an edit to a photo, just to decide you weren’t sure you liked how it looked? Got stuck in the undo-redo loop?
Layers are how pros avoid that loop. They allow you to isolate elements of your photo, so you can test out different looks. And if you need to compare, you can just toggle the layer’s visibility.
Photos aren’t one-size-fits-all, and neither are their edits
Even if you’re happy with how a certain contrast level looks in one photo, that same setting is going to look different in another photo. So remember to adjust your photos to match an overall aesthetic—don’t just match numbers on the contrast slider.
Sometimes, adjusting vibrancy and lighting isn’t enough, you want to do something special for your photo. Whether you’ve got a vintage vision or want a new way to make color work, let’s explore some special effects for you to try out
This photo effect is a popular way of making a photo appear much older than it is. It replaces the colors in your photo with a single mellow tone to mimic vintage photos.
In free or beginner software, you can often get a sepia-tone look by changing a photo to black and white to shorten the range of colors, then applying a single-color filter over the image.
More advanced photo software will usually have existing effects or filters to make this process simpler for you.
Similarly to sepia, the duotone style replaces a photo’s existing color palette—but instead of one color, it uses two, often to create a contrasting effect.
Duotone is a little more complicated to create, so it will likely require more powerful editing software.
Often confused with blurring, bokeh is a specific style of blurring a photo that mimics the effect you’d get by taking a picture with a wide and fast aperture.
It leaves your photos with an ethereal effect, filling backgrounds with bubbles of color and light.
While you can get this effect just with your camera, more advanced photo editing software like Corel PHOTO-PAINT will often include filters to apply and adjust bokeh effects on your images after the fact.
HDR, or high-dynamic range, photos typically combine multiple versions of the same shot, taken with different exposure levels, to create one vibrant image.
This method can give you impressive contrast, saturation, and sharpness.
Most cameras these days have an HDR option that can take multiple shots and combine them for you, but you can mimic the HDR effect using filters in photo editing software, too.
Need some inspiration before you dive into photo editing? Let’s look at some popular styles and how they’re used on social media.
Minimalist editing uses subtle corrections to keep your pictures looking natural. With this style, try to balance your contrast, keep neutral tones, and only use minor sharpening and blurring.
Scandinavian design company HAY uses a minimalist style to let designs speak for themselves:
This style wants to feel heavy, like a cliffhanger at the end of the show you’ve been binge-watching. With moody and dramatic photos, go for darker shadows, high contrast, and cooler tones. You can also experiment with lowering saturation for individual colors.
Germany-based photography account livingitrural showcases the moody and dramatic style well, using low lighting and soft colors:
This style wants to give its viewers a big visual hug. Try editing methods like turning up your photo’s temperature or focusing saturation on warmer tones. You could also experiment with softening focus in parts of your photo and adjusting lighting for a brighter look.
Blogger Liz Marie Galvan captures a warm and cozy style in photos that bring together an eclectic mix of textures:
Black-and-white photos depend on texture and contrast for their visual appeal. You’ll often see this style used to make photos feel timeless. When you're using this style, try experimenting with contrast levels and lighting to change what stands out in your photos.
Photographer Michael Kenna uses the black-and-white style to create stark images that put the spotlight on their subjects:
https://www.instagram.com/michaelkennaphotography/p/BA-D0gIG9QK/
Vibrant photos want to catch eyes with their boldness. They love having high saturation, sharp details, and lots of highlights. This style tends to work well for travel photos and naturally bright textures.
Photographer Senai Senna uses a vibrant approach to draw attention to the natural beauty of urban landscapes:
Photos edited to look cinematic share quite a few similarities with moody and dramatic ones: Lowered saturation, higher contrast, stronger shadows.
The key difference is that cinematic photos want to mimic the look of classic films, so they'll often experiment with grain and sharpening as well.
Photographer Jack Harding captures a cinematic style in photos like this, using a combination of blurring and grain to invoke the big screen:
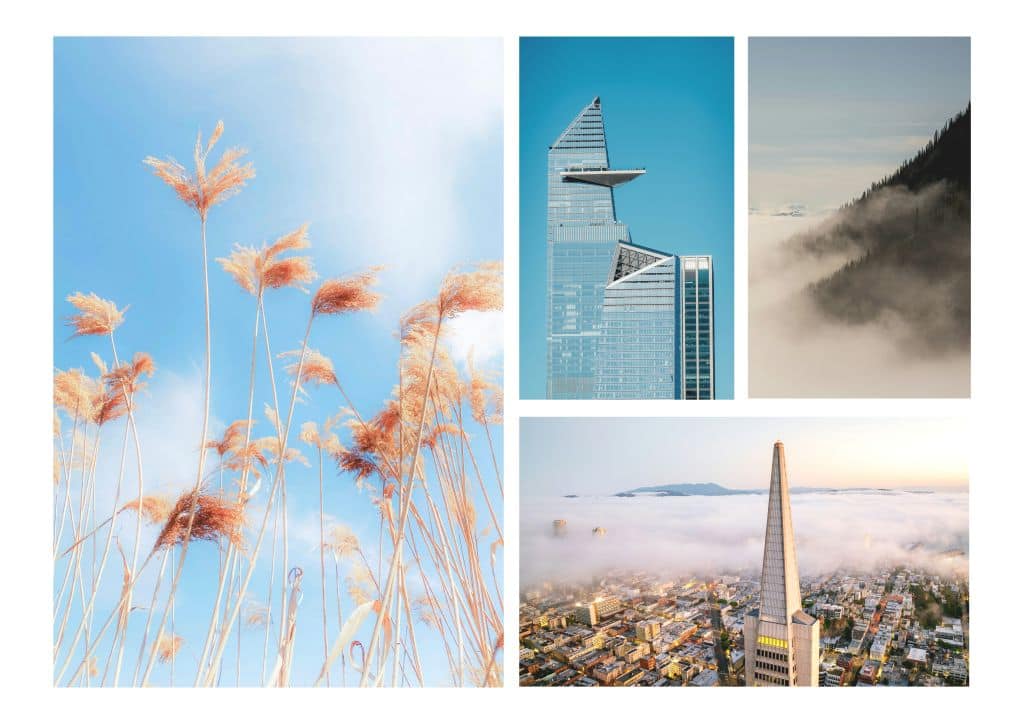
More of a photo arranging technique than a strict photo editing technique, collage photos showcase multiple images at once. This gives you flexibility on platforms like social media to tell more of a story at first glance.
Ultimately, following photo editing best practices isn’t about chasing perfection—it’s about understanding the tools, techniques, and styles available to you, and experimenting with bringing them to life. After all, the more you test out and adjust and play with settings, the more you’ll find yourself defining your style.
Ready to get started? See how you can experiment and improve your photos with CorelDRAW Go’s 15-day free trial

Erin Penney is a writer and wordsmith passionate about blending narratives and data into powerful and informative pieces. She combines her experience in journalism, publishing, and tech marketing with a love for all things creative—from graphic design to the world of gaming and beyond—to tell clear stories that inform, inspire, and engage readers.