How To Resize an Image
There are a couple of reasons why you may want to resize a photo. It could be that you want to print at a certain size, or possibly want to email it to a friend or family member. One other scenario would be if you were going to share it on social media. The smaller file size will load quicker
For this guide we’ll be using Corel PHOTO-PAINT, included in the CorelDRAW Graphics Suite
Now an important note here. You should never really increase the size of the image by any more than about 20% as this will result is compromising the quality.
1. Open the Image
There are a couple of ways to open the image. From the Welcome Screen, select Get Started and then click on the button to Open Document, alternatively, from File > Open.
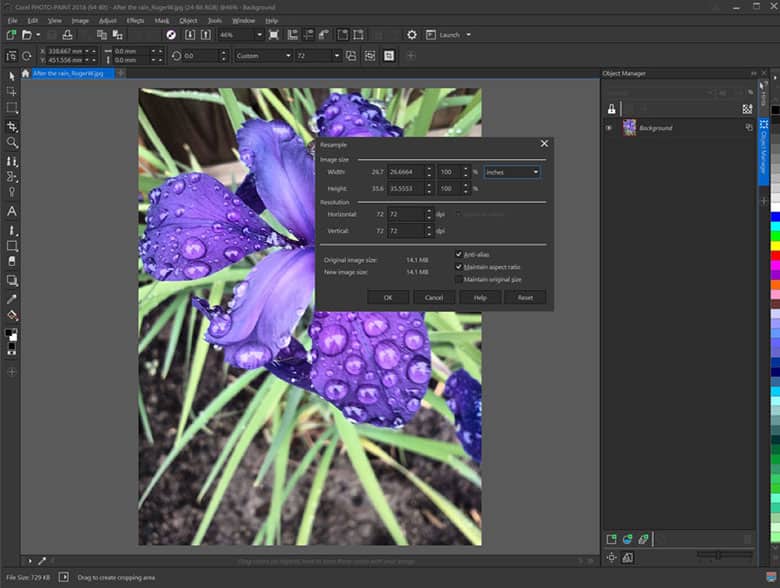
2. Resizing an image
To resize the image, from Image > Resample. This will open the dialog box that will allow you to resize or resample the image. Here you have the ability to adjust horizontal & vertical measurements and resolution. You can maintain original file size , aspect ratio as well as enable or disable Anti-aliasing.
3. Next Steps
Now that the image has been resized, you can save the file or continuing to edit your image.
CorelDRAW Graphics Suite does more than just resize photos
Check out some of the other graphic design features in CorelDRAW Graphics Suite, like How To Straighten A Photo, How To Watermark Photos, How To Make An Image Black And White, and more! Create high quality designs in a fun and easy to use graphic design software and make your work stand out more than ever.
 How To Add Lens Flare Effect
 How To Use Photo Masks
 How To Add Color Splash
 How To Add Vignette Effect